Hello again,
Team Petri-FI has had an exciting week this week. We have a new design, and we’ve completed and tested a prototype, all in the span of two days! But first, we had some challenges.
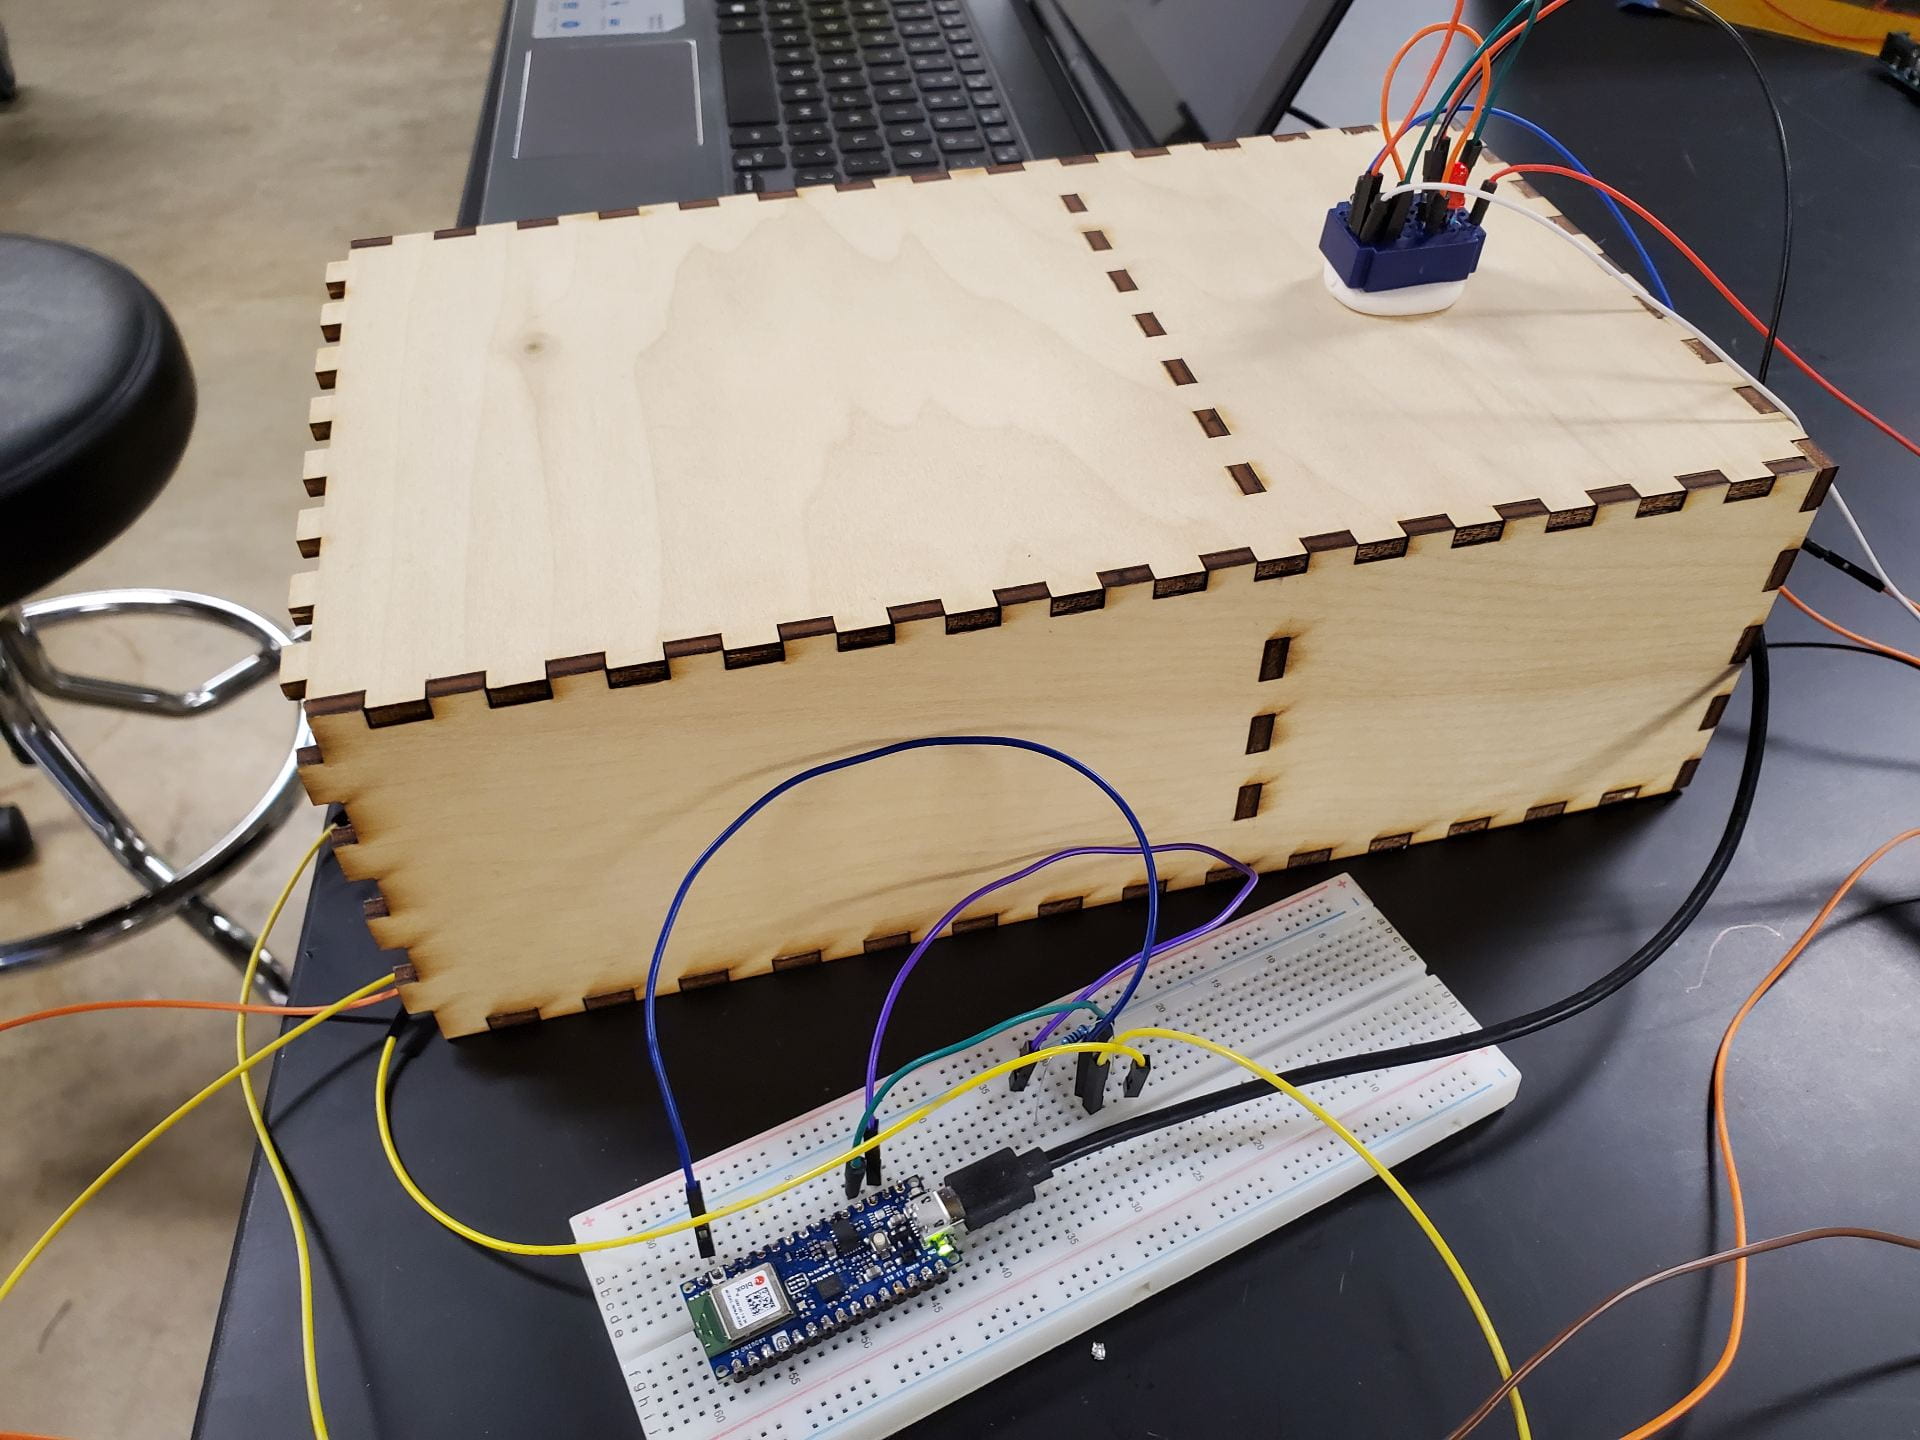
In the last blog post, I talked about creating a breadboard to replace our fried PCB and left it with the ominous words, “Now, to debug it . . .” Debugging has not come easy, but we were fortunate enough to meet with multiple mentors who taught us a lot about electronics. The debugging is still in progress, but in the meantime we’ve built a small circuit for the purpose of heating the heating pads.
Now onto the exciting stuff: our new designs!
On Thursday, we presented our prototype ideas to Dr. Wettergreen, a professor at the OEDK who’s pretty much the expert on prototyping at Rice. We had two ideas for the heating chamber we would use: a double-walled thermos and a lunchbox. Dr. Wettergreen pointed out something that we hadn’t thought of: while both are open source in the sense that anyone can go online and order a thermos or lunchbox of similar size, they’re proprietary – you would need to order from a company, wait for shipping, etc. Why not just make your own box?
We started out with the “pink box.”
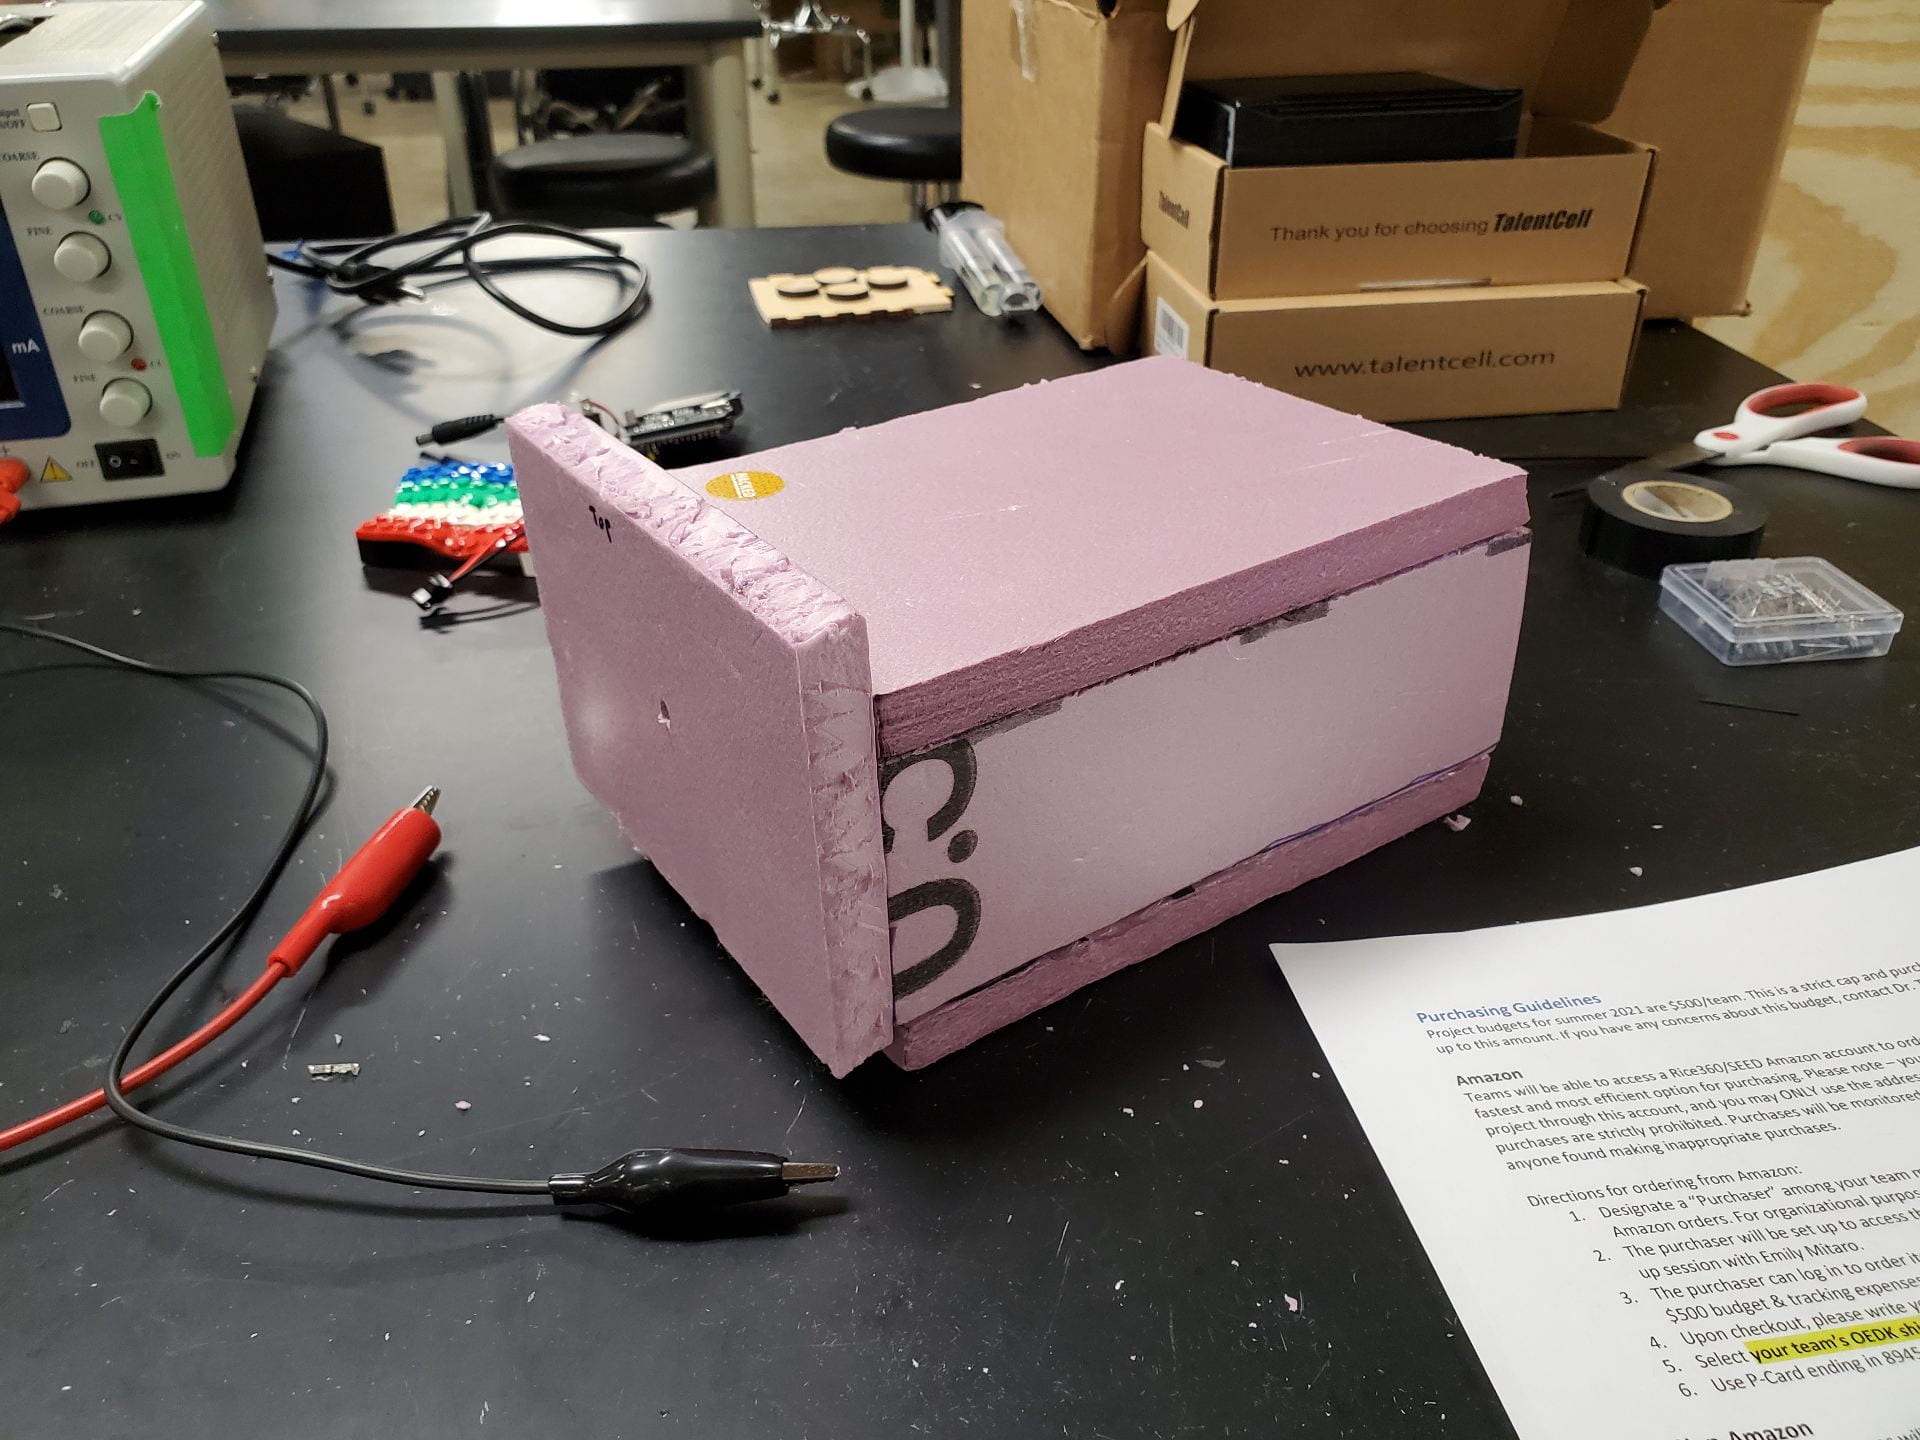
It’s made entirely out of polyiso insulation, and the inside contains the heating apparatus. The heating pad is inside on the bottom, and above that, perched atop a platform made of Legos, are the petrifilms. For this iteration, we wired up a breadboard externally, just so we could easily control our device as we began initial heat testing.
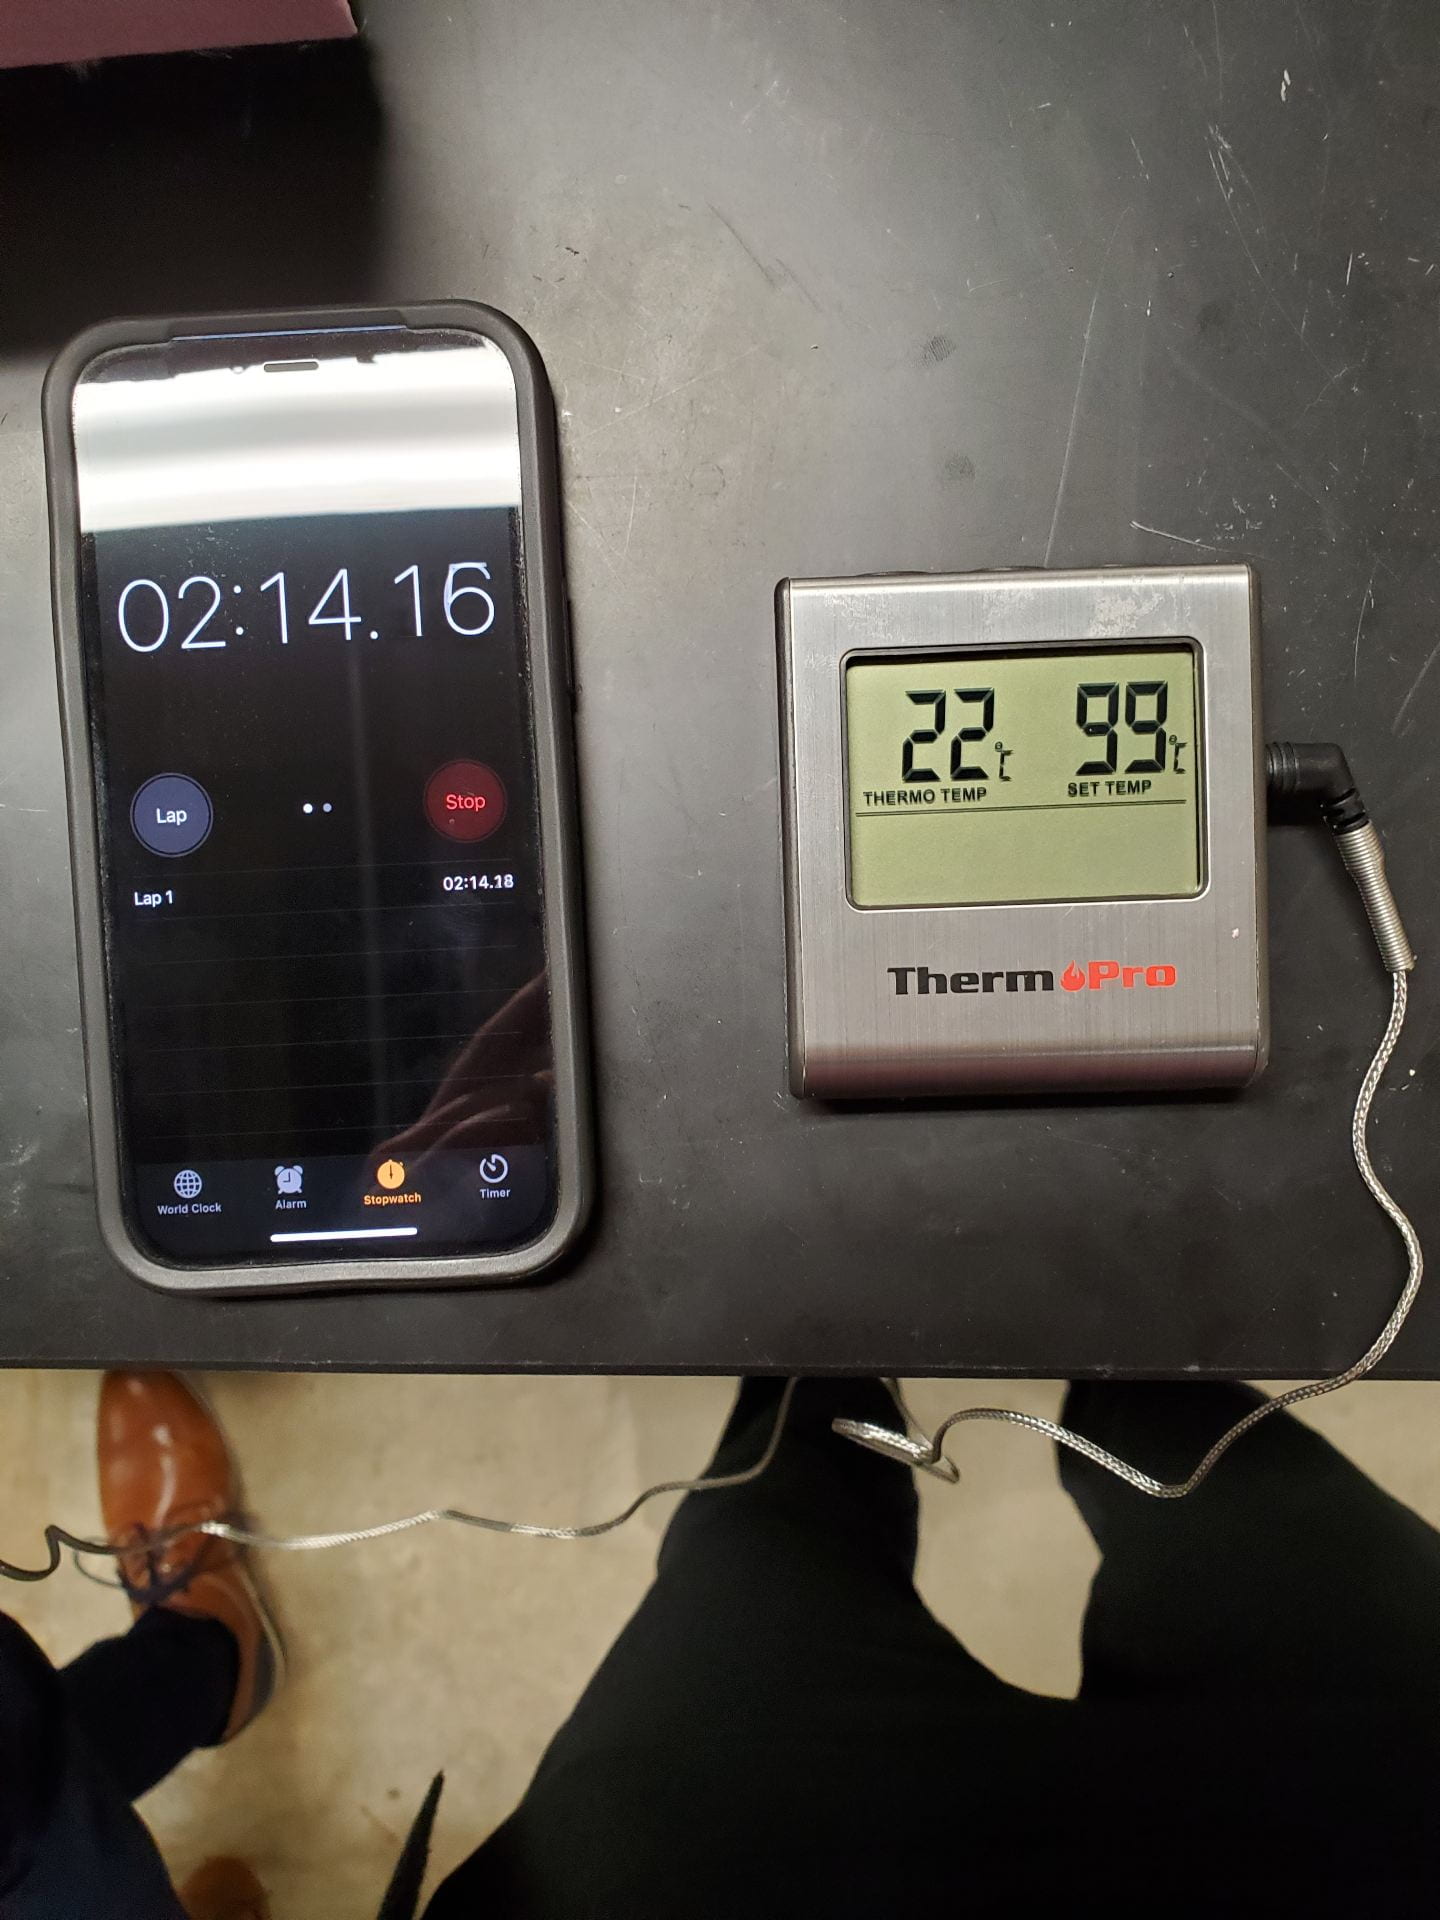
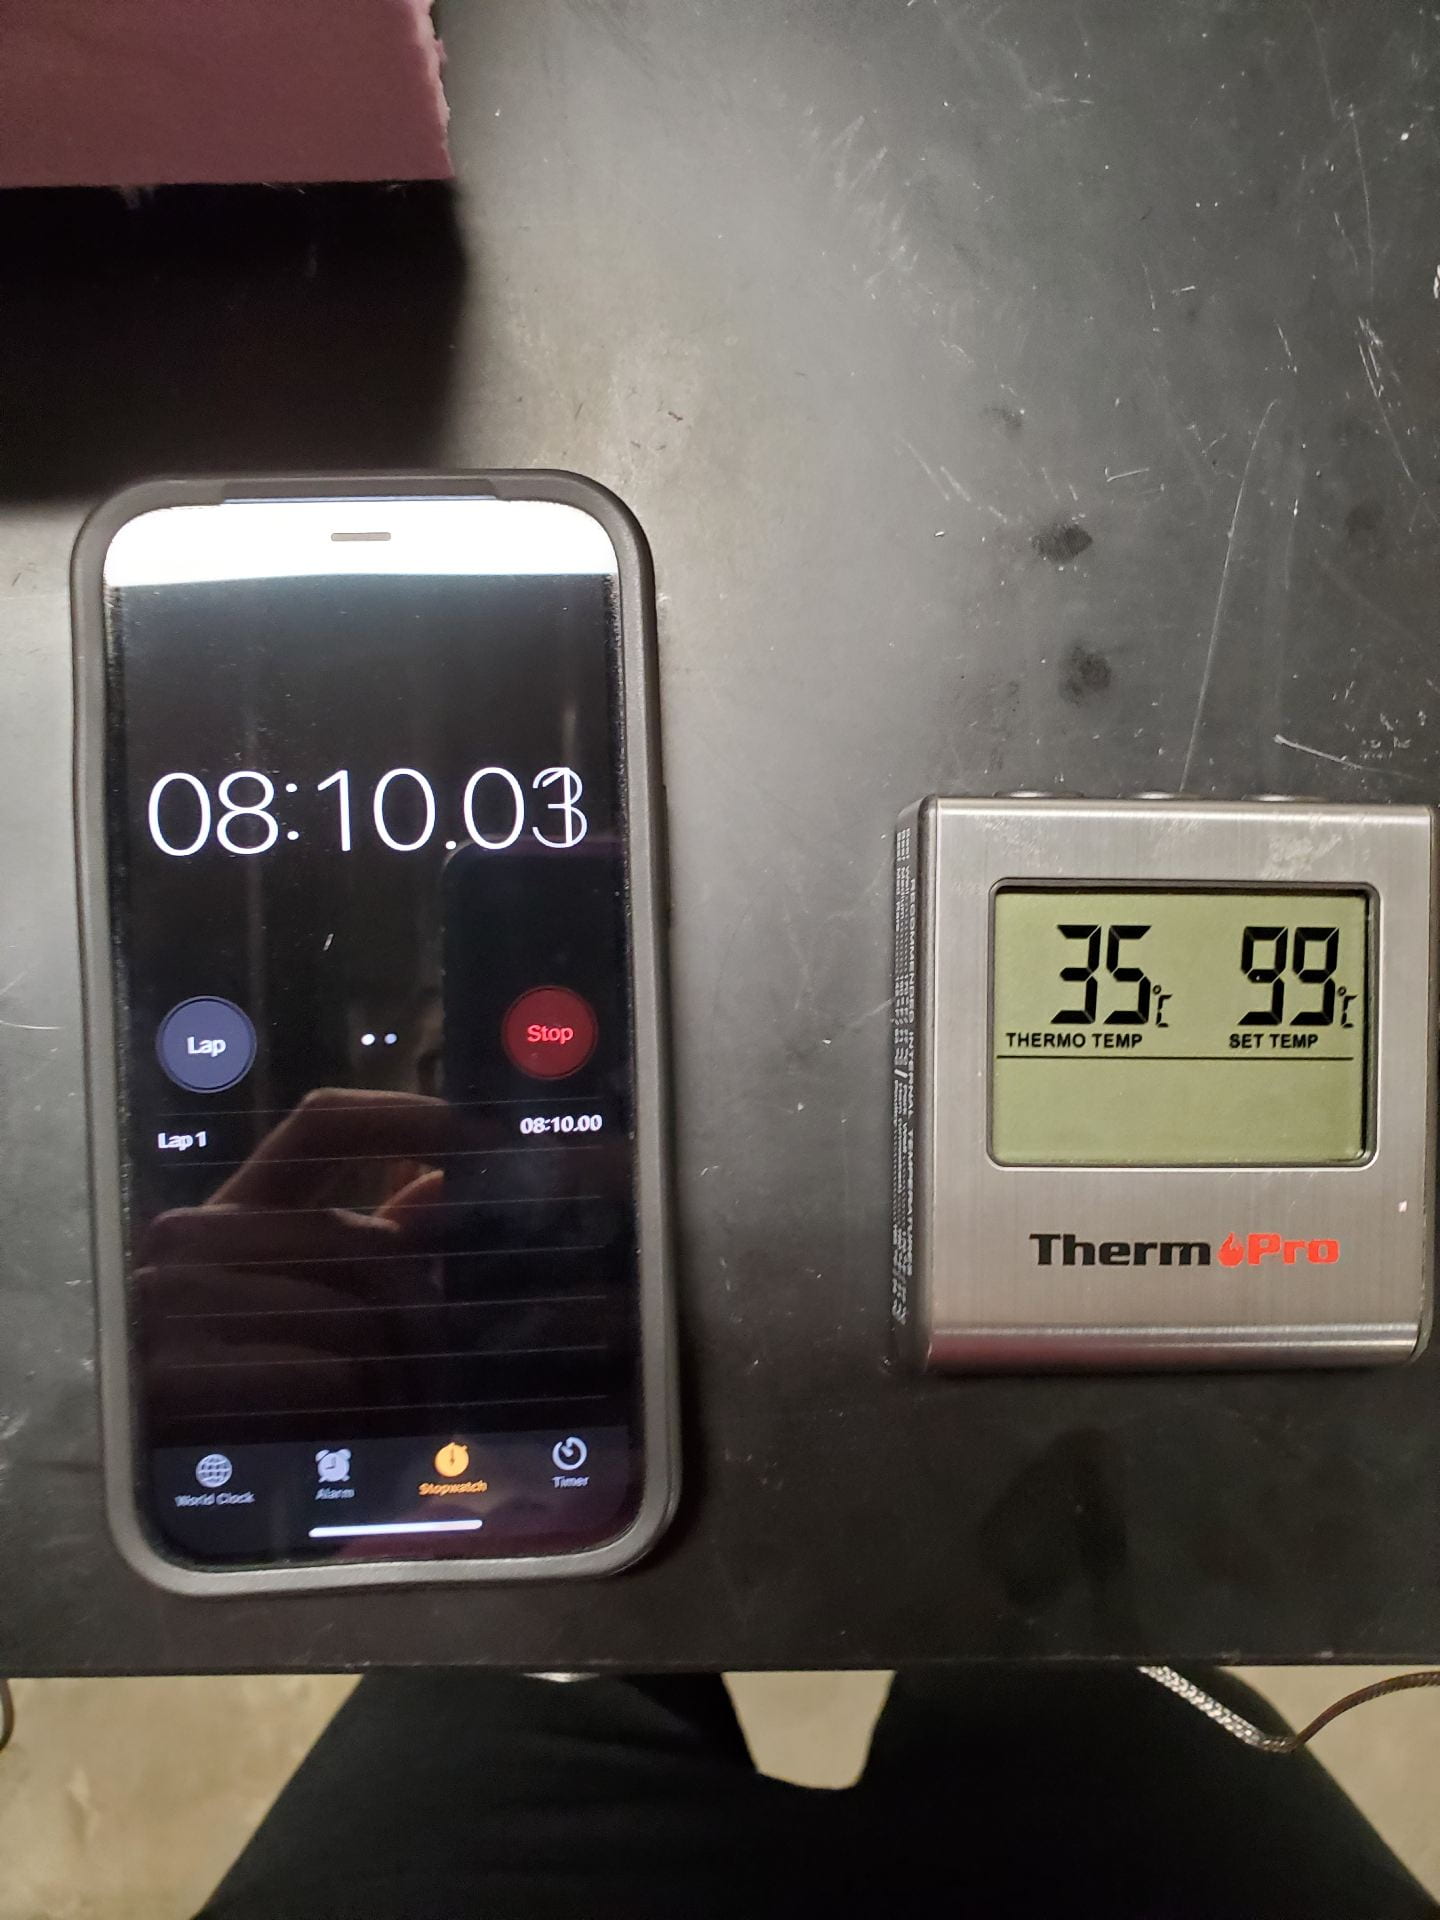
Our data came out quite nicely – it only took seven and a half minutes to heat up from the frigid 20C of the OEDK basement to our target of 35C, and longer to go back down to 20C – 13 minutes. These are quite promising results.
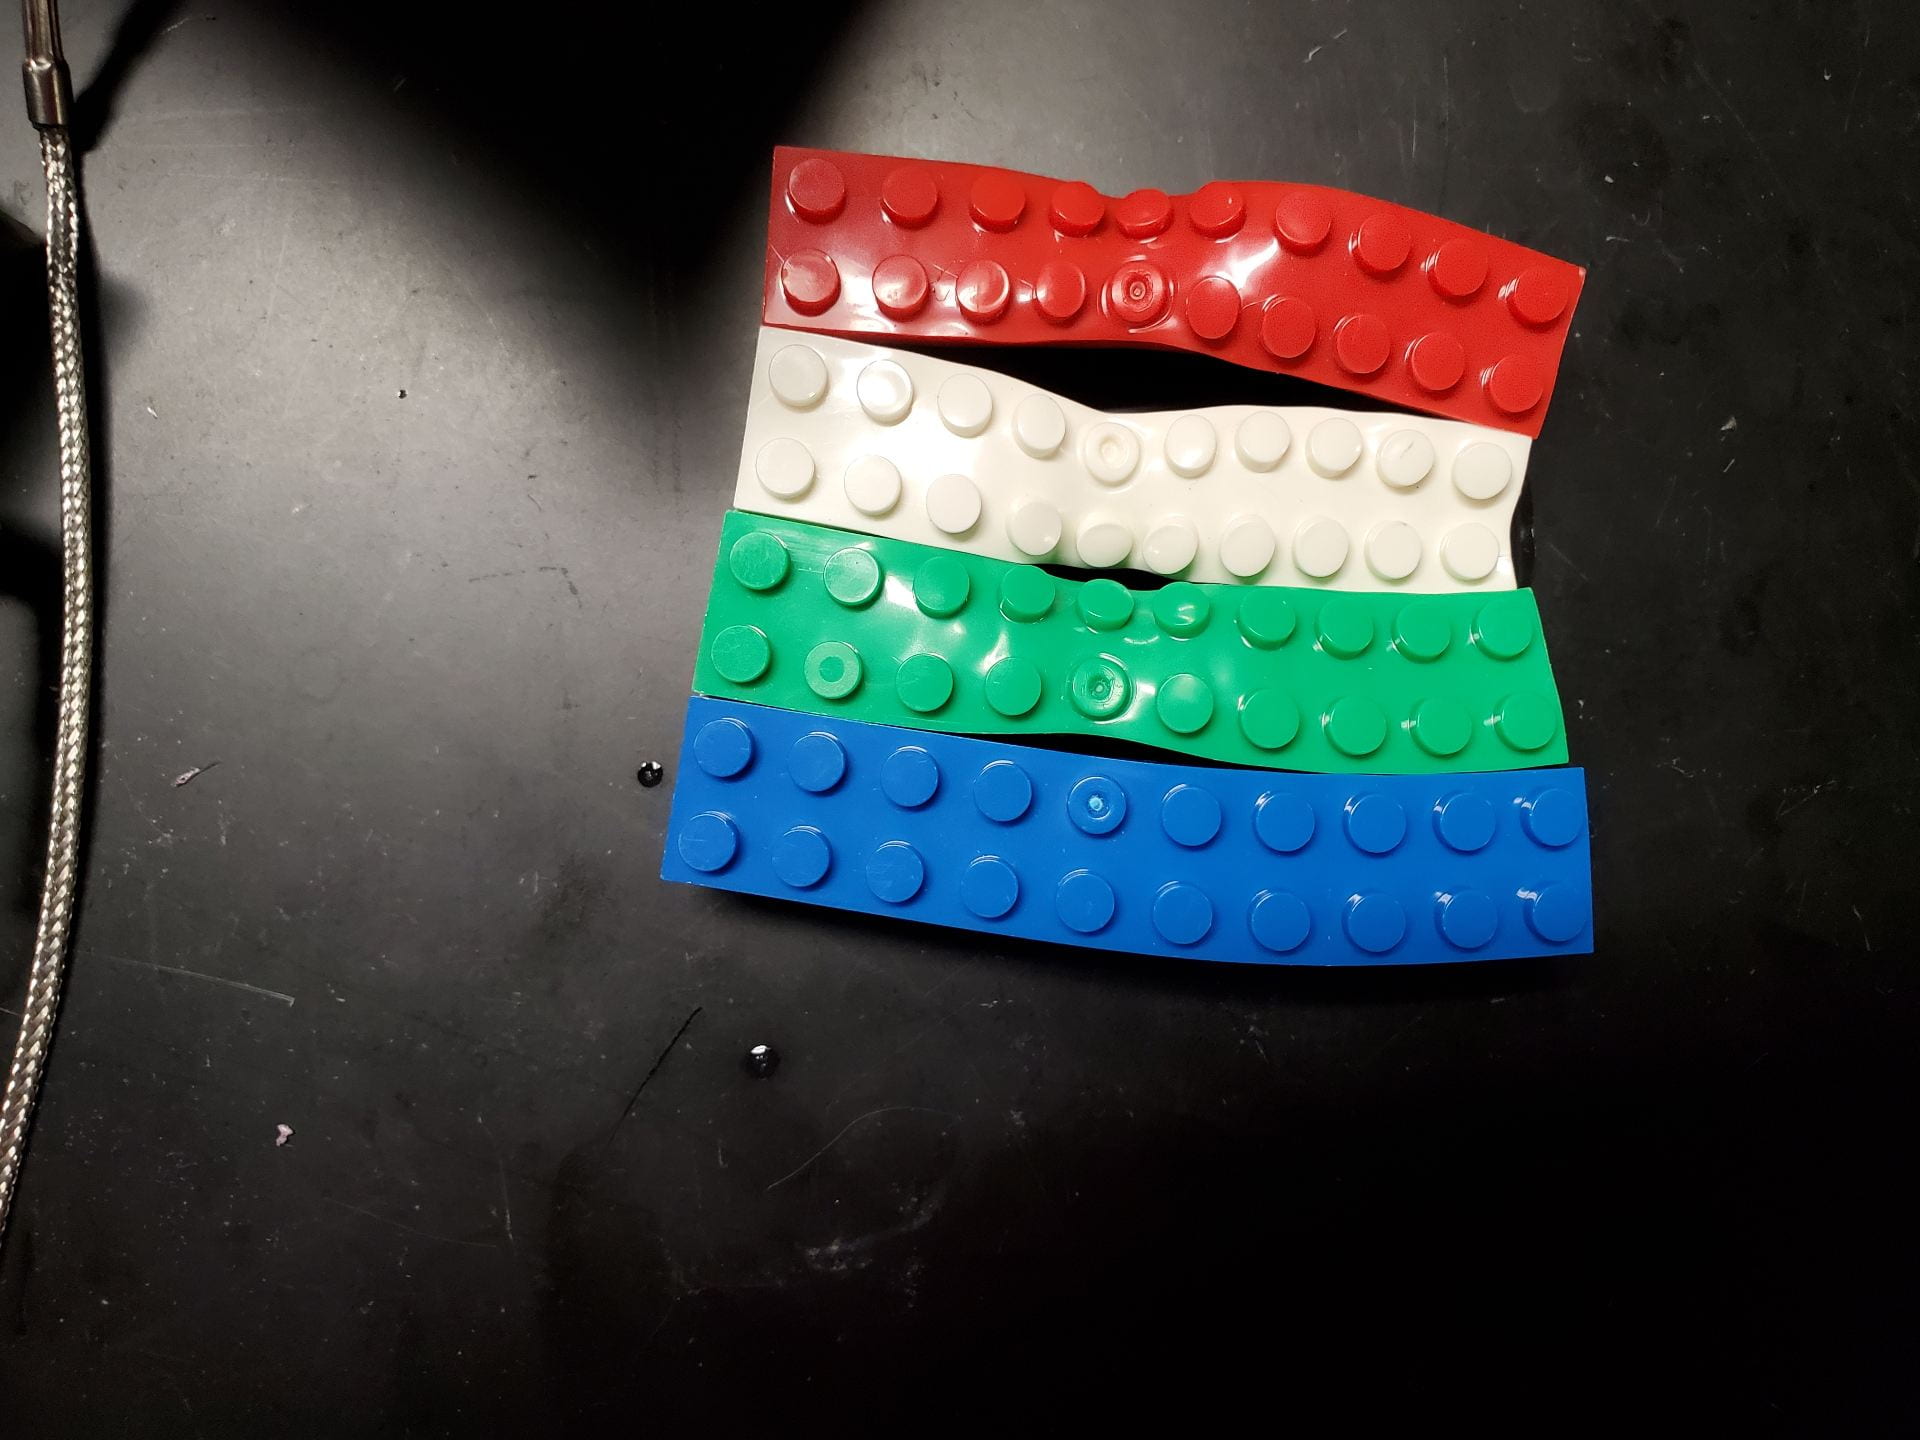
After this test, we ran another one – maximum heating. There’s a legitimate reason for this: when the temperature remains constant, that’s the equilibrium point – the point where the amount of heat going in equals the amount of heat flowing out.
At this point, we can determine the heat loss in our device. (Honestly, though, we mostly just cranked the heat up to see how far it would go). It got up to 66C (150F)! And check out what it did to our makeshift petrifilm holder:
Once we determined that our device does, in fact, get hot, we planned to make something a bit more high-fidelity (i.e. not made of Legos – Legos are cool, but would you buy a piece of lab equipment made out of Legos?). The result was this two-chamber, laser cut wood box:
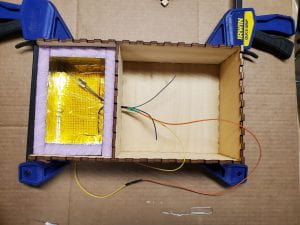
One side is heavily insulated with polyiso (what the pink box is made of), and the other holds the batteries. There’s a small hole in the middle to lead the wires from the battery to the heating pad. This design improves upon our pink box because it solves a problem that’s been plaguing us for a while: what exactly to do about the battery. Previously, our options were to have the battery externally connected – which exposes it to environmental dangers and also makes the device unwieldy to carry – or have the battery in the same space as the heating chamber – which exposes it to heat hot enough to decrease its lifespan. The two-chamber design means that everything is internal, but the battery is kept near ambient temperature.
As of writing this blog post, we are currently in the middle of performing heat tests on our new two-chambered device. We also have some other big improvements in the works, including an interactive mockup of the UI, a tentative vertical model of the two-chamber box, and of course, the long-awaited completion of the breadboard. Thank you readers for following Team Petri-FI on our design journey, and cross your fingers for good news next week about that darned breadboard.