Towards the very end of the internship, our team made a lot of progress, and overall we are quite happy with our results. Our final prototype is complete and functional, despite lacking two features we wanted to implement: the new user interface and the perfboard.
The Incubator
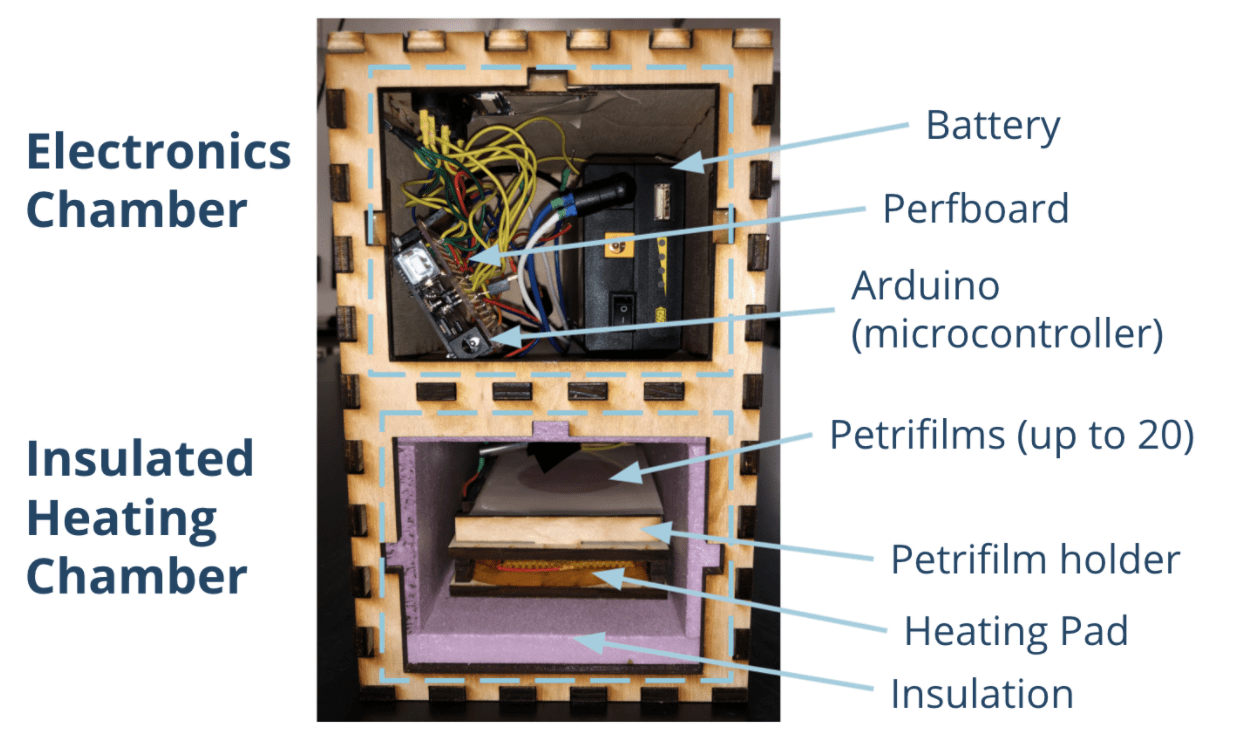
Here is what the final box looks like when the doors to both chambers are open:
Here is what the final box looks like when the doors are closed, which is what the user would see and interact with during incubation:
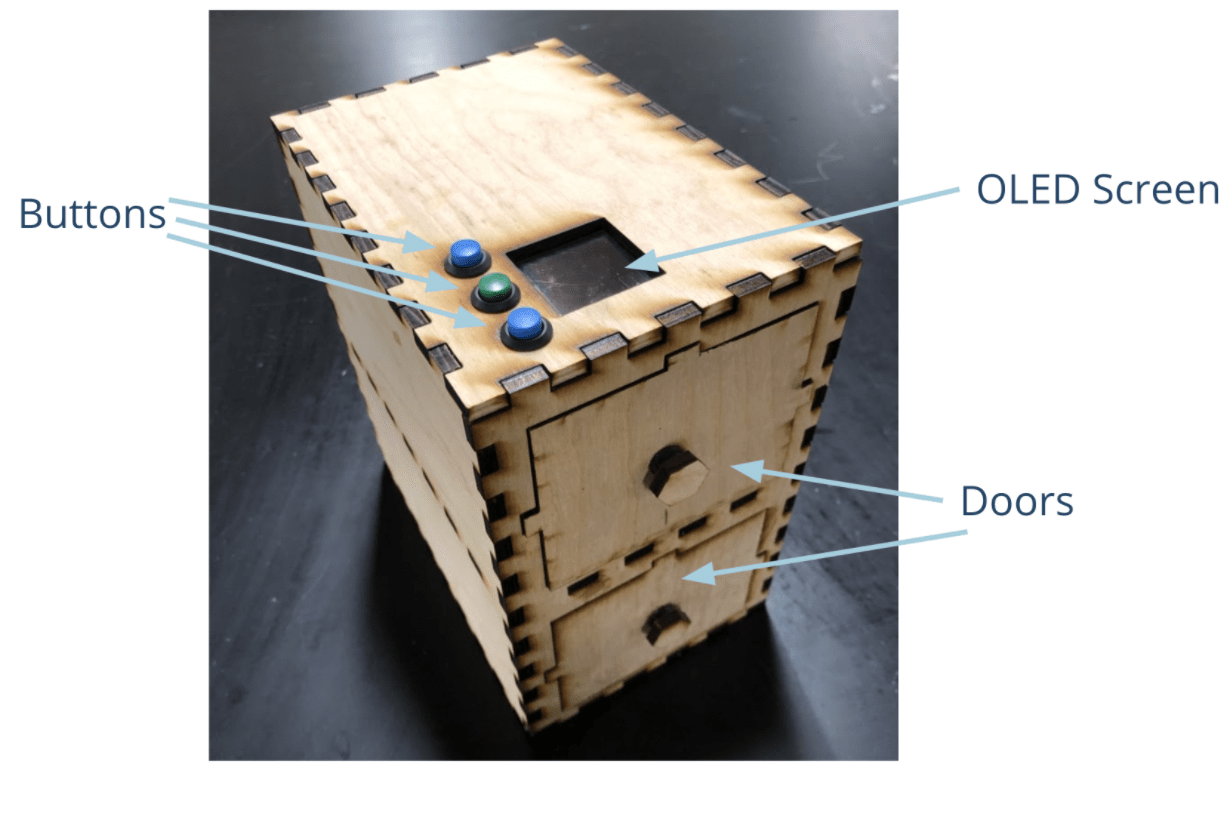
The buttons are up, select, and down, from top to bottom.
As you can see in the first of the images above, the perfboard is complete. Unfortunately, there were still a few issues with it not working properly, most likely because somewhere a wire is shorting part of the circuit. Because of this, we re-assembled the prototype with a breadboard to make sure all of the functionality was there before presenting it and performing more tests.
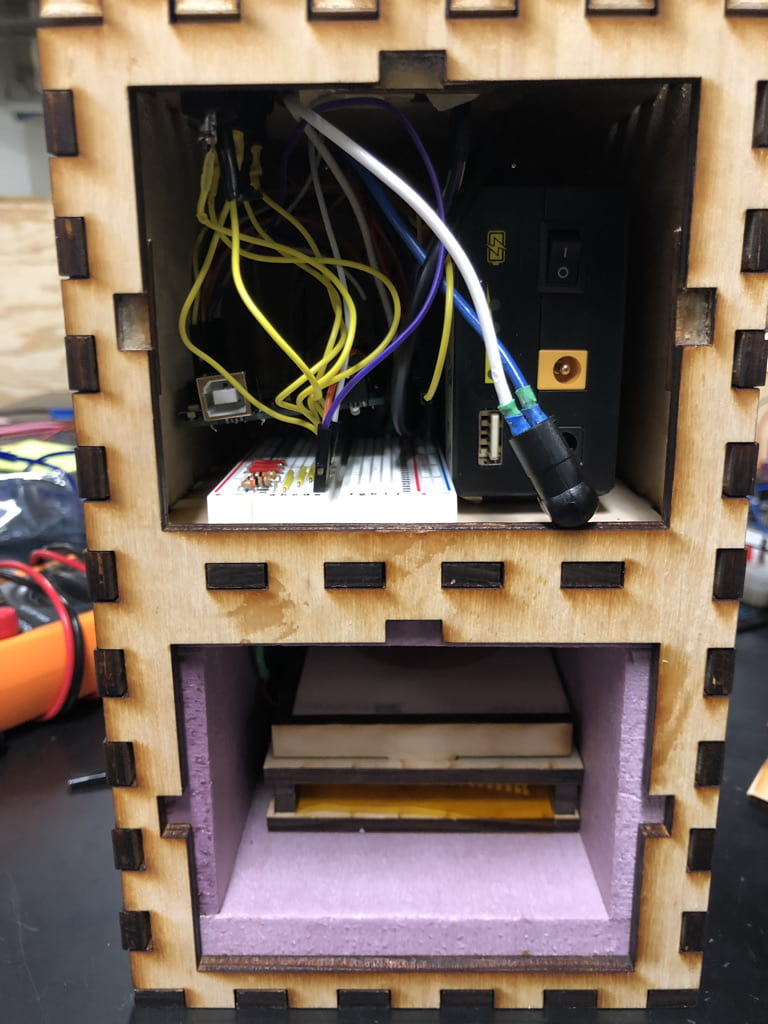
This version worked fully! We handed it off to our client. Instead of continuing down the road of building a perfboard, we suggested that our client use a schematic based off of the current, functioning breadboard to order a custom PCB, since PCBs are much less prone to wires shorting out or breaking.
The User Interface
This is what our current user interface looks like. Using the up, down, and select buttons, the user can set the temperature and time of the incubation. Once the incubation starts, however, there is no further user interaction with the device.
We wanted to make a user interface that had more opportunities for interaction, especially during incubation. So we made a flow chart of all of the different screens and how to get to them. Below is the portion of the flow chart that details what our improved interface would look like during incubation. This is about 40% of the whole flow chart, which also includes setting up an incubation, what happens when temperature falls out of range, and options for after the incubation has ended.
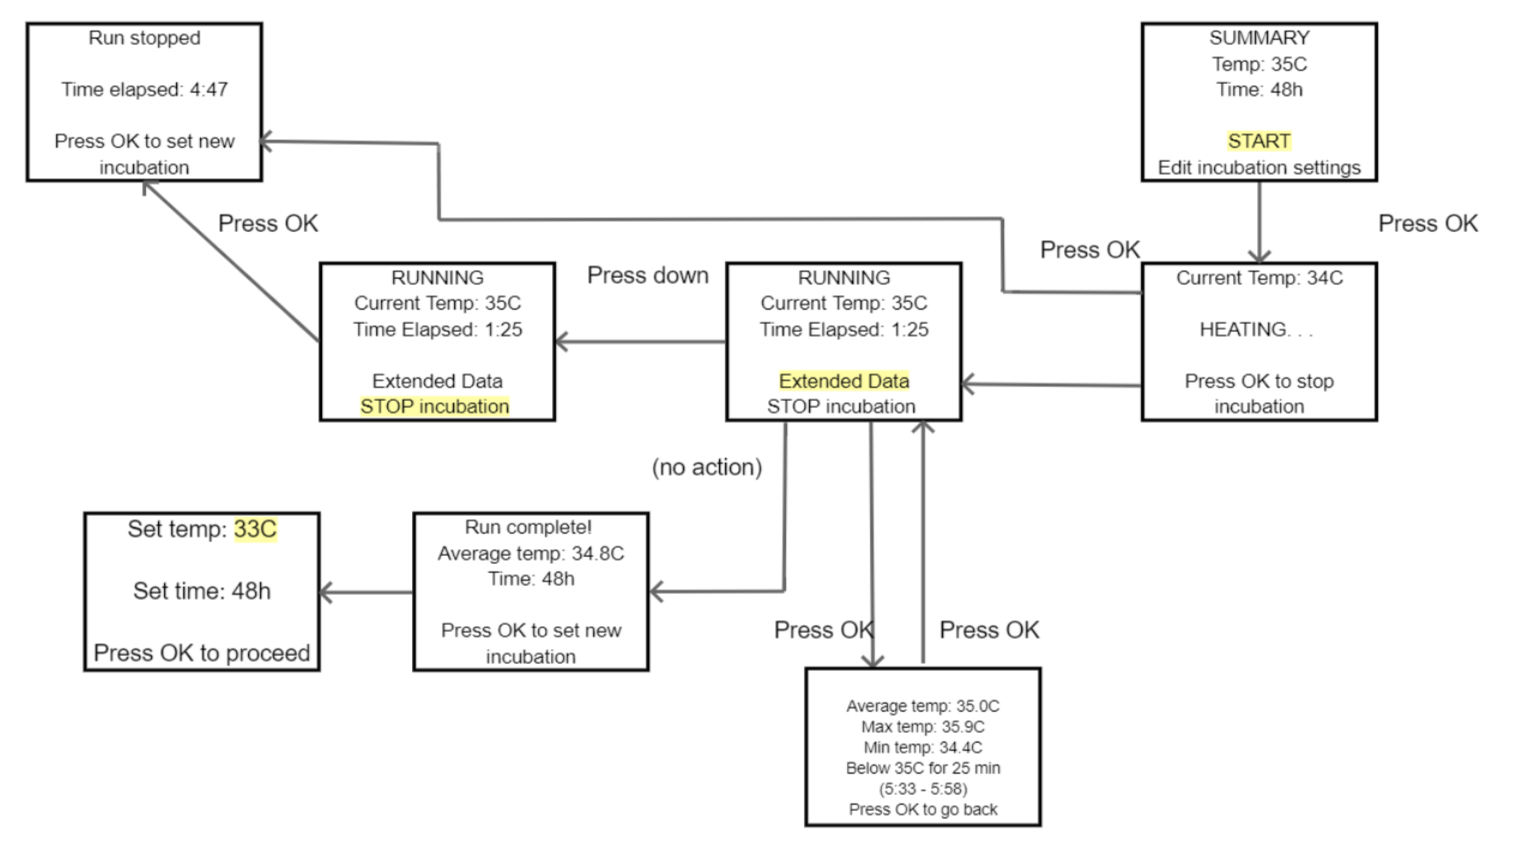
Due to time constraints and coding difficulties, we never got to implement this plan. Our client is very excited about it though, and he said that he plans to program a UI based on our flow chart later this year.
Comparative Testing
To test wether our incubator works, we did a side-by-side test with two samples from the same water source (Buffalo Bayou), where we incubated one sample in our prototype and the other in a commercial incubator borrowed from a biology professor. Here are the results:

As you can see, there is no visible difference between the quality of our incubator and a lab incubator. This test was a resounding success! Because the water had so much bacteria, though, it would be impossible to get an accurate quantitative count of E. coli colonies. The indigo spots on the petrifilms above represent E. coli, but because there are so many, and especially because some of them are so large, it is clear that in many places several colonies merged together.
Overall I am proud of what my team accomplished this summer. As sorry as I am that the perfboard doesn’t work, we still managed to create a functional, effective device that is much more portable than anything currently on the market. I hope that eventually a future iteration of this project becomes available for water testing in low-resource settings.