*Content warning: My project deals with pediatric sexual abuse. Please exercise self-care while reading.
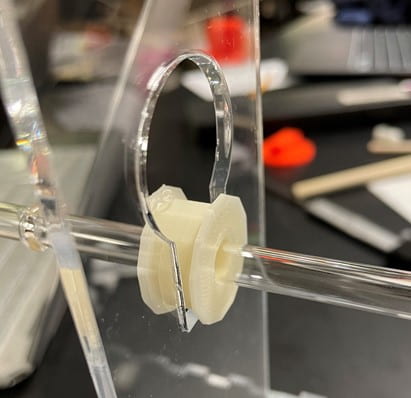
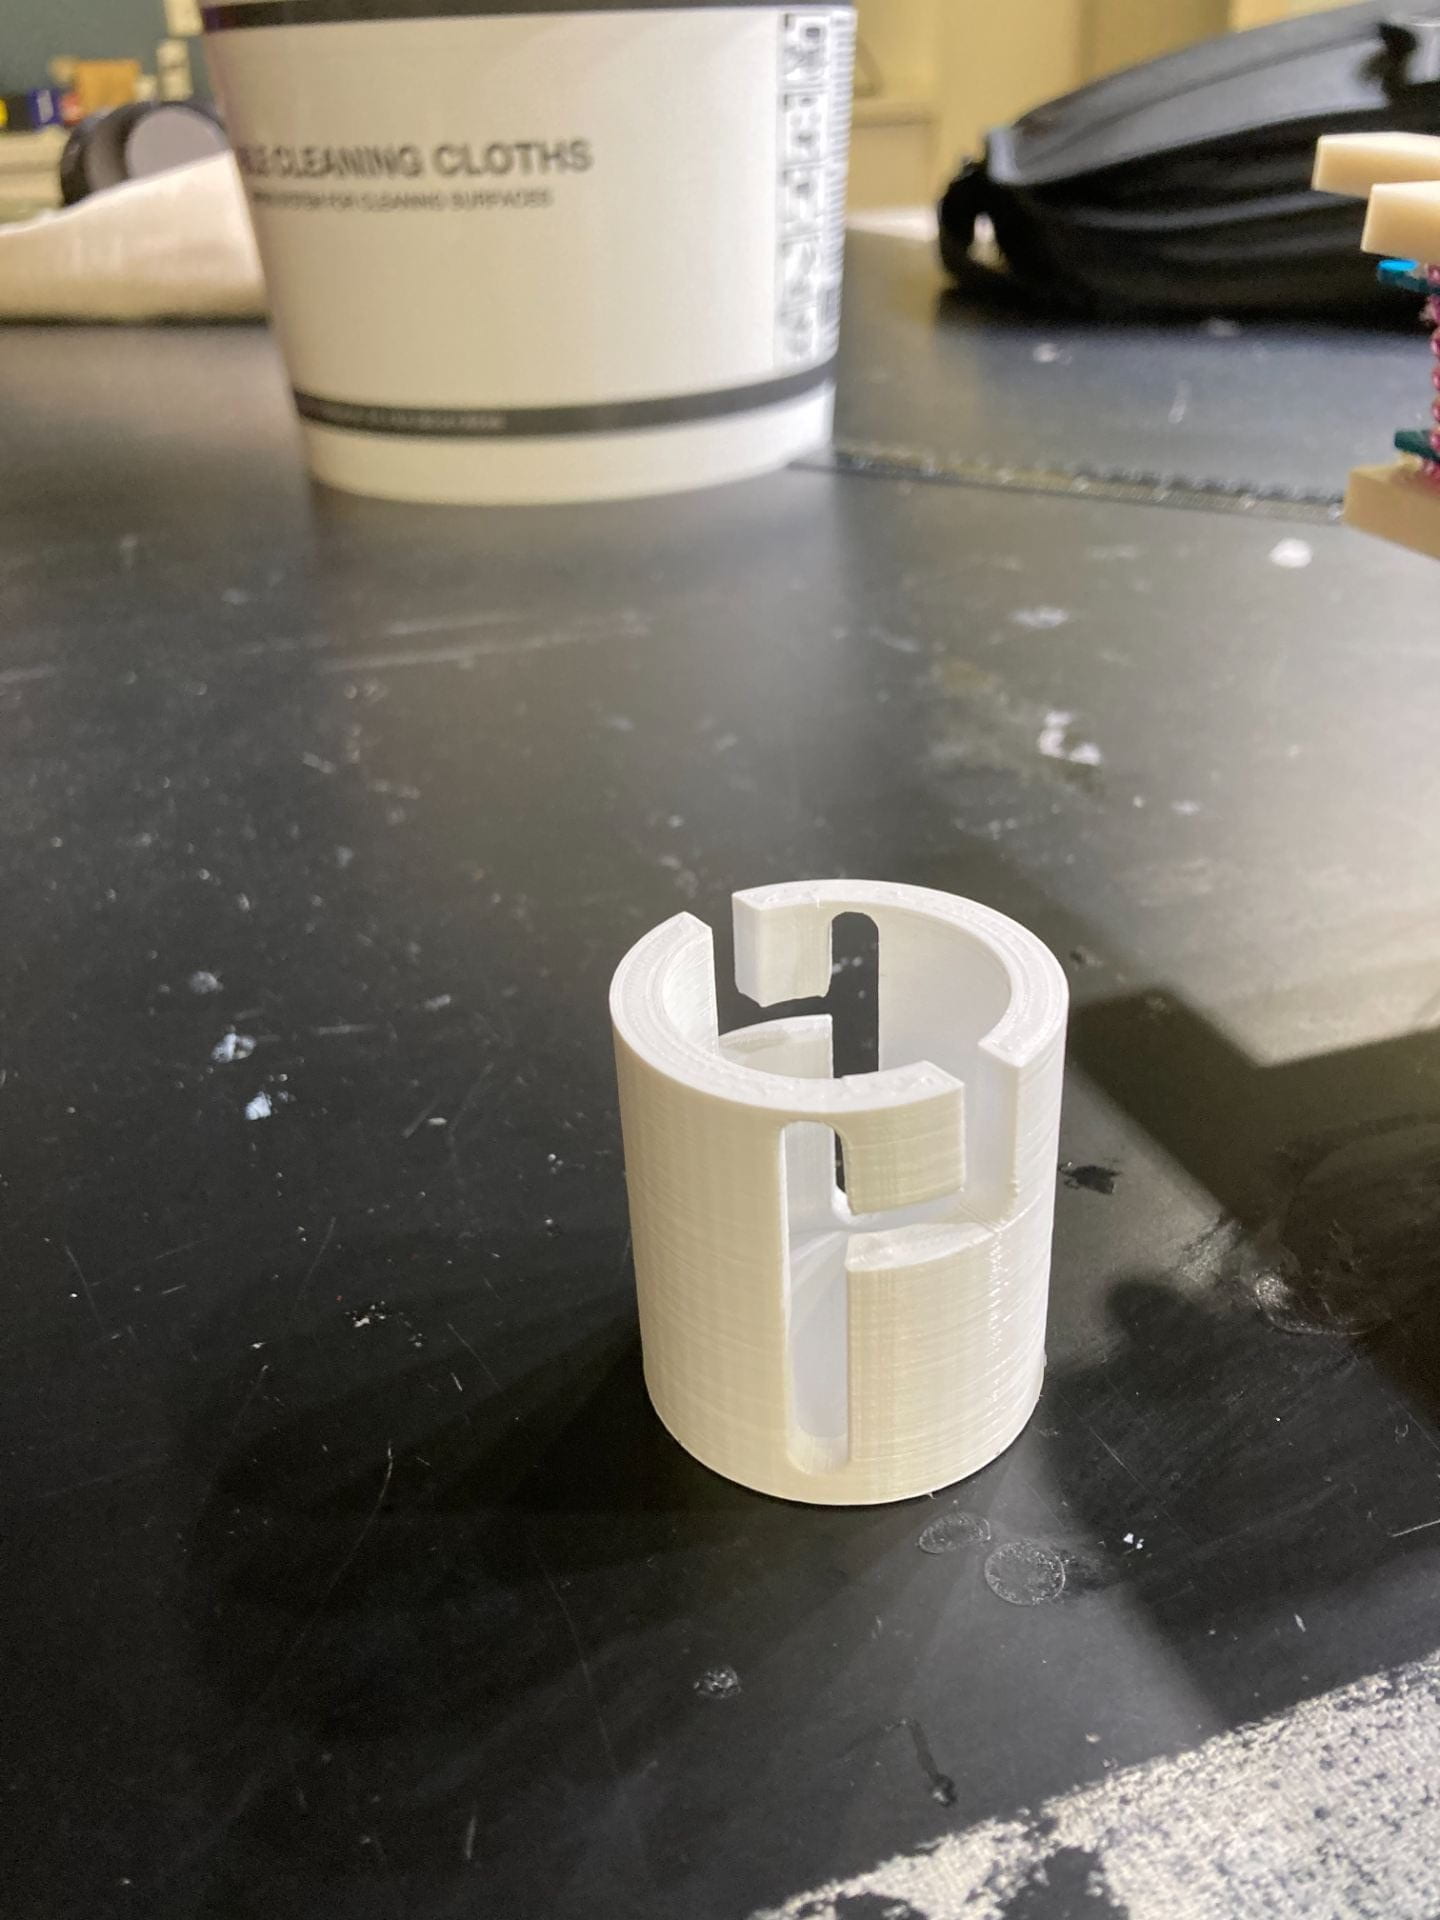
close-up of our rotation lock mechanism!
For Team PIPER, week 5 was incredibly exciting time – we found a way to attach the labia and hymen together in a way that stretches them both together accurately! We also got to experiment with darker skin tones for pigmentation, finalized the rotation lock-in mechanism for our base, transitioned to an acrylic base, and created a user testing plan.
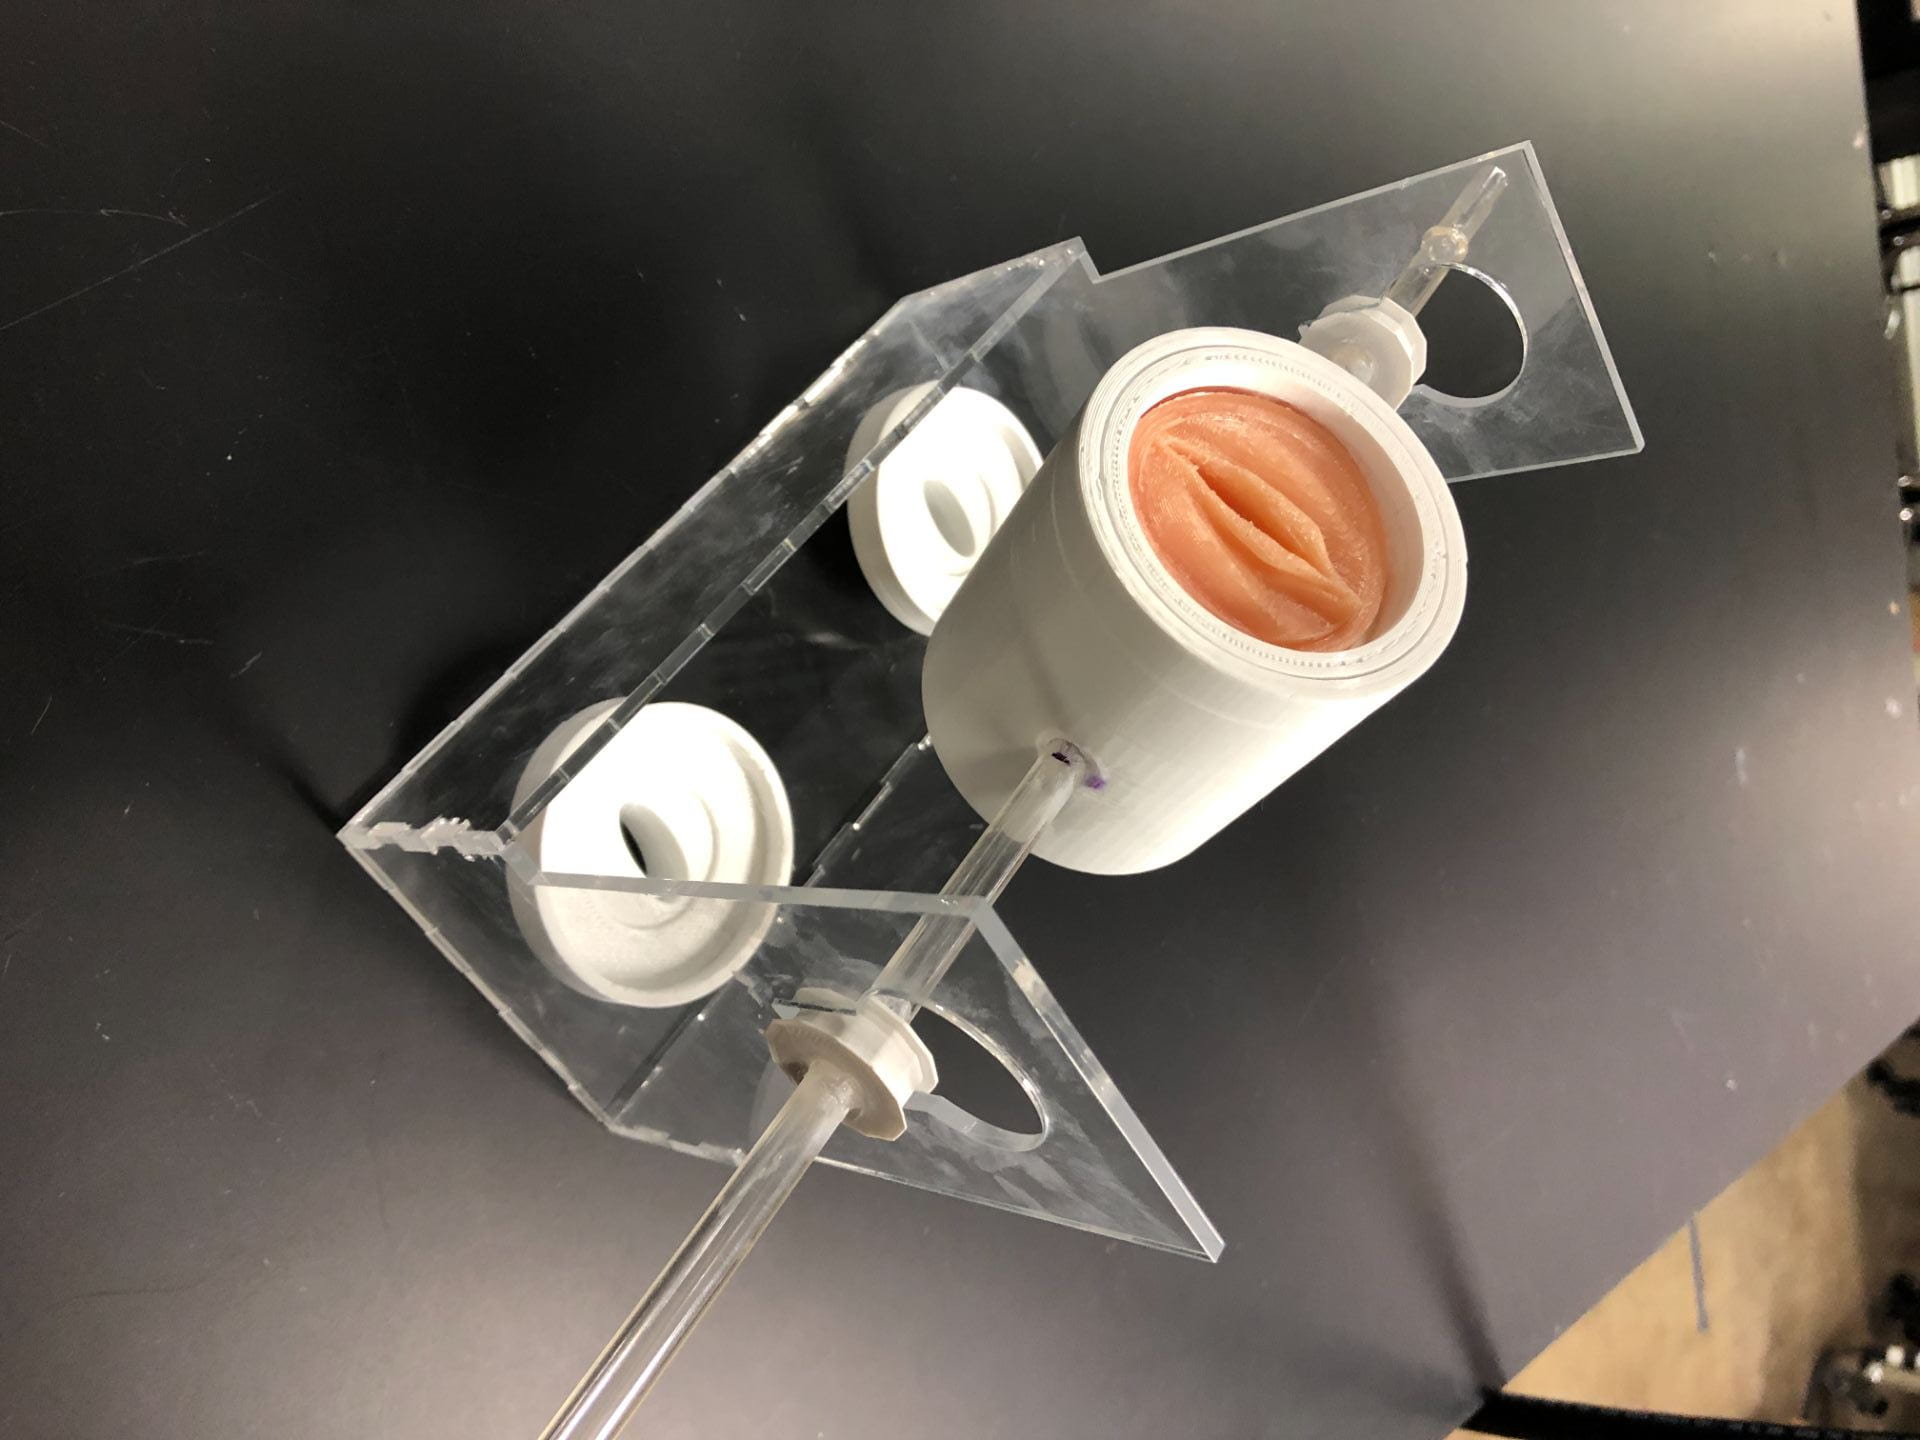
And – most exciting – we assembled a full, high-fidelity prototype of our model!…
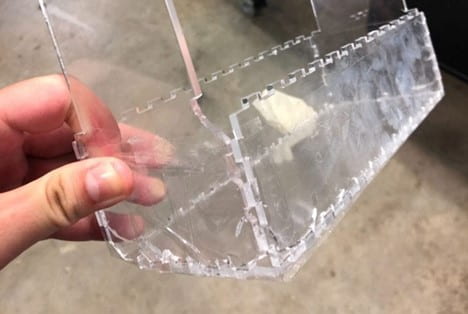
… Only to find that once we wiped it down with isopropanol solution just to sanitize it, it cracked and degraded before our eyes. Funny how design constraints (like easy sanitization) can sometimes seem so deceptively easy and simple to meet. We had incorrectly assumed that hard plastic, or acrylic, would be easy to just wipe down with alcohol-based wipes in a hospital setting.
Since this past week was our last week of troubleshooting and prototyping for this internship, we decided on a temporary solution, and include suggestions for improvements in our documentation for future steps/iterations on our design. So for the meantime, we made a new acrylic base and put it together using acrylic adhesive instead of friction fitting it to reduce the chance of stress cracks, and created cleaning instructions for user testing to temporarily avoid degradation of our base.
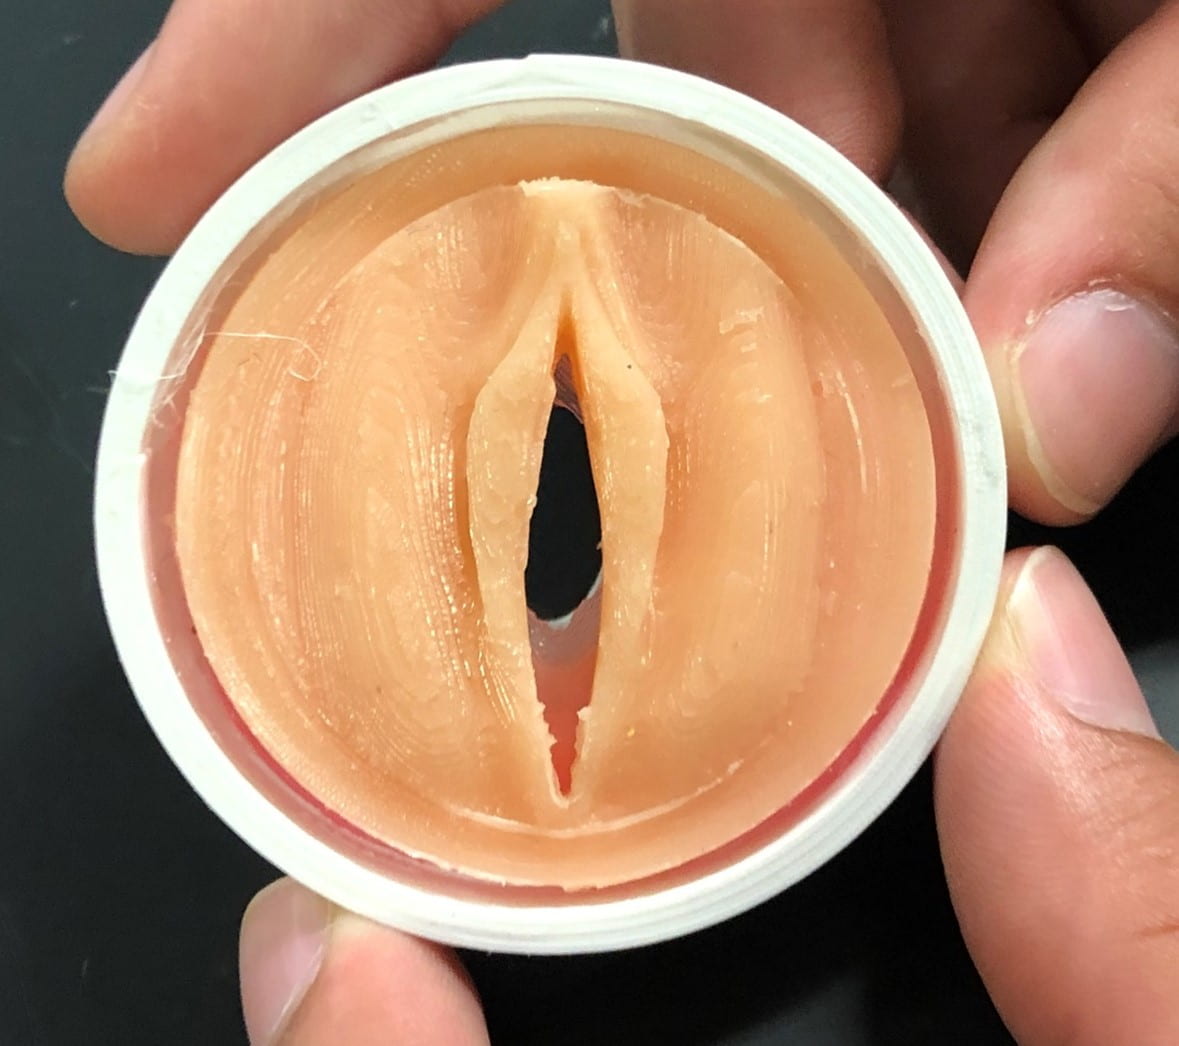
Fortunately, we were able to assemble another full model, be it with an acrylic base! We also were able to integrate a hymen mold (for annular hymens) into the CAD mold of the labia itself, so that the labia and hymen could actually be cured together instead of attached via glue, so the attachment wouldn’t wear down over time.
curing a hymen layer in an integrated labia + hymen moldgetting our model ready for showcase!
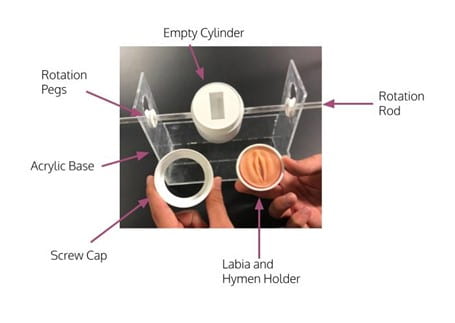
a labeled diagram of our final prototype!
When our team sat down at the end of the week to reflect on our progress and prepare our showcase presentation, we realized that even though the week had been full of setbacks and design iterations, we had come incredibly far since the beginning of the internship five weeks ago. We went from literally nothing – no existing pediatric pelvic model – to a fully assembled, functional model that in many ways can provide a realistic simulation of a pelvic exam to clinicians in training. It’s easy to get bogged down in the details of what works and what doesn’t work, but overall I think it is important to recognize that any progress is progress.
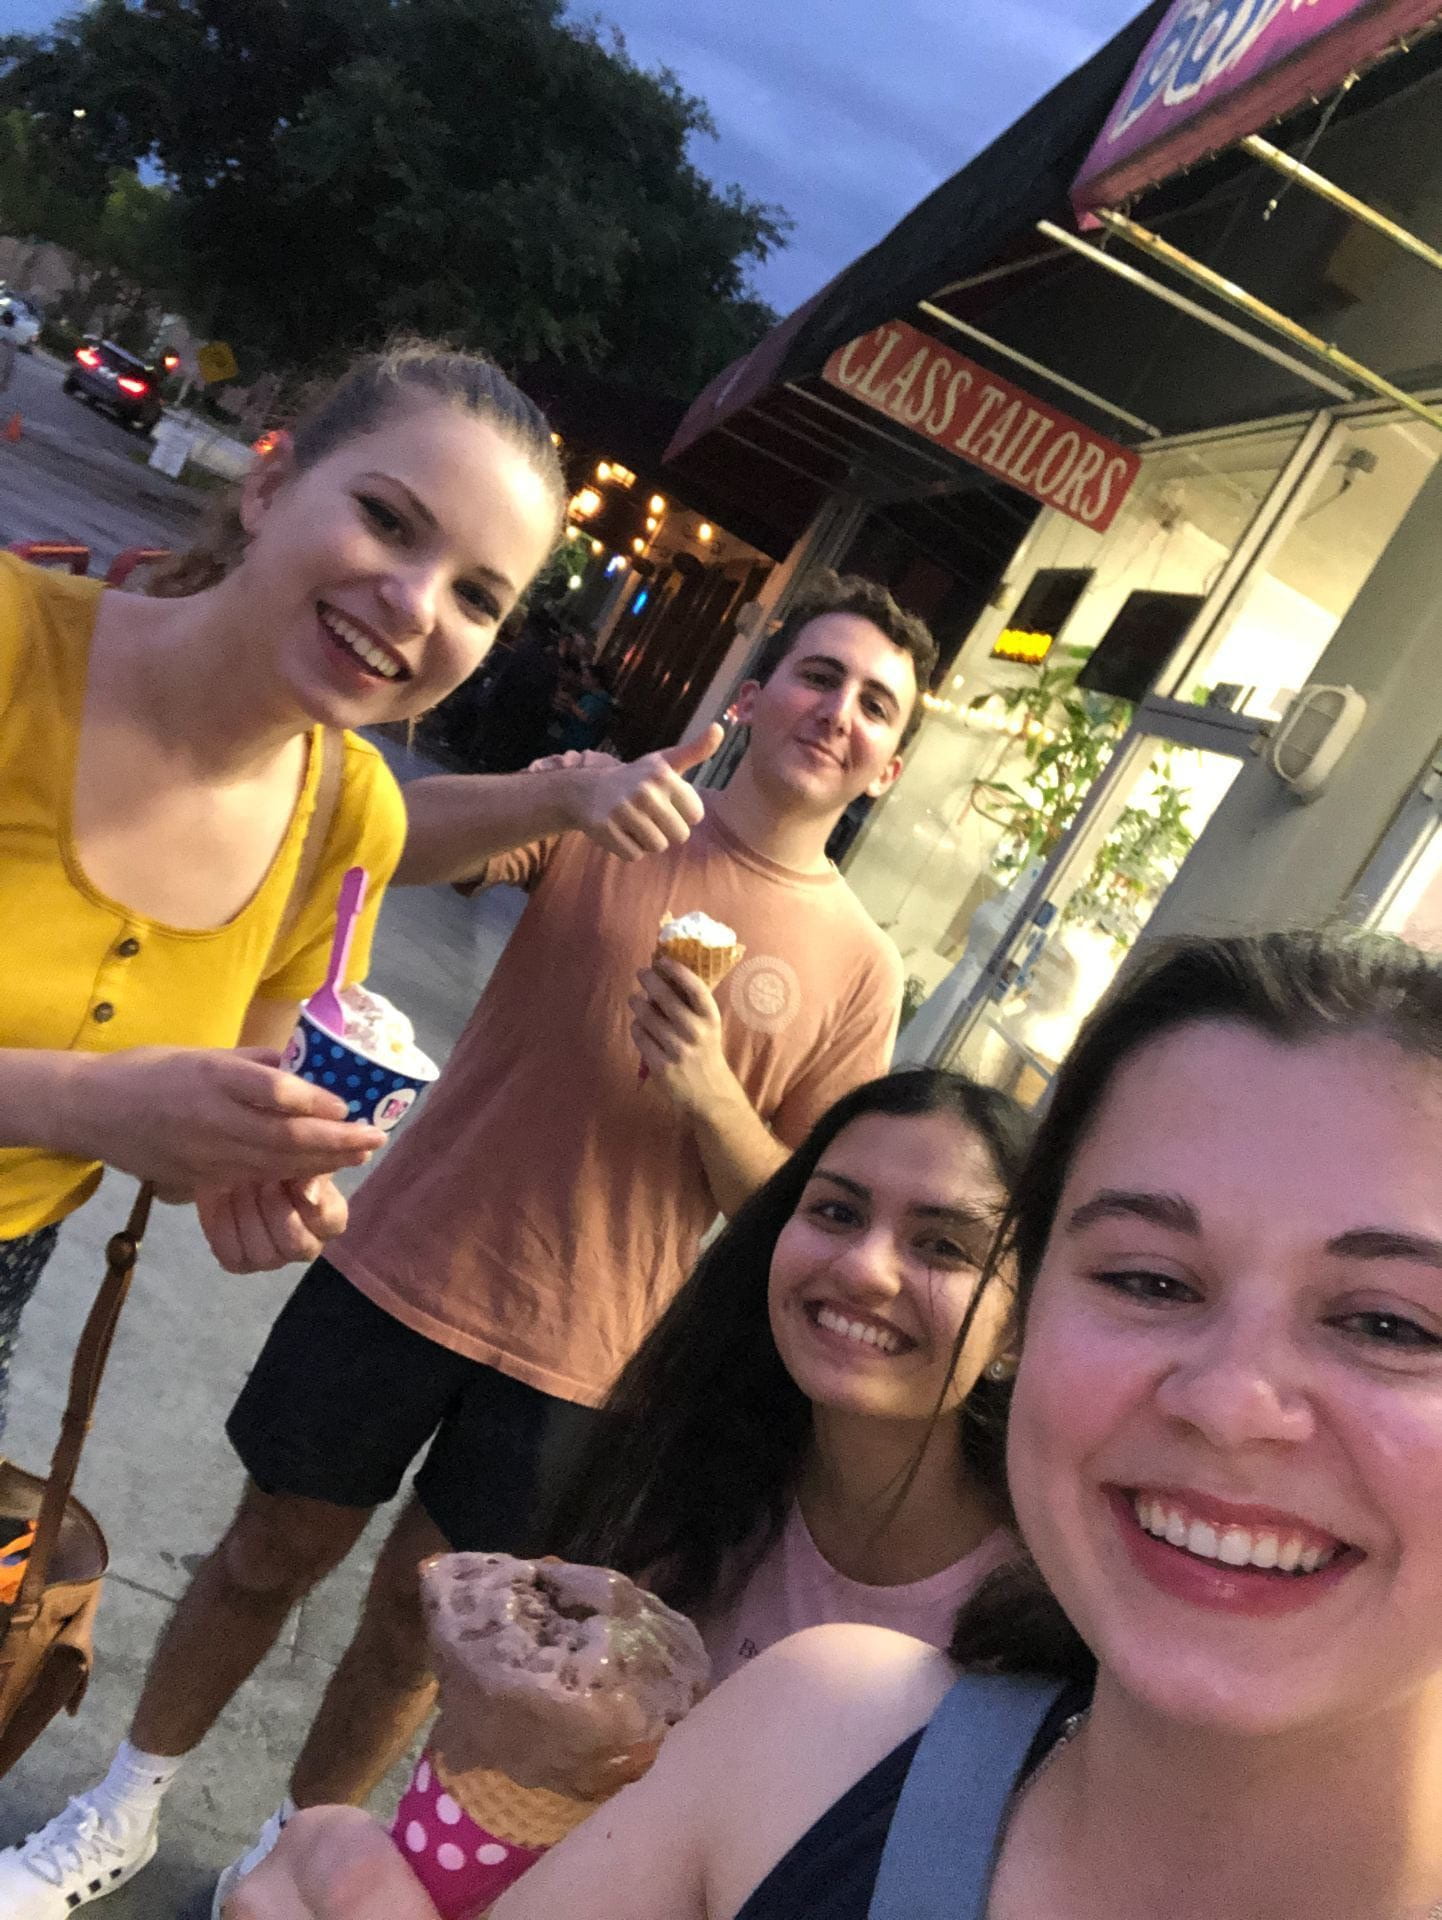
Team bonding at Baskin-Robbins 🙂
I’m really proud of how far our team has come, and for our amazing group dynamic that has helped me get through these past five weeks without getting frustrated with things that fail or don’t work. I’m glad to say I now consider my teammates Shannon, Elise, and Alex as friends, and I’m grateful we have gotten to spend a summer together working on an impactful project that we all care about equally.
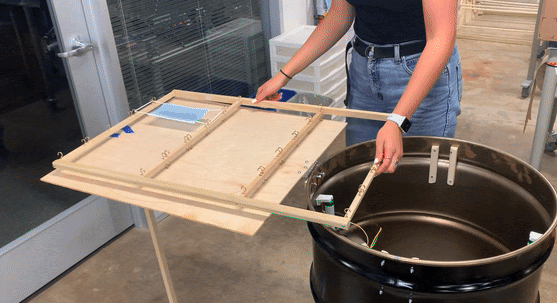
This has been an absolutely CRAZY week, filled with both highs and lows. Over the course of the week, we made a lot of progress on the mechanical/physical aspects of the oil drum. We installed “tracks” to help the frame slide in and out of the oil drum easily. In addition, we mounted the drum on a flat cart with wheels in order to make it portable and easy to move around in a hospital setting. We also used this cart to create a stand which can hold the lid of our device – which we attached to the drum this week as well – at a 90 degree angle, allowing the mask tray to be placed on it to make changing masks in/out very easy.
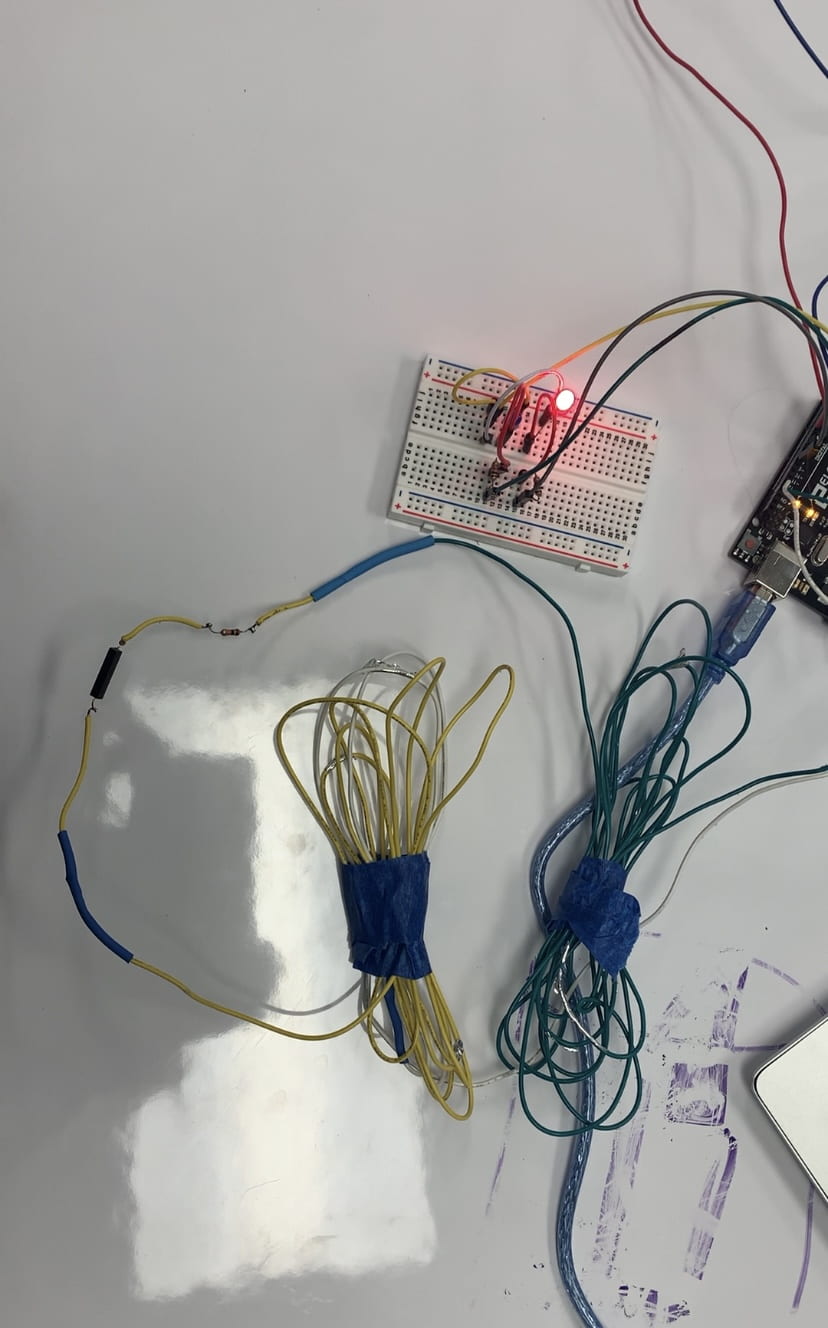
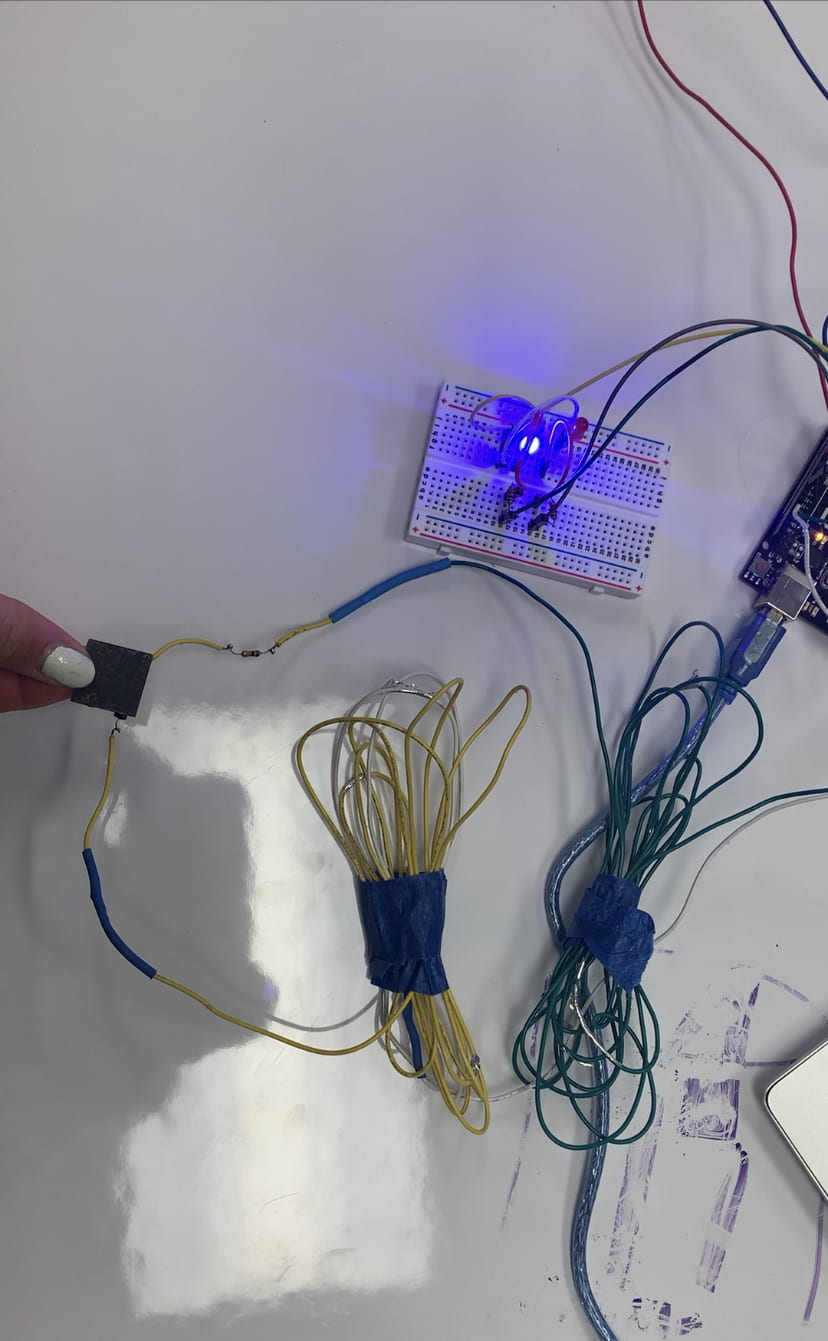
In addition, midway through the week, we began working on figuring out the electrical components of our circuit. We started with looking at the safety switch mechanism, which uses a switch to complete the circuit when it touches a magnet, and breaks the circuit when separated from the magnet. By placing a magnet on the lid so that it comes into contact with the switch when closed, we will be able to turn on the UV bulbs when the lid is closed and have them automatically turn off when the lid is opened. In addition, when the lid is closed, a blue light will turn on for a designated cycle length, after which it will be shut off. If the lid is opened midway through a cycle, a red light will turn on. We were able to get this mechanism working, which we were very proud of due to our limited practical experience with electrical circuits.
Next, we began looking at the part of the circuit which contains the UV bulbs (all of the components were taken out of the previous Steribox). We bought some fluorescent lights that were nearly identical to our UV ones, with the thought that they would allow us to test the circuit without dangerous UV exposure. However, after speaking with electrical specialists, we discovered some flaws in the circuit design that might make the entire arrangement infeasible. This was extremely hard to hear, and my teammate and I were both trying to hide our panic, as the news could mean completely changing our design in the few days we had left. But, after talking through the problems a bit more, we determined that we could actually incorporate additional safety measures which would allow us to achieve at least partial functionality using the fluorescent bulbs by the end of the internship. Though it was challenging at first to change the scope of what we would be able to put together as our end product, once we re-defined what could reasonably be achieved we were able to work much more efficiently on producing the best final device possible.
Over the next few days, we worked very closely with electrical specialists in order to begin putting together our circuit and installing it in the oil drum. During the first part of our final week, we will be finalizing the electronics, as well as preparing for our project pitch on Tuesday and a second presentation on Thursday!
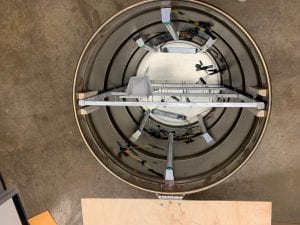
Inside of Oil Drum With Electrical Components
I honestly can’t believe we’re entering the final week of this internship. I feel as though I have learned so much, and I’m also sad to leave behind the amazing people I’ve met!
Content warning: My project deals with pediatric sexual abuse. Please take care of yourself and feel free to forgo reading any parts of this blog.
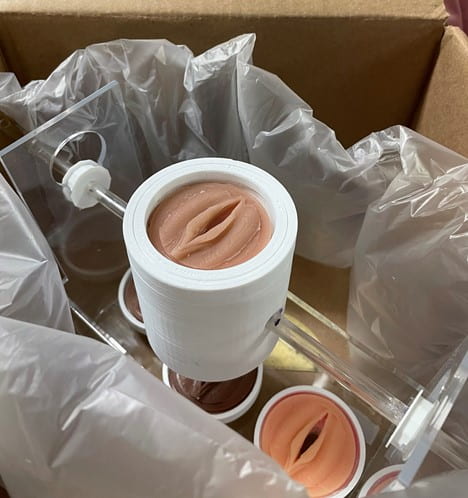
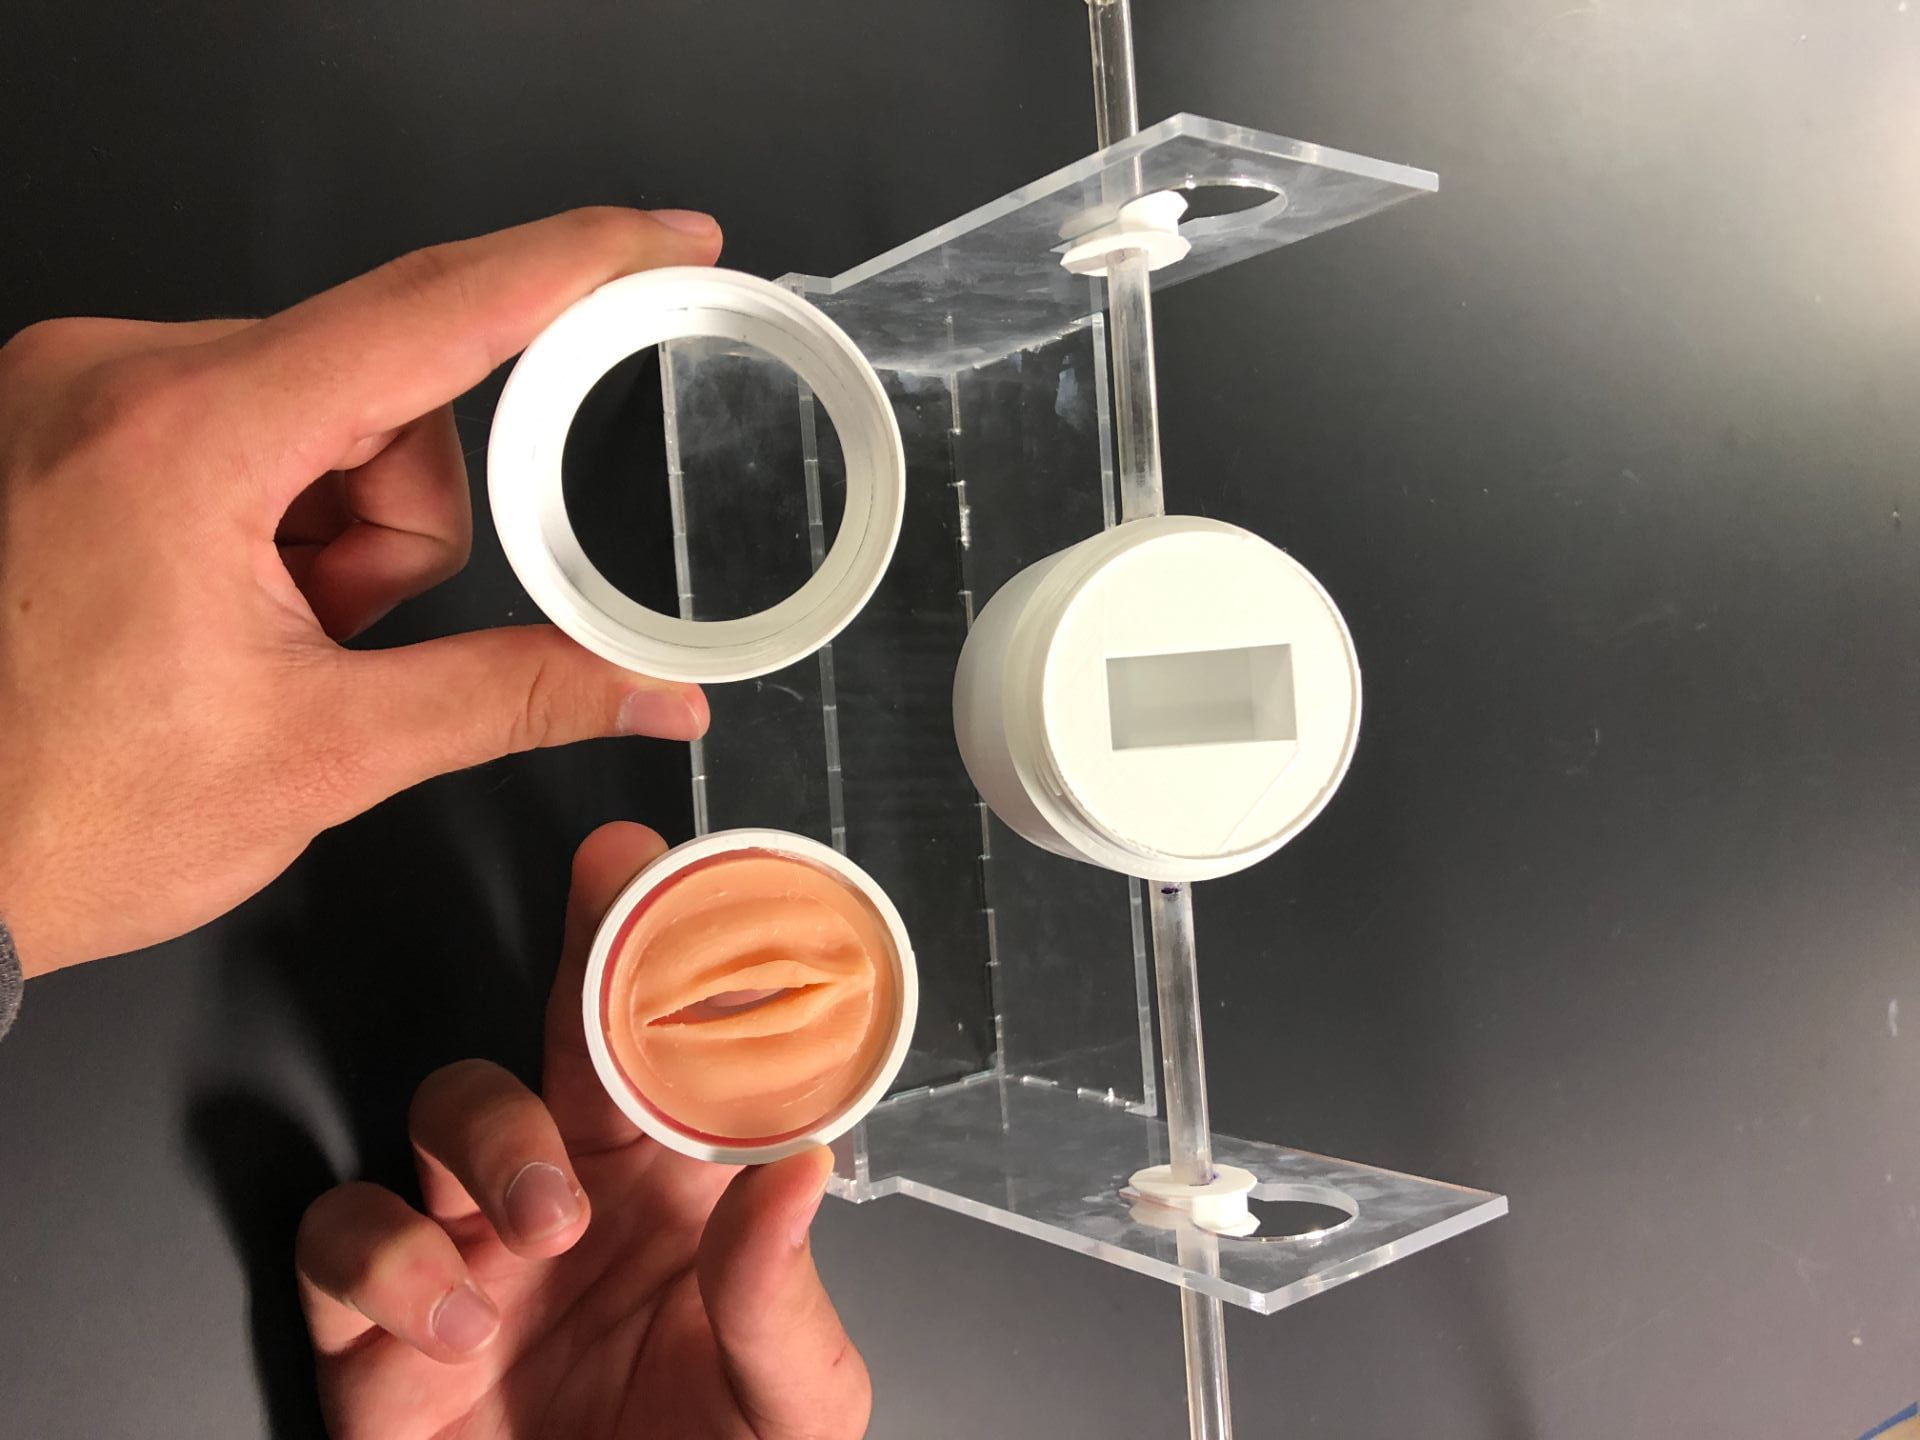
As we entered into week five of the internship and the last full week of prototyping, iteration was our best friend. We began the week by laser cutting our acrylic base and rotation lock mechanism. Both worked well as a proof of concept, but we had a few details to iron out. We varied a few dimensions on our base, as well as changed the thickness of the acrylic. Our rotation locks had to be iterated so that they would fit exactly in the keyholes in the base without slipping side to side. Throughout the course of the week, I probably 3D printed 15 different peg sets- it was so finicky to find the perfect fit! We also iterated on our Mason jar attachment mechanism to ensure the sizing was correct and the mechanism would securely hold the labia and hymen caps onto the model.
Left- This is our acrylic base and rotation lock dodecagons! Right- The attachment mechanism with the cylinder, labia and hymen table, and screw cap!
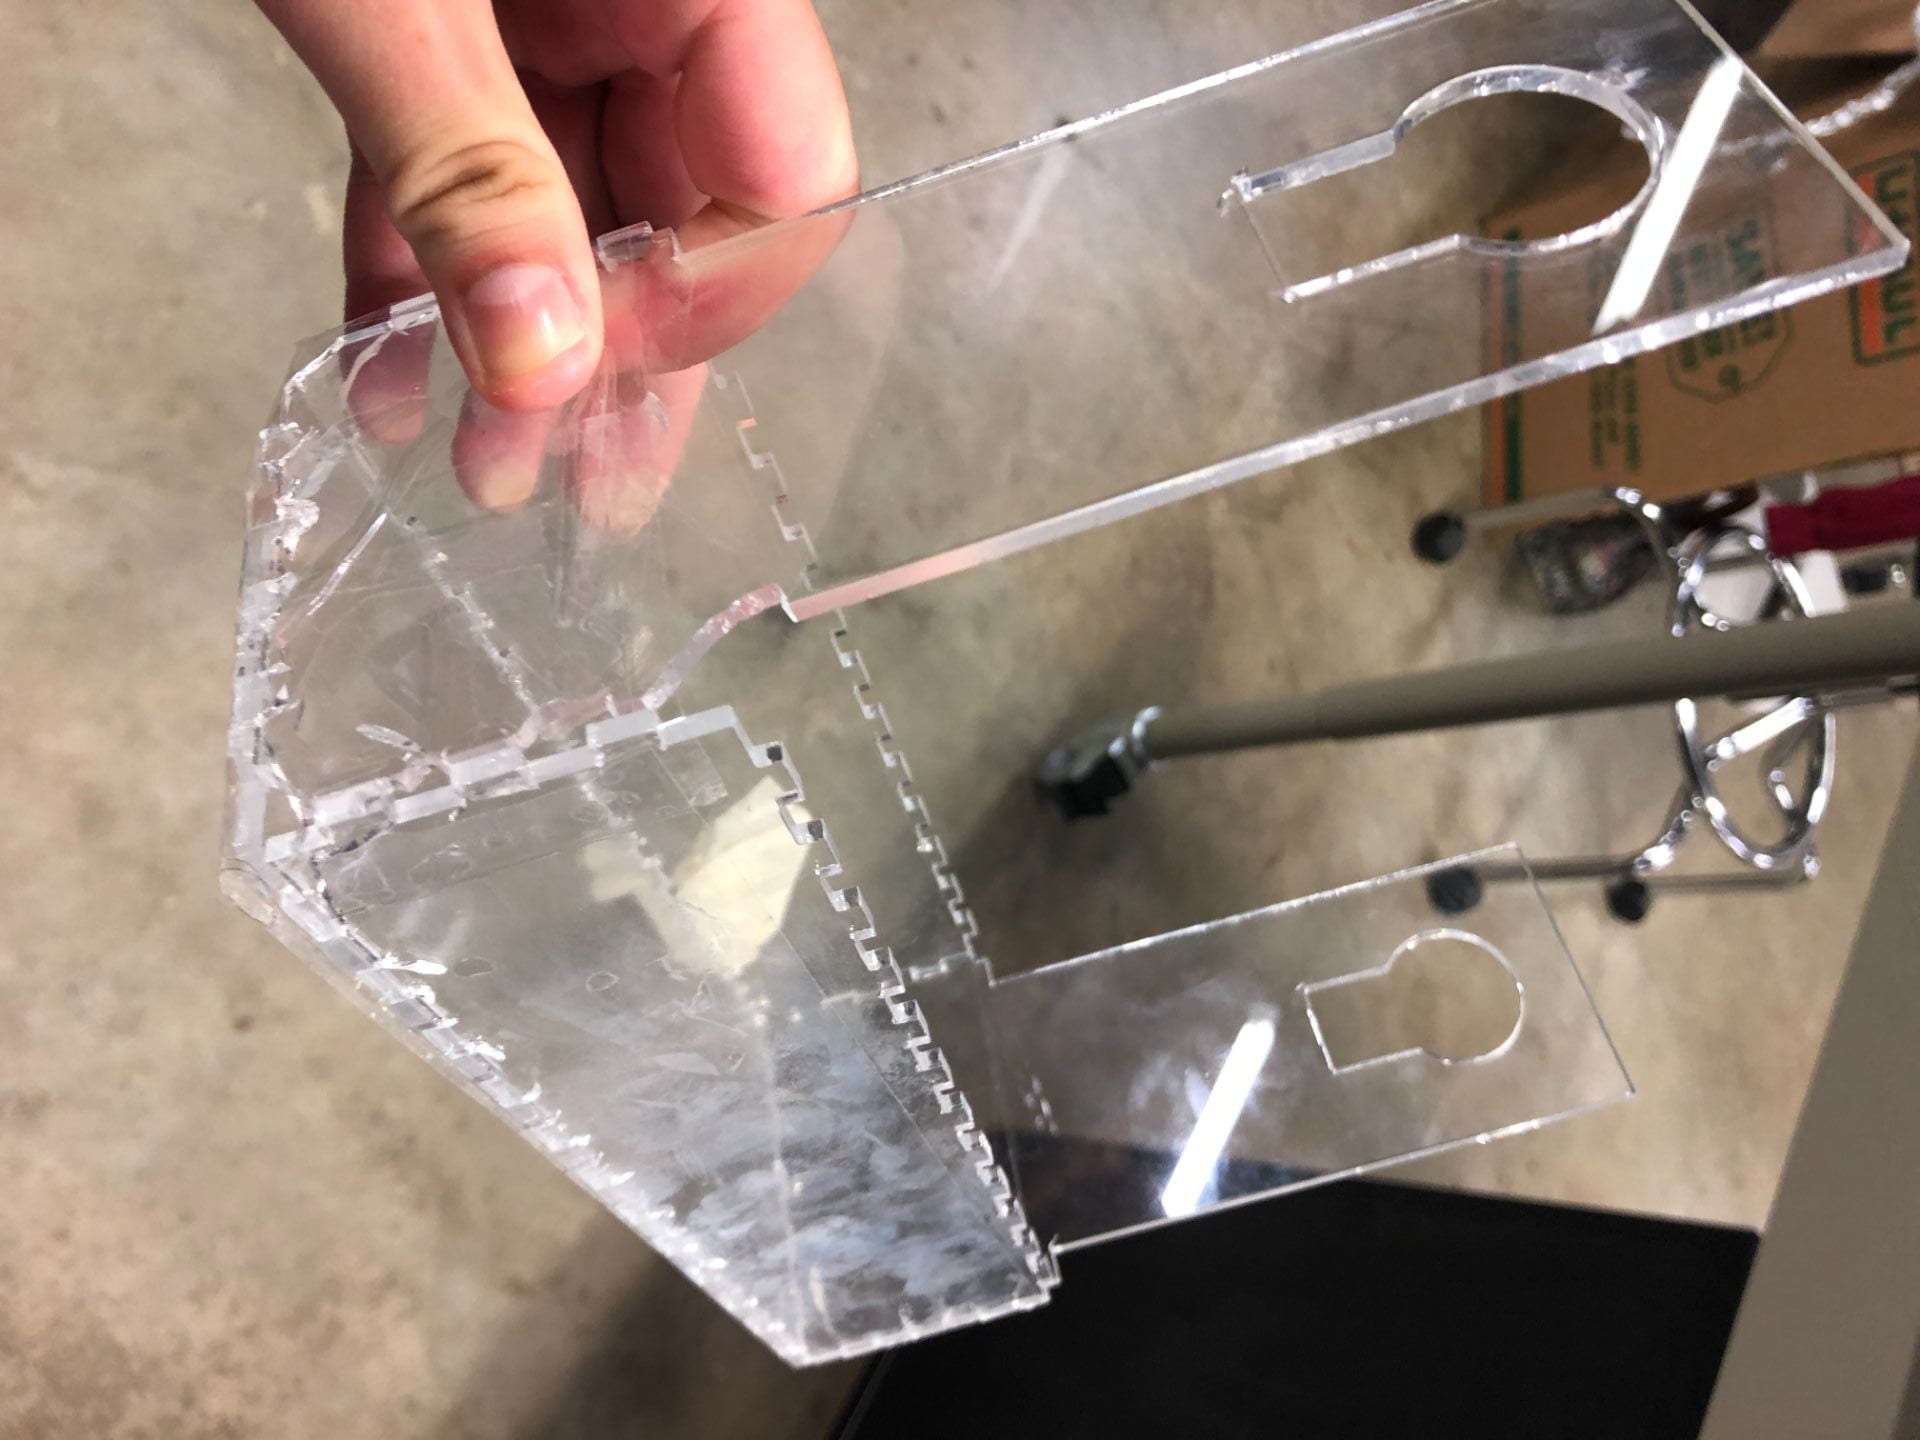
On Wednesday, we hit a slight bump in the road. Elise decided to clean off the acrylic base because there were smudges all over it. She used concentrated isopropyl alcohol. Soon after cleaning, the base cracked like crazy. It literally degraded before our eyes! This made us take a step back and reconsider materials, as many hospitals do use alcohol-based cleaning supplies. Additionally, one of the constraints on our model was that it needed to be easily sanitizable. Ultimately, we decided we do not have enough time to switch materials, and we struggled to find one that won’t degrade in the presence of isopropyl alcohol- after all, it’s job is to kill anything and everything. For now, we plan to clean our model with non-alcoholic or low concentration alcohol-based cleaning supplies, and we hope further teams can do more research into this issue. Though this situation was frustrating, it taught me a very important lesson- never assume any design criteria will be easily met! Our team figured sanitization wasn’t a huge thing we needed to design around, and we could just wipe down the model with any cleaning supplies. Man, were we wrong!
Our acrylic base that degraded after being cleaned with isopropyl alcohol- a sad day for us!
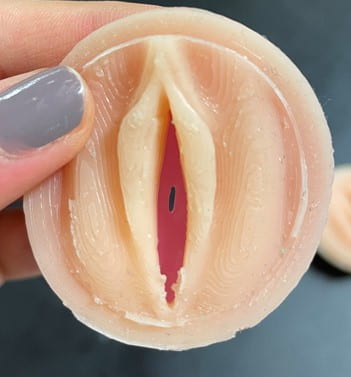
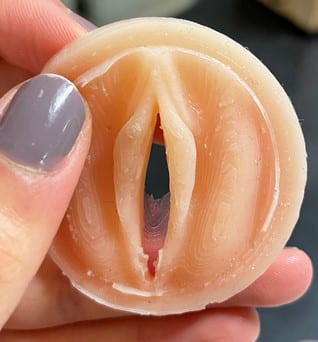
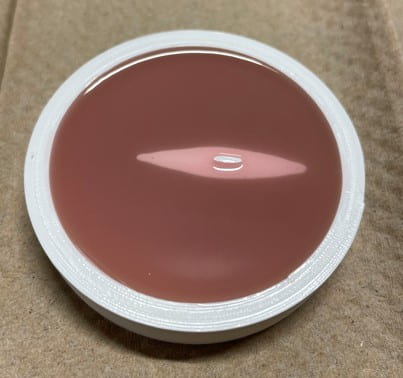
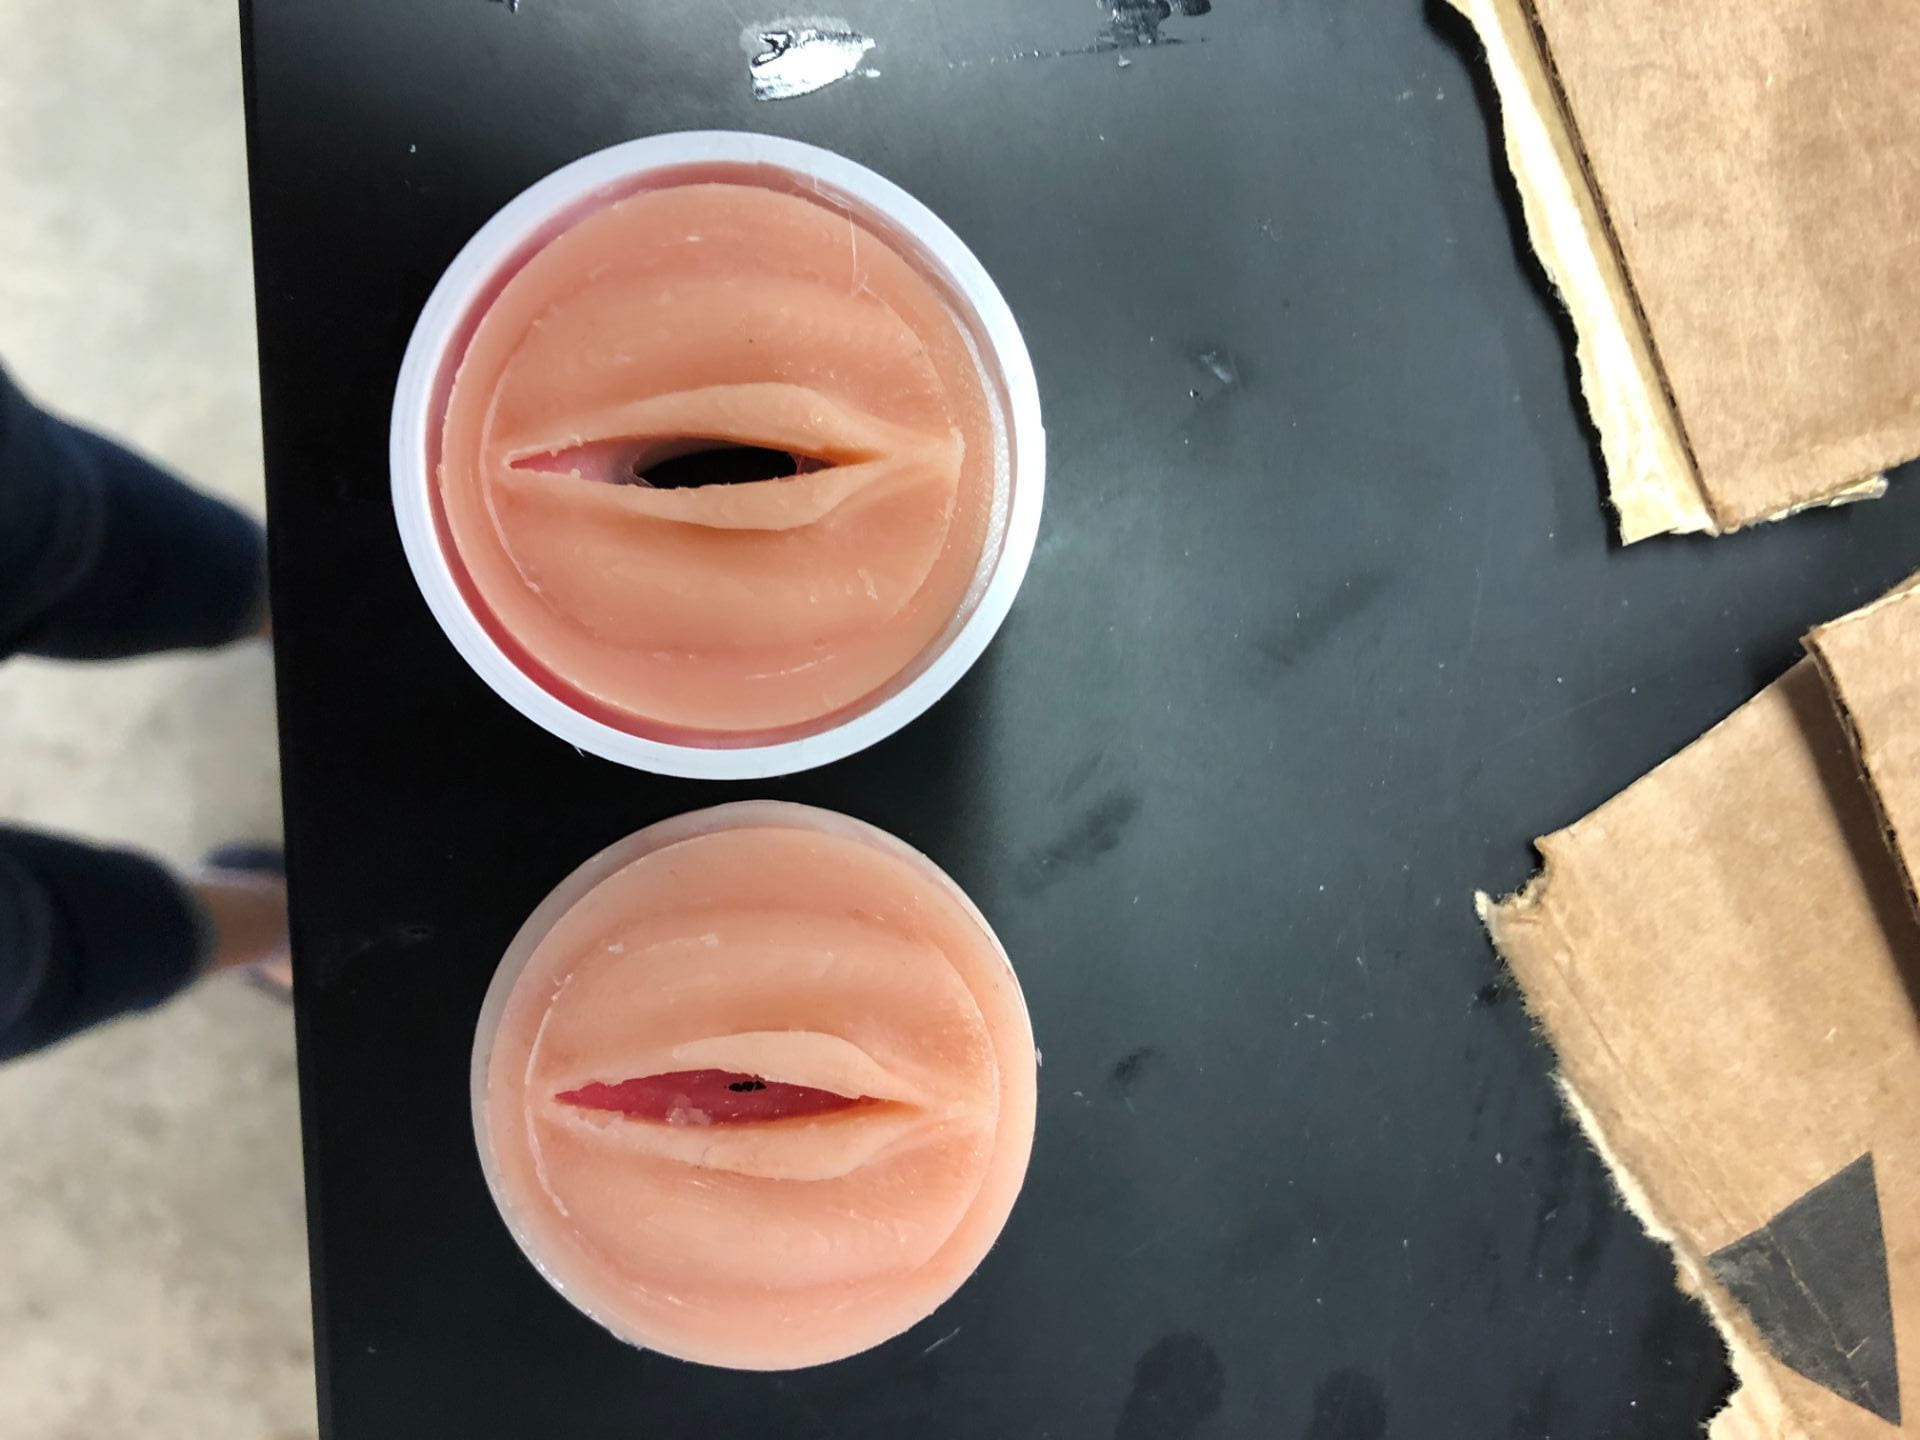
Throughout the week, we also continued molding the labia and hymen. We tried many different ways of molding and attaching the labia and hymen: gluing them together, cutting out the hymen, molding them together, and adding another layer on a partially cured labia for the hymen. After much iteration, we decided it would be best to glue the crescentic hymen and labia and add a hymen layer after partially curing the labia for the annular hymens. We also acquired pigmentation to create labia in different skin tones, and we experimented with that at the conclusion of the week.
Hymen and labia caps that were molded separately and glued together. The left is a non-estrogenized crescentic hymen and the right is an estrogenized annular hymen.
Outside of prototyping, this week also contained logistical tasks as we prepared for the conclusion of this internship. For team PIPER, this included developing a testing plan and project transfer documentation. For our testing plan, we created forms for user feedback both before and after using our model. We will send this plan to our client so she can gather clinical provider feedback at a training in early August. In regards to project transfer, we began working on a product specifications document, user instruction manual, materials list, and cleaning instructions. Another key task was preparation for our project showcase and pitch next week. I cannot believe we are entering our final week of the internship, but I am excited to share our work with a broader community next week.
I grew even closer to my team and the other interns this week. On Wednesday night, team PIPER got Baskin-Robbins for team bonding. The ice cream was delicious as always, and we ended up chatting for three hours! I appreciate our close bond and group dynamic, especially given our project subject matter. Our constant laughter and growing list of inside jokes never make for a boring day. On Saturday, the TAs organized an intern pool party! We ended up playing pool basketball for over two hours- it was so fun! Again, my competitive side came out, and I was able to help my team score some points. I’ve also got a painful sunburn and some gnarly blisters to show for it- haha! I am so grateful for the other interns, and I feel I have made some wonderful friends as a result of this program. I am walking out of this week a bit sentimental that the program is wrapping up, but I am so excited to share our progress and finish strong next week!
For as long as I can remember, I have been fighting an ongoing battle with my stomach. Having been hospitalized multiple times for unbearable stomach aches, I’ve had to avoid many different food groups, and often center my life around how my stomach is doing on any given day.
Why am I starting this blog post off by talking about my struggle with IBS? Because I never thought I would have to deal with something more difficult than my own stomach, but this past week I met its match: wooden dowels.
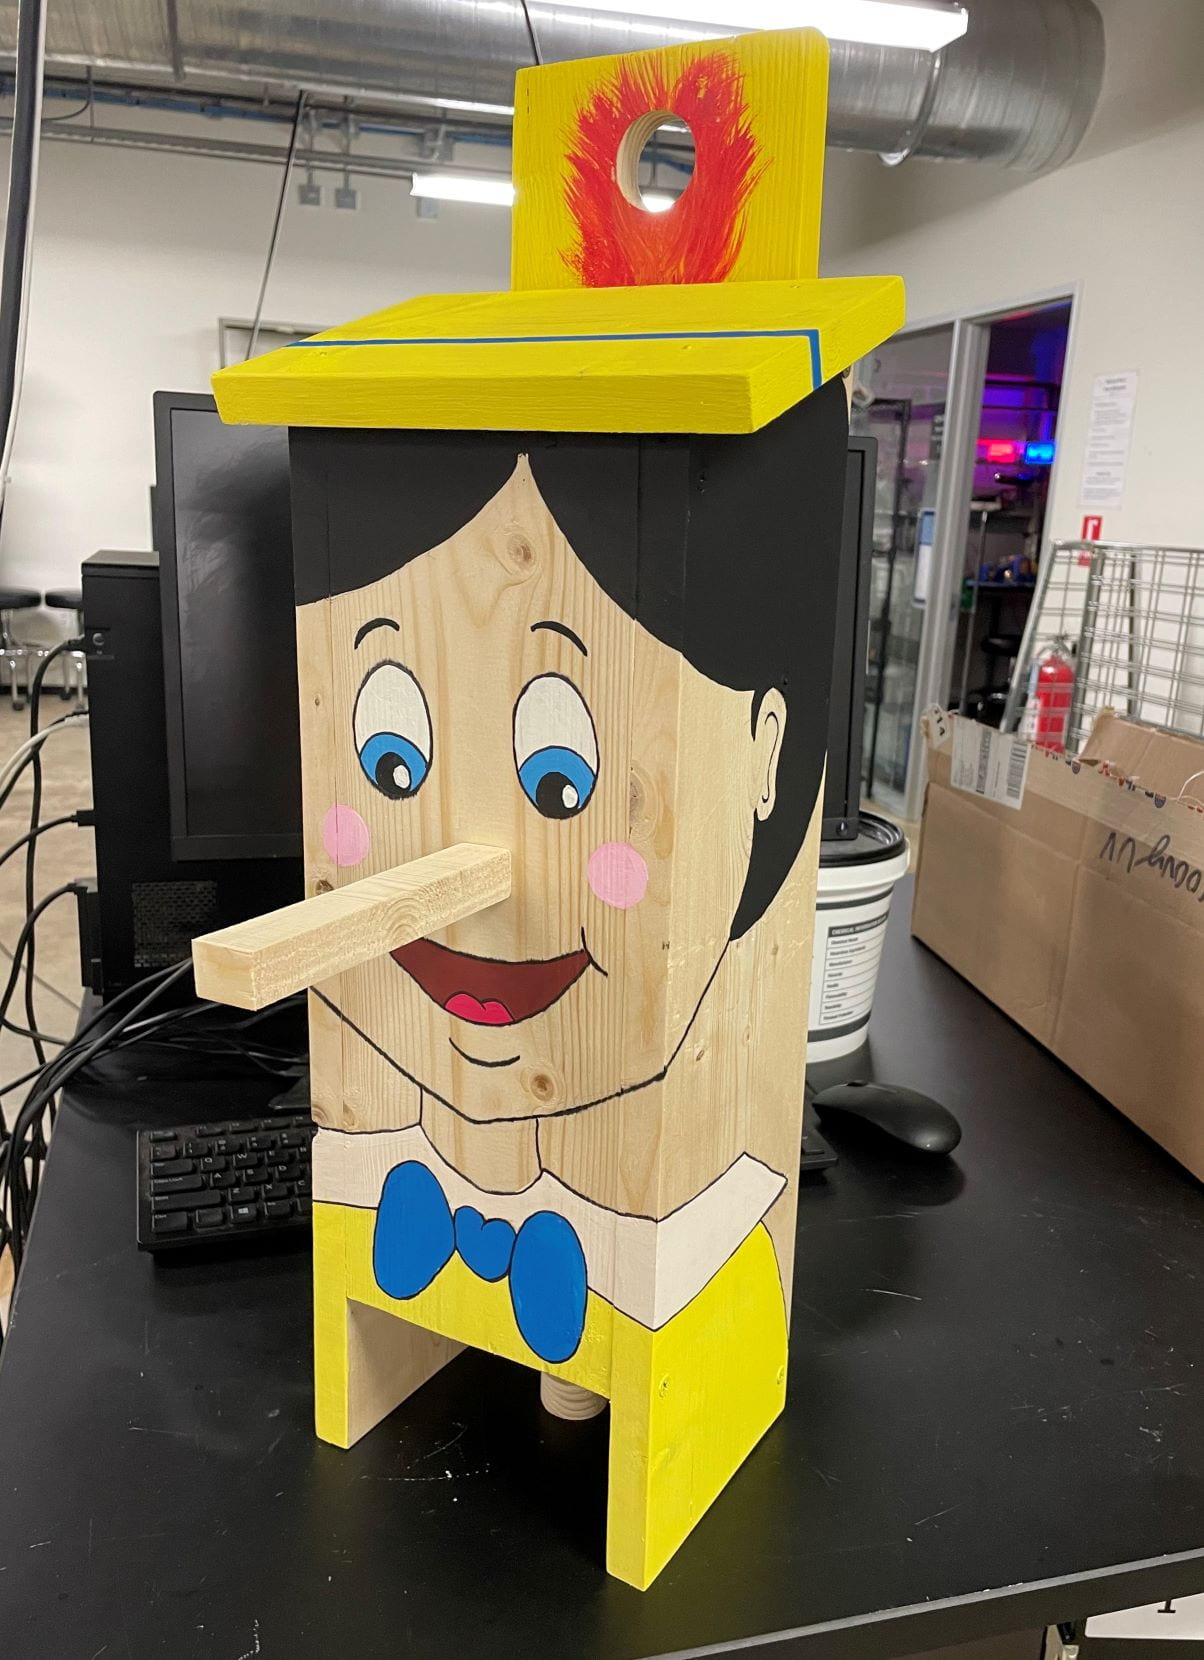
Towards the beginning of the internship, we participated in a woodworking workshop, in which we created bat houses out of planks of wood and learned about appropriate tools in the process. My woodworking team (Rachel, Christopher, and Kenton) and I decided that we didn’t want to stop at a simple bat house: we crafted the MSAAC (Multi-Species Animal Apartment Complex), which included a perch to be inclusive towards birds and squirrels seeking lodging. Rachel and I also painted the MSAAC to look like Pinocchio, and it still sits at our team table. Dare I say it’s even become a bit of an internship mascot :))
Our team decided to create our mask-hanging frame out of wooden dowels since this is a material that is lightweight and globally available. Also, given our experiences with the woodworking workshop, we decided that wooden dowels would be nice and easy to work with. Or so we thought.
In order to create the frame, we needed to create a 24” by 34” rectangle with some horizontal crossbeams so that the masks would hang vertically. (Don’t worry–I’ll attach a photo later in the post.) We chose a 0.5” thick rectangular dowel to begin, since it was strong enough to resist bending but still small and lightweight. However, when we tried to screw two of the beams together, the dowels split down the middle.
Determined, we tried everything: smaller screws (still split the dowels), super thin nails (which bent upon impact with the hammer), even creating guide holes with a screwdriver, and nothing worked. The 0.5” dowels were just as stubborn as we were.
We then reluctantly moved on to a 0.75” thick dowel, and decided to use the 0.5” dowels as the horizontal crossbeams still since we would be screwing into the tops of the dowels, which were less prone to splitting. Sadly, even the 0.75” dowels split as we screwed into them.
What if the problem wasn’t the dowel thickness, but the quality of the wood itself? Abby and I ran (well, drove) to Home Depot and picked up another set of 0.75” dowels, but these seemed much more solid than the ones we found at the OEDK. Finally, we were able to create the skeleton of the dowel frame!
Once we attached the mask-hanging screws (which was an Irritable process in itself–screwing in 60 hooks by hand is quite painful), we finally completed the frame for our final prototype. I’ll attach a picture of Curtis down below (yes, we name all of our prototypes :).
After the full 1.5 days of working to create Curtis, I learned two things: one, dowels are lightweight and accessible, but they have their drawbacks; and two, my stomach is not the most Irritable thing I’ve had to deal with. Let’s hope that these dowels were worth the trouble 🙈
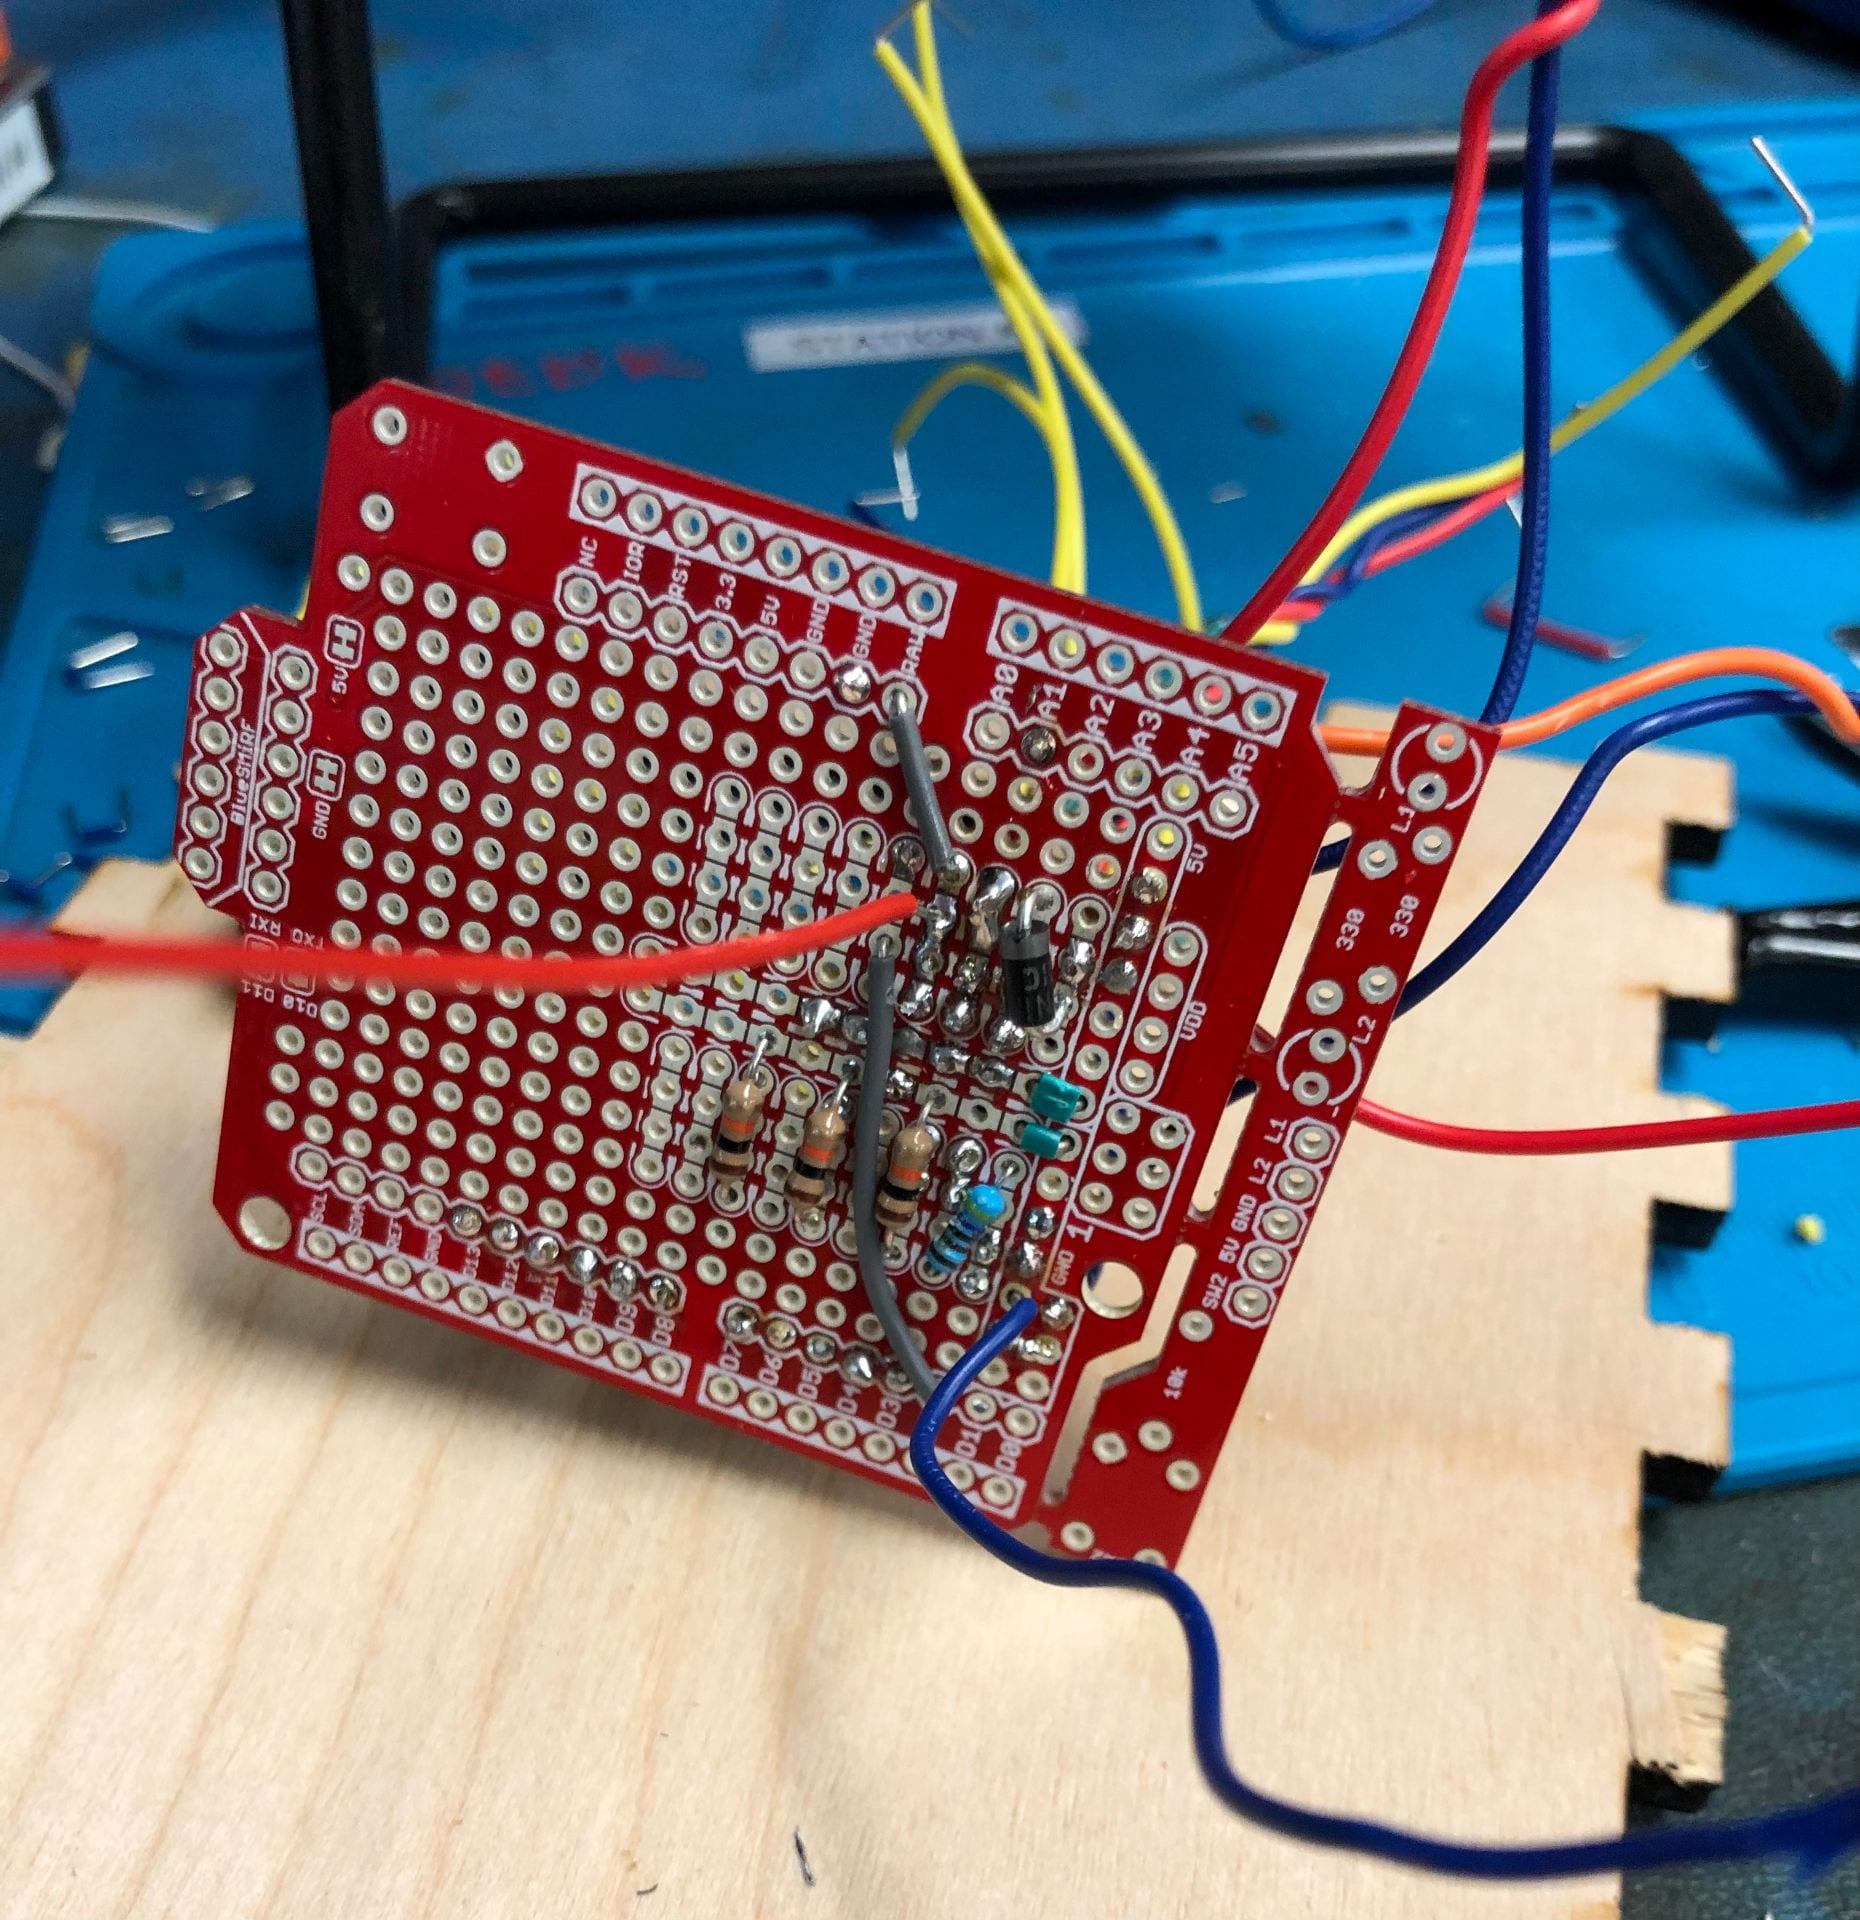
Week 4 was shortened because of the long holiday weekend for the 4th of July, but it was still productive! This week, we finally, finally got the complete circuit working!! So, I transferred it all to a perfboard, which is a more permanent, soldered-on circuit that winds up being much smaller and eliminates the issue of wires accidentally being unplugged. This process was long, because first we redid a more organized version of the breadboard where all of the wires were shortened so the connections could easily be seen. Then I used the software Fritzing to plan out the perfboard wiring before I actually started to solder all of the wires to an Arduino-specific perfboard called an Arduino shield, which fits neatly on top of the Arduino Uno and shares the same footprint:
All of the wires that stick out of this perfboard go to specific components, such as the screen, heating pad, thermometer, and piezo (alarm). This will make our final product much easier to work with and fit into a smaller box!
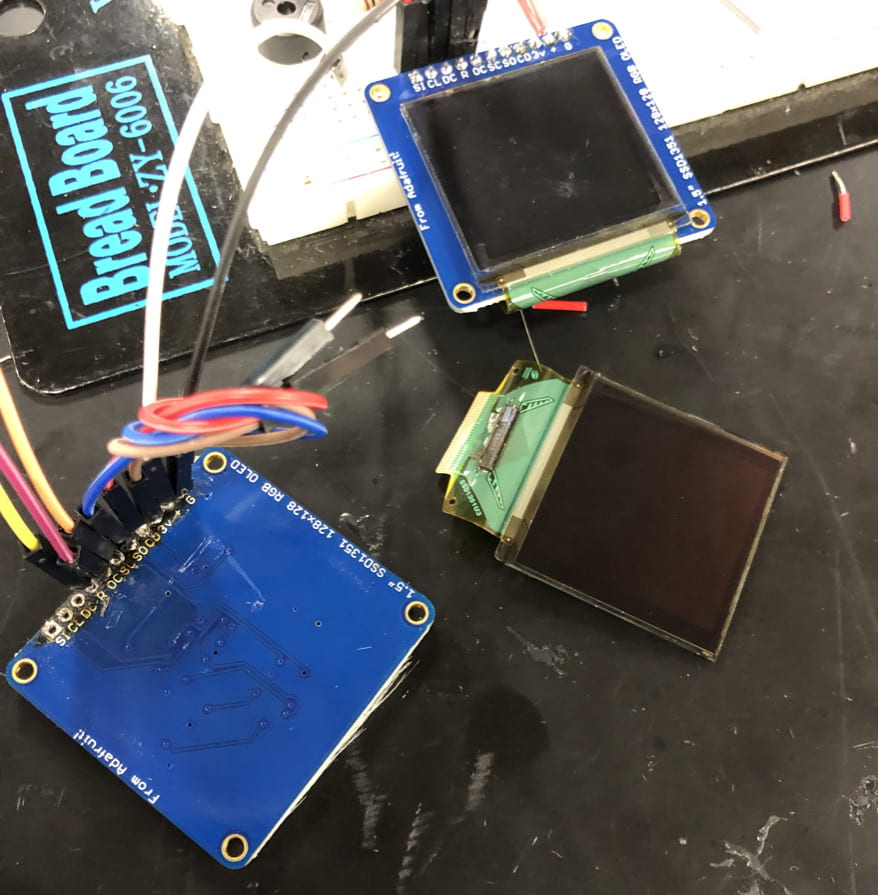
We did encounter one issue when we tried to assemble everything–– we fried yet another screen! At first this seemed like a major setback, but then I realized that on this OLED, the screen had fried, but on the previous one, the circuit controlling the screen had fried. So I tried something:
I ripped the screens off of their PCBs, swapped them, and plugged in the ribbon connection, and it actually, remarkably, worked! Because the connection is still looser than it should be, we did order another screen to use in the final design, but for testing, this is sufficient.
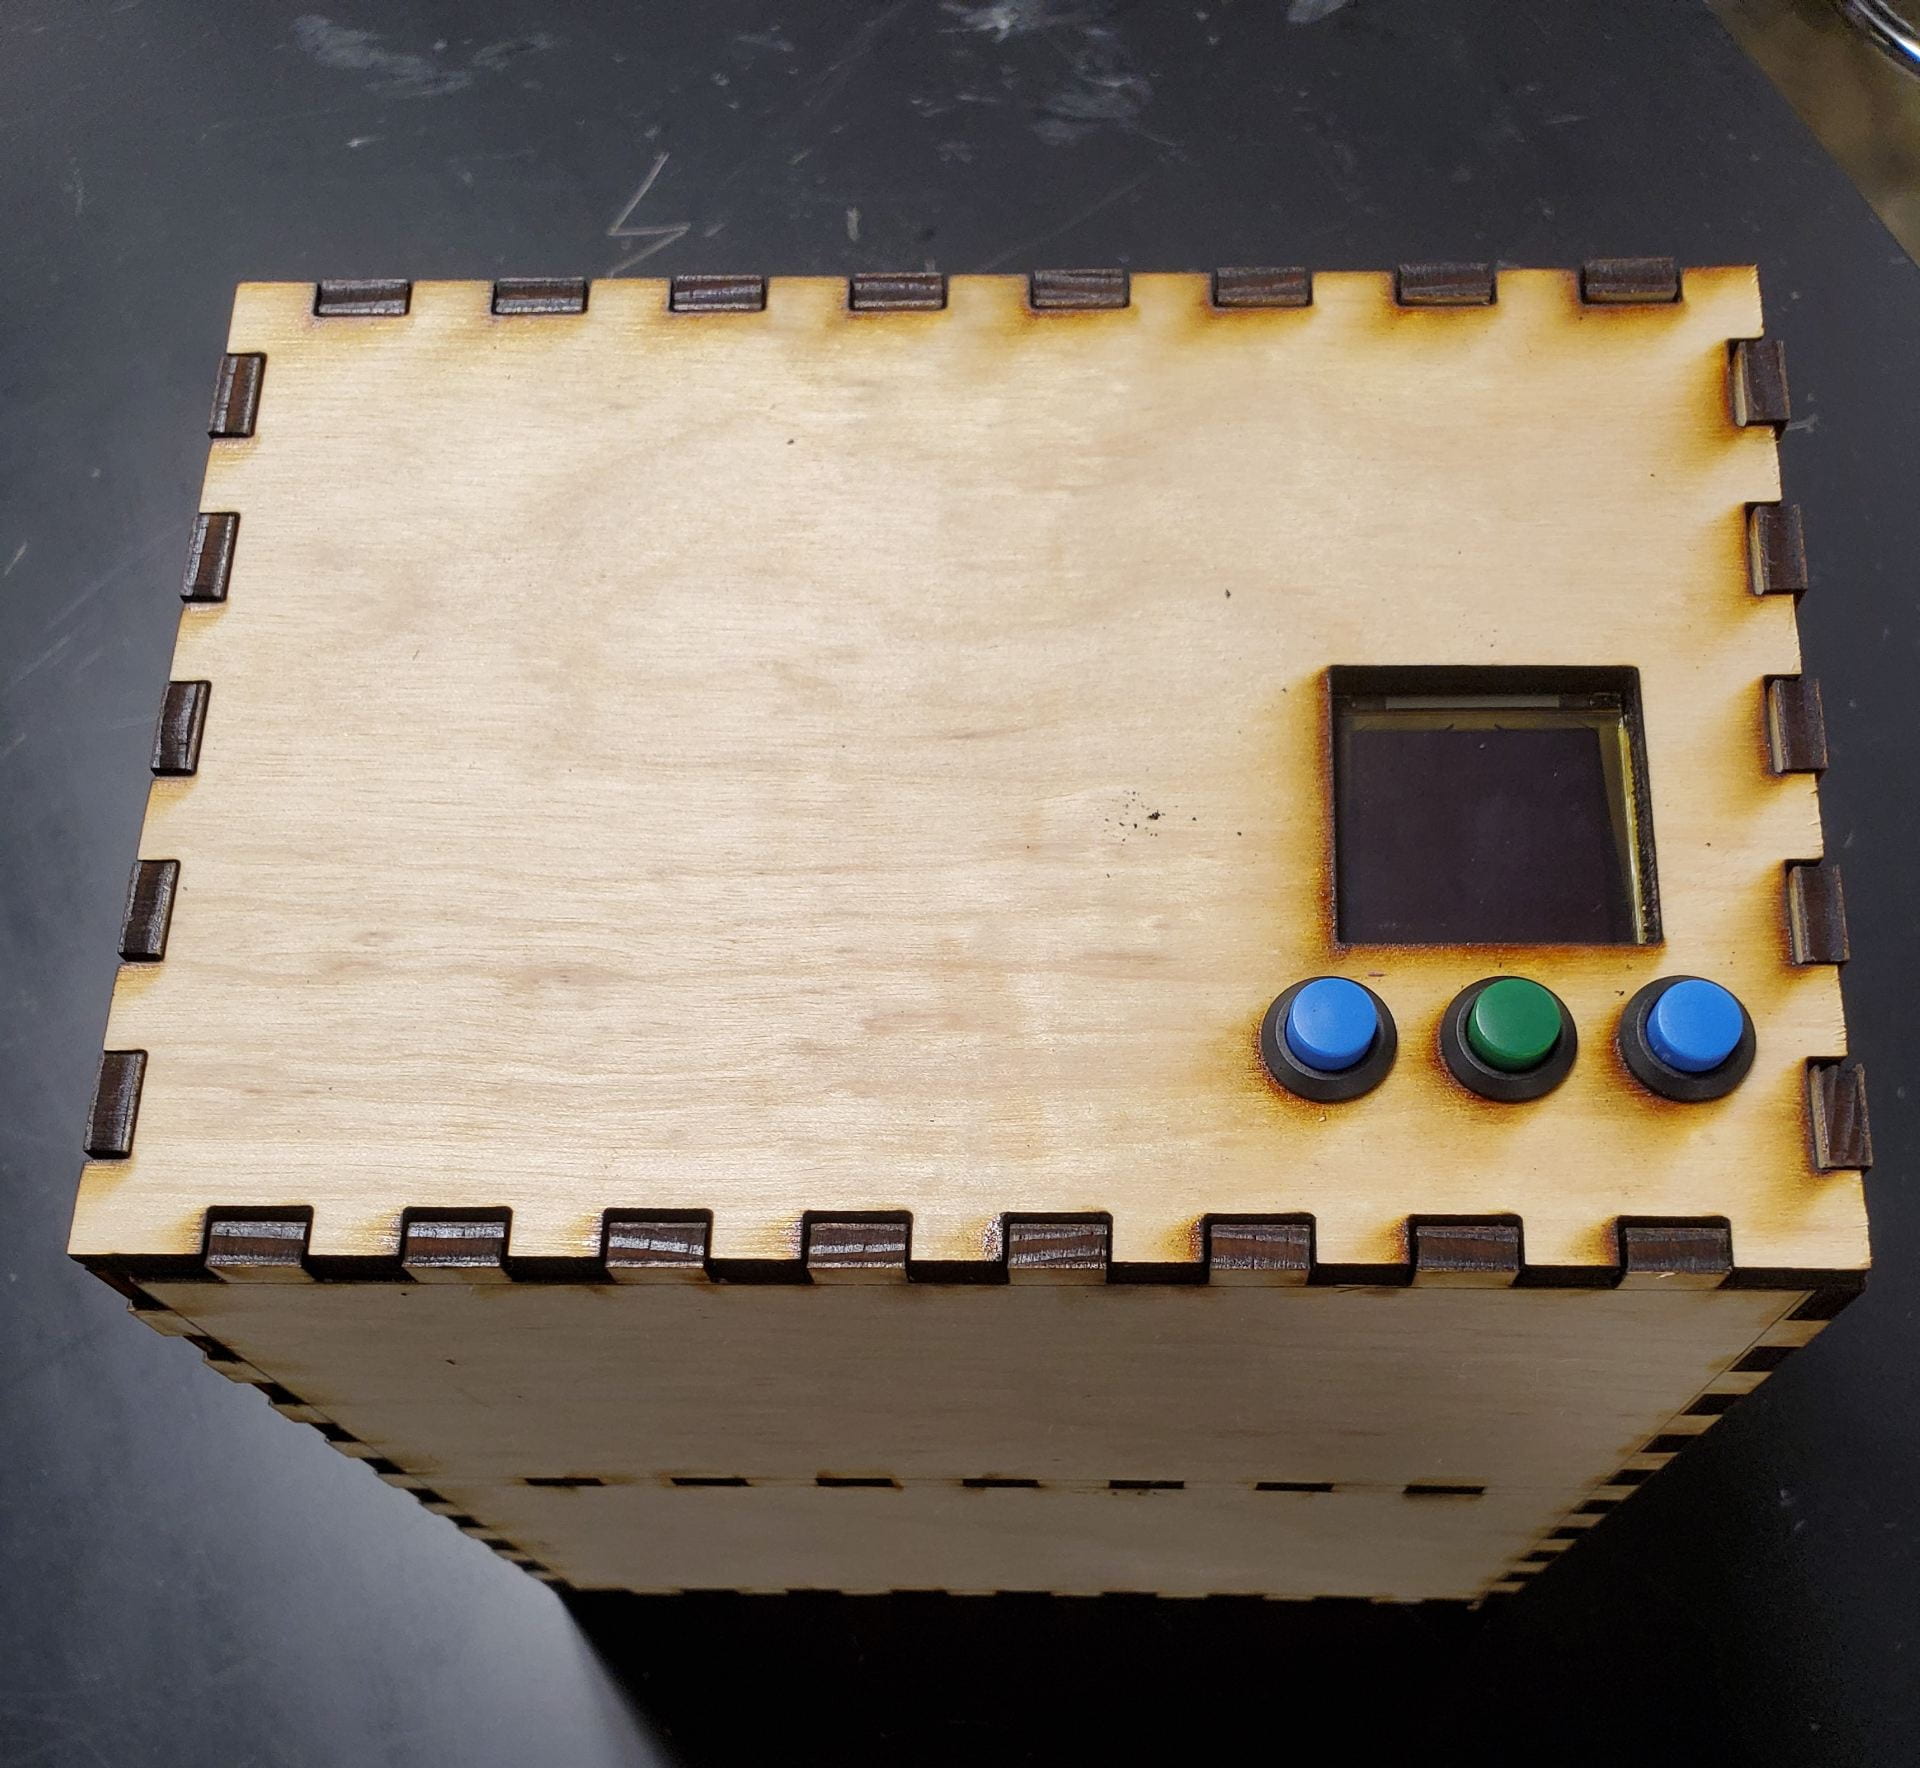
New Box
Since the circuit was going to be so much smaller, we also implemented our new box design! Instead of two side-by-side chambers, in this box the electronics chamber is the same size as the heating chamber and positioned directly above it. Here’s what it looks like fully assembled, including the screen and buttons on top:
We’re currently conducting a comparative incubation test with our device and a lab incubator which was lent to us by a biology professor. If all goes well, our device is in it’s final stage and ready for presentations next week!
We’re done with 66.667% of the internship! While 5 significant figures may have been enough to get humans on the moon, I can’t decide if they are enough for this blog. Thankfully, though, our design decisions are not as vague to make. This week, we finalized the mechanical structure of our device.
Last week, I mentioned that we had finally decided on using a 55 gal. steel oil drum as the container of our device. The oil drum was chosen because of how readily accessible it is, especially in the low-resource settings that we are designing for. It has a standard cylindrical geometry that opens the door to some exciting design prospects. The steel is also an upgrade to plywood which, in addition to not being accessible, can also warp after repeated exposure to UV-C light. With the container selected, we began selection of framework designs for our mask holder.
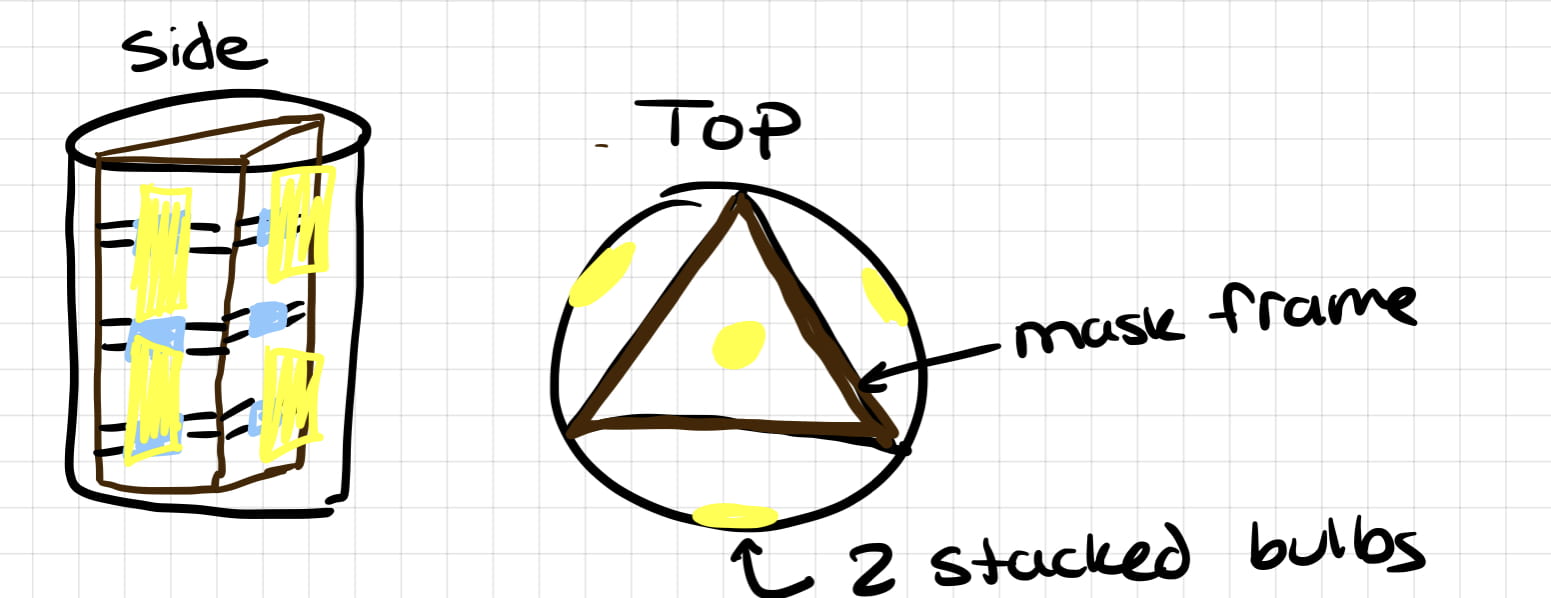
We had two major designs. These included a pyramidal frame and a rectangular frame (see below). Both of these frames had their pros and cons. For the pyramid, you can fit more masks (27 including all sides!), as well as increase the sterilization efficiency more than 20-fold. However, this requires a large amount of stacked bulbs (8 in total), which increases overall manufacturing and power cost as well. At the same time, with its compact geometry, we would have to potentially attach a bulb to the lid, which adds a number of complex mechanical issues, especially with handling of delicate bulbs in high-stress environments.
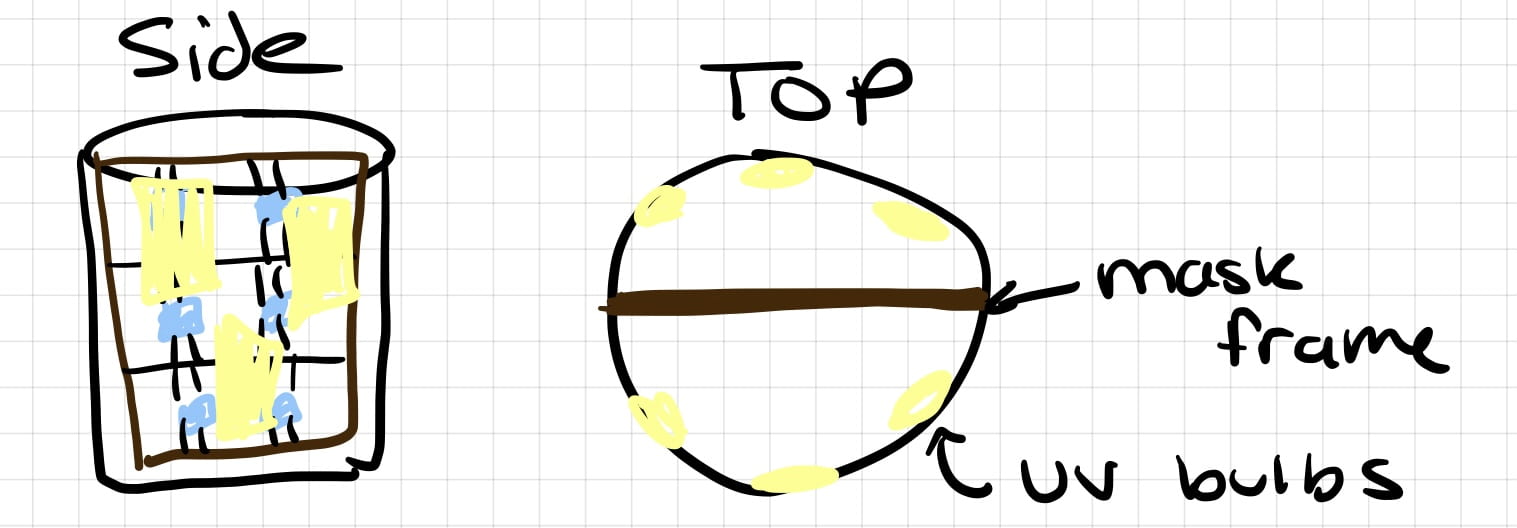
For the rectangular frame idea, we would have three bulbs on either side of the frame. The bulbs would each be at a different height to ensure all levels of the mask-holder receive uniform UV exposure. The frame itself would be a matrix of masks with 3 rows (and 5 masks per row), increasing the sterilization efficiency more than 10x. Since we would be able to attach the UV tubes to the oil drum, this frame would give us higher mechanical stability (as well as use fewer bulbs!).
One thing I’ve learned to appreciate over the course of this internship is the value of breaking things down into simpler tasks. When we created our design criteria, we did so because of the design goals we hoped would shape our project. Now, after breaking down each aspect of each framework, we began to cycle through our criteria. After many rounds of discussion and deliberation, we decided to go with the rectangular frame owing to its comparative mechanical and usability advantages. In the end, what seemed like a complex issue (that would have shaped the rest of our project) ended up as a simple decision based on our fundamental goals.
As I move into the final stages of our design, I’m trying to make it a habit to trust the process. I continuously remind myself to look at our project from afar and see how every step we take, and every singular change we make affects the bigger picture. And it’s beautiful.
The fourth week was a somewhat interesting period of this internship, for a few reasons. The first one we became aware of was that we would be missing Thursday and Friday for the Fourth of July. Later, it became apparent for our team that this week would be somewhat of a transition period between the “bulk” of the project, and the grand finale. After our four-day weekend, we would come back with only two more weeks to make as much progress as possible and to tie up loose ends. Therefore, we focused on preparing ourselves for the end of the internship. It’s crazy how time flies when you’re having fun (and when there’s a deadline).
Inside the Box
After some testing of our “incubator” last Friday, we had our “Pink Box” as a low-fidelity insulated box. We knew that we would like to improve this aspect of our design this week, so that we would have something more robust on which to perform heat loss experiments. On Monday, we started on this path by laser-cutting the wooden walls of our box, and then cutting pieces of pink foam board as precisely as we could with hand saws. This quickly became one of the most satisfying parts of the process, because we already knew the dimensions and specifications of our new box. Now, all we had to do was cut the pieces to size and assemble the box. Compared to other elements of our project, this was like playing with Legos.
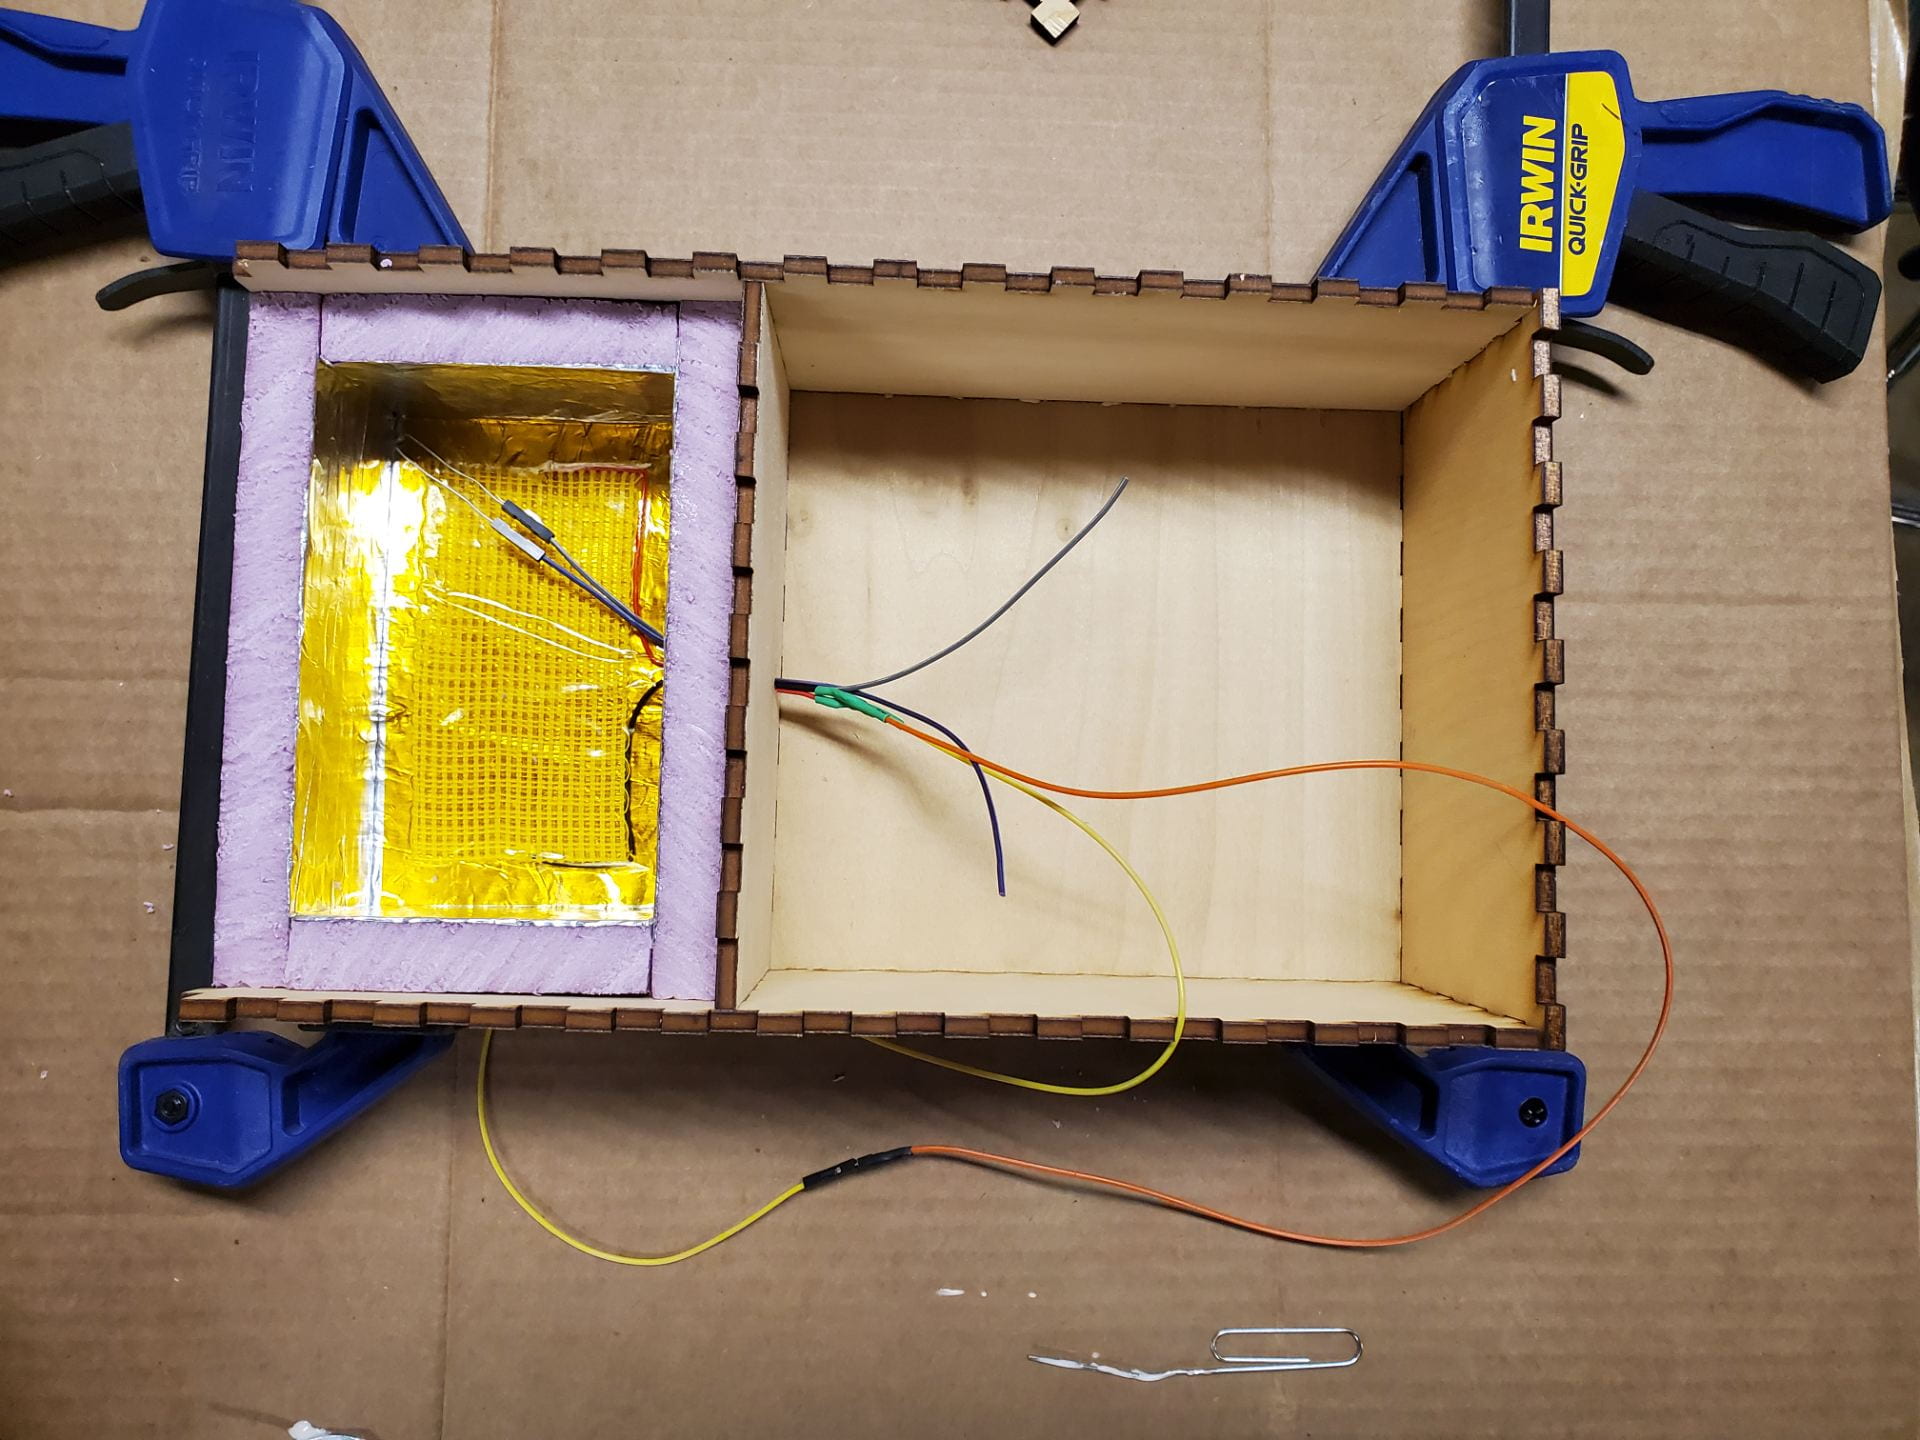
Our two-chambered box. The left chamber is insulated with pink foam, and has a heating pad for temperature control. The right chamber will contain the battery and electronics necessary for our device.
We finished our two-chambered wooden box on Tuesday. This box was meant to be a complete incubation device, so that all of the functions of the incubator would be contained within one box. While the previous “Pink Box” was an insulation chamber alone, the new box had one insulated chamber (with foam board), and a separate chamber to house the battery and electronics. The two chambers were positioned side by side, and all of the necessary connections between the chambers (such as wires for the thermometer and heating pad) would be accomplished with a small hole on the inside of the device. As the box came together, we noticed various areas of improvement that we could make to our design, but our main priority was to learn as much about the heating characteristics of the new box and any other iterative changes we would like to make to it.
Learning
In preparing for our heat loss experiments, we knew that it would be nice to have a nicely-coded test interface with a complete Arduino circuit. Although we had completed components of our final Arduino circuit, it was not yet ready for testing, nor did we want to spend too much time coding it for that purpose. The bare minimum was a power supply with variable voltage (check), a circuit for turning on and off the heating pad (also check), and a thermometer that could display temperature values to a computer (not check). We did have an Arduino that could display text when plugged into a laptop, but we did not have an accurate circuit for reading temperatures.
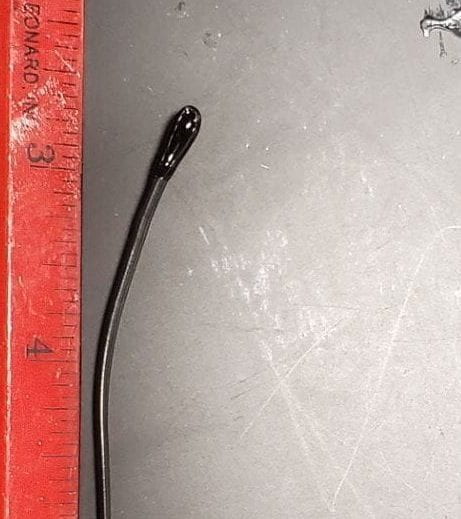
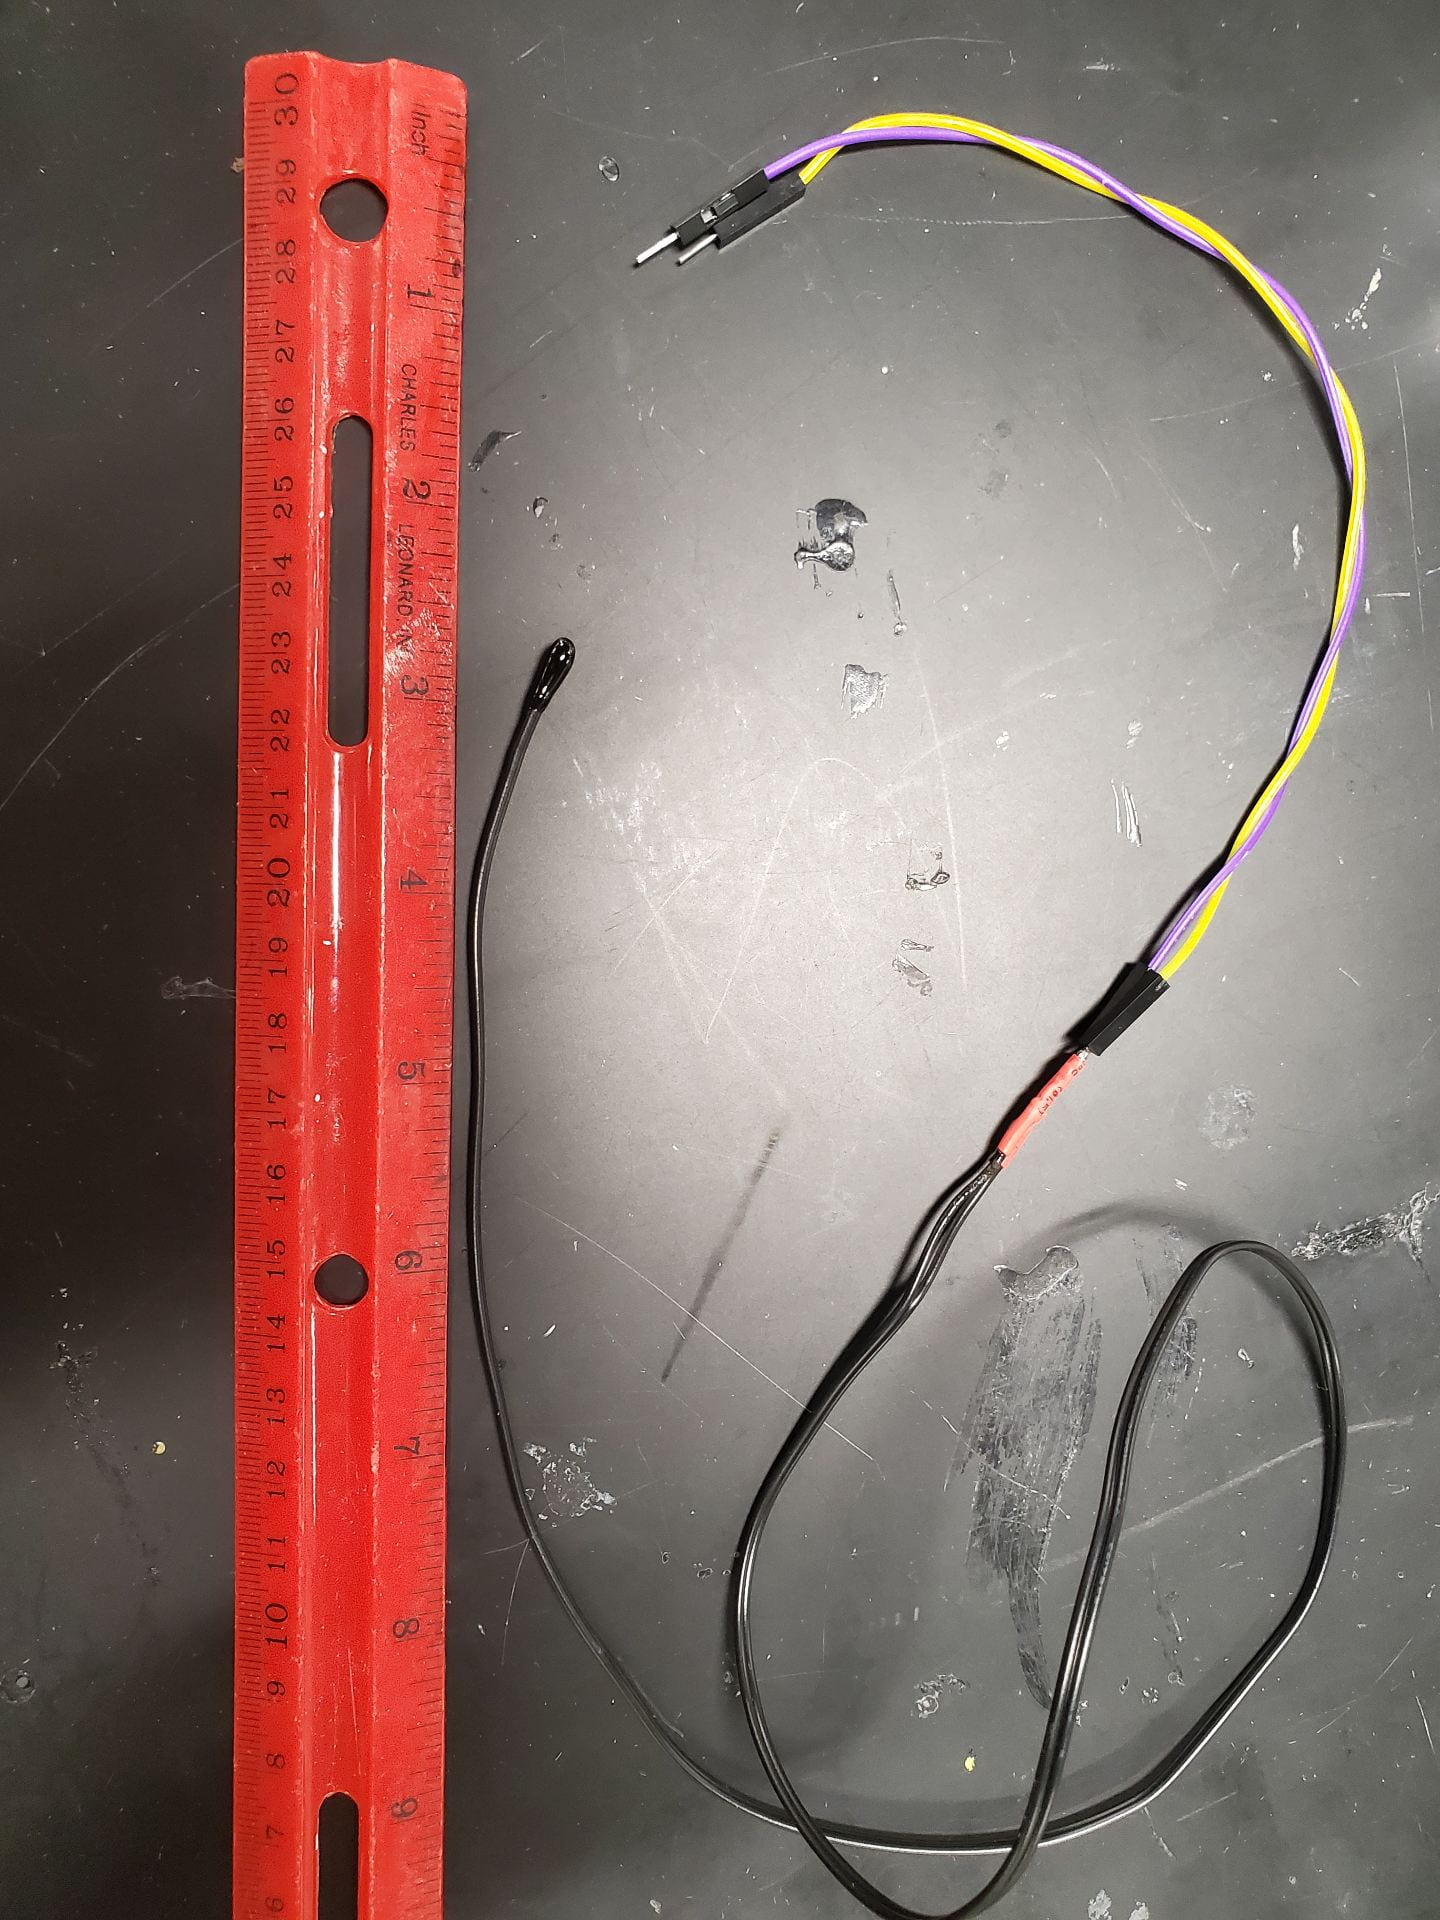
The thermistor. The little black head is the resistor that measures temperature.
We followed the lead of previous teams in attempting to use a thermistor for this purpose. This is a type of resistor that changes its resistance predictably depending on the temperature. Therefore, the most important piece of this circuit would be a way to measure the resistance of the thermistor using the Arduino. We were confronted with another challenge when we noticed that the temperatures were just a few degrees off with our thermistor. Because the resistance curve of our current thermistor was different from that of the Minicubator team, a mentor suggested to us that we could adjust our code to accommodate the new hardware. It worked wonderfully! After learning a great deal about thermistors, we now had a solid way to control heating to our new box and read temperatures. We started those thermal equilibrium tests, but we still have more tests to go.
Hopeful Changes
The biggest struggle of our entire project has been understanding the Arduino circuits. While we have a majority of the components finished, we have yet to put them together in such a way that we could run Minicubator’s previous code. At this point, our team has changed bits of the code to include better documentation and to change some functionality, but we will be able to test everything once the breadboard is complete. Nonetheless, we have noted many potential changes that we would like to make to the code. First, the user interface is lacking in the previous prototype, and we have already created some flowcharts to show how users will be able to move through our interface. This will make the product easier to use and ultimately improve its flexibility in the case of errors, reboots, and other unexpected events.
Beyond this, one of our results from Friday indicates that we should make a major adjustment to the temperature control algorithm. As the heating pad is turned on, the temperature rises (of course), but even after being turned off, the residual heat on the pad continues to heat the chamber. Therefore, our client and mentors have directed us to use some form of a PID controller, which will mitigate small temperature oscillations during incubation. We have many improvements that we would like to make, but an effective temperature controller would be an exciting improvement to the overall functionality.
As we near the last two weeks of our internship, we have learned a great deal about our problem, and we have already made some improvements, though we are still waiting for them to become integrated into one entire system. It has become more clear that we will not be able to complete everything that we would like to improve about previous designs of portable incubators, so we must now prioritize improvements that will be most useful to our client and to future teams working on our design and code. Now we have some time to take a break from our projects a take a deep breath, but Team Petri-FI is ready to tackle this last couple of weeks!
Highlight: Fireworks
The four-day weekend was very pleasant after such hard work. Being from Arkansas, this was my first time in Houston during the Fourth of July, and I was excited to watch a fireworks show that I had never seen before. I heard from others that the shows near downtown Houston or Galveston would be great options. The Houston show would have been perfect, but there was something so enticing about driving to Galveston, smelling the ocean, and taking some photos of the beach and the fireworks. So on Sunday, July 4, I planned a solo adventure out to the ocean, and brought my camera. Despite the tiring day, I felt energized and inspired for the week to follow.
A sample of the weekend’s fireworks in Galveston, TX.
This week was a week of big strides! As the internship comes to a swift close, we are working on pulling together some final deliverables. We have a fully functioning circuit (minus a mysteriously buggy SD card), a more ergonomic casing, and an almost finished journal paper to pass on our work to the next team. The most exciting development, however, is that we are culturing a real water sample in our prototype.
The current design for the top face of the prototype– screen and buttons so the user can adjust temperature/time and see any collected data.
After spending the beginning of the week troubleshooting our breadboard, Nancy began soldering together the circuit on perfboard. This will allow us to have all of the hardware far more compact than the scary rainbow tangle of wires we had on a big breadboard. Most importantly, this will allow us to fit all of the electronics into the small enclosure on top of our heating chamber.
As a part of the next iteration of our plywood casing, we moved to arranging our electronics and heating chambers vertically on top of each other rather than side-by-side. We felt this orientation, though no smaller in size, makes our device more portable as it will now easily fit in a backpack in the correct orientation for the Petrifilms (they need to be held horizontally, parallel to the ground). Furthermore, we have cut holes out of the top surface of the electronic chamber for the buttons and screen to be displayed. Lastly, we implemented some intuitive doors for access to the SD card (which stores data), battery (to recharge after use), and also the Petrifilms themselves.
The electronics are on top, and the heating happens on the bottom.
While we were working on the form factor and perfboarding, another teammate, Kenton, worked tirelessly on the code so that we could store temperature data for a test incubation period. However, the code simply would not read data to a file on the SD card. Even after a very knowledgeable mentor tried helping us, we just could not get data to transfer onto the SD card. However, because Kenton had biked all the way to Brays Bayou to collect water, we had to start an incubation cycle in our prototype as the individual bateria (which are what grow into visible colonies on our Petrifilms) would die after 24 hours.
To do our incubation test, we pipetted 1 mL of the Brays Bayou water sample to each of 20 different Petrifilms. We then placed 10 of these Petrifilms in our prototype and 10 in a commercial laboratory incubator. As of right now, the Petrifilms have been incubating for almost 24 hours. We will pull them out tomorrow (Friday, July 9) to see if colonies have grown- stay tuned for next week’s blog post to see our results!
Last week I promised news about the breadboard, and I am pleased to say, it is now working!
After four weeks of endless tinkering, consulting experts, and frying not one but two screens, we finally achieved it. This is such a huge deal because now we can run tests using the thermistor and screen. Before we fixed the breadboard, we had to come up with workarounds to get the data off the thermistor or use another temperature measurement device altogether.
Thermistor. The actual temperature sensing part is that black bead on the end.
Thermistors are simply little beads of metal oxide. They act like resistors – they’re made from materials that change the amount of resistance they put up against flowing current depending on the temperature they’re feeling. Pretty cool science, right? But they’re not exactly convenient to read like you would a mercury thermometer – you have to have a program that measures the resistance of the thermistor at each time point and converts that to the associated temperature that causes that resistance. There’s no screen or anything built in, so we had to do some complicated wiring tricks to get it to display data on a computer. With the breadboard working, we now have a way to easily monitor the temperature and read it on its own dedicated screen.
The other big news is our new and improved two-chamber model.
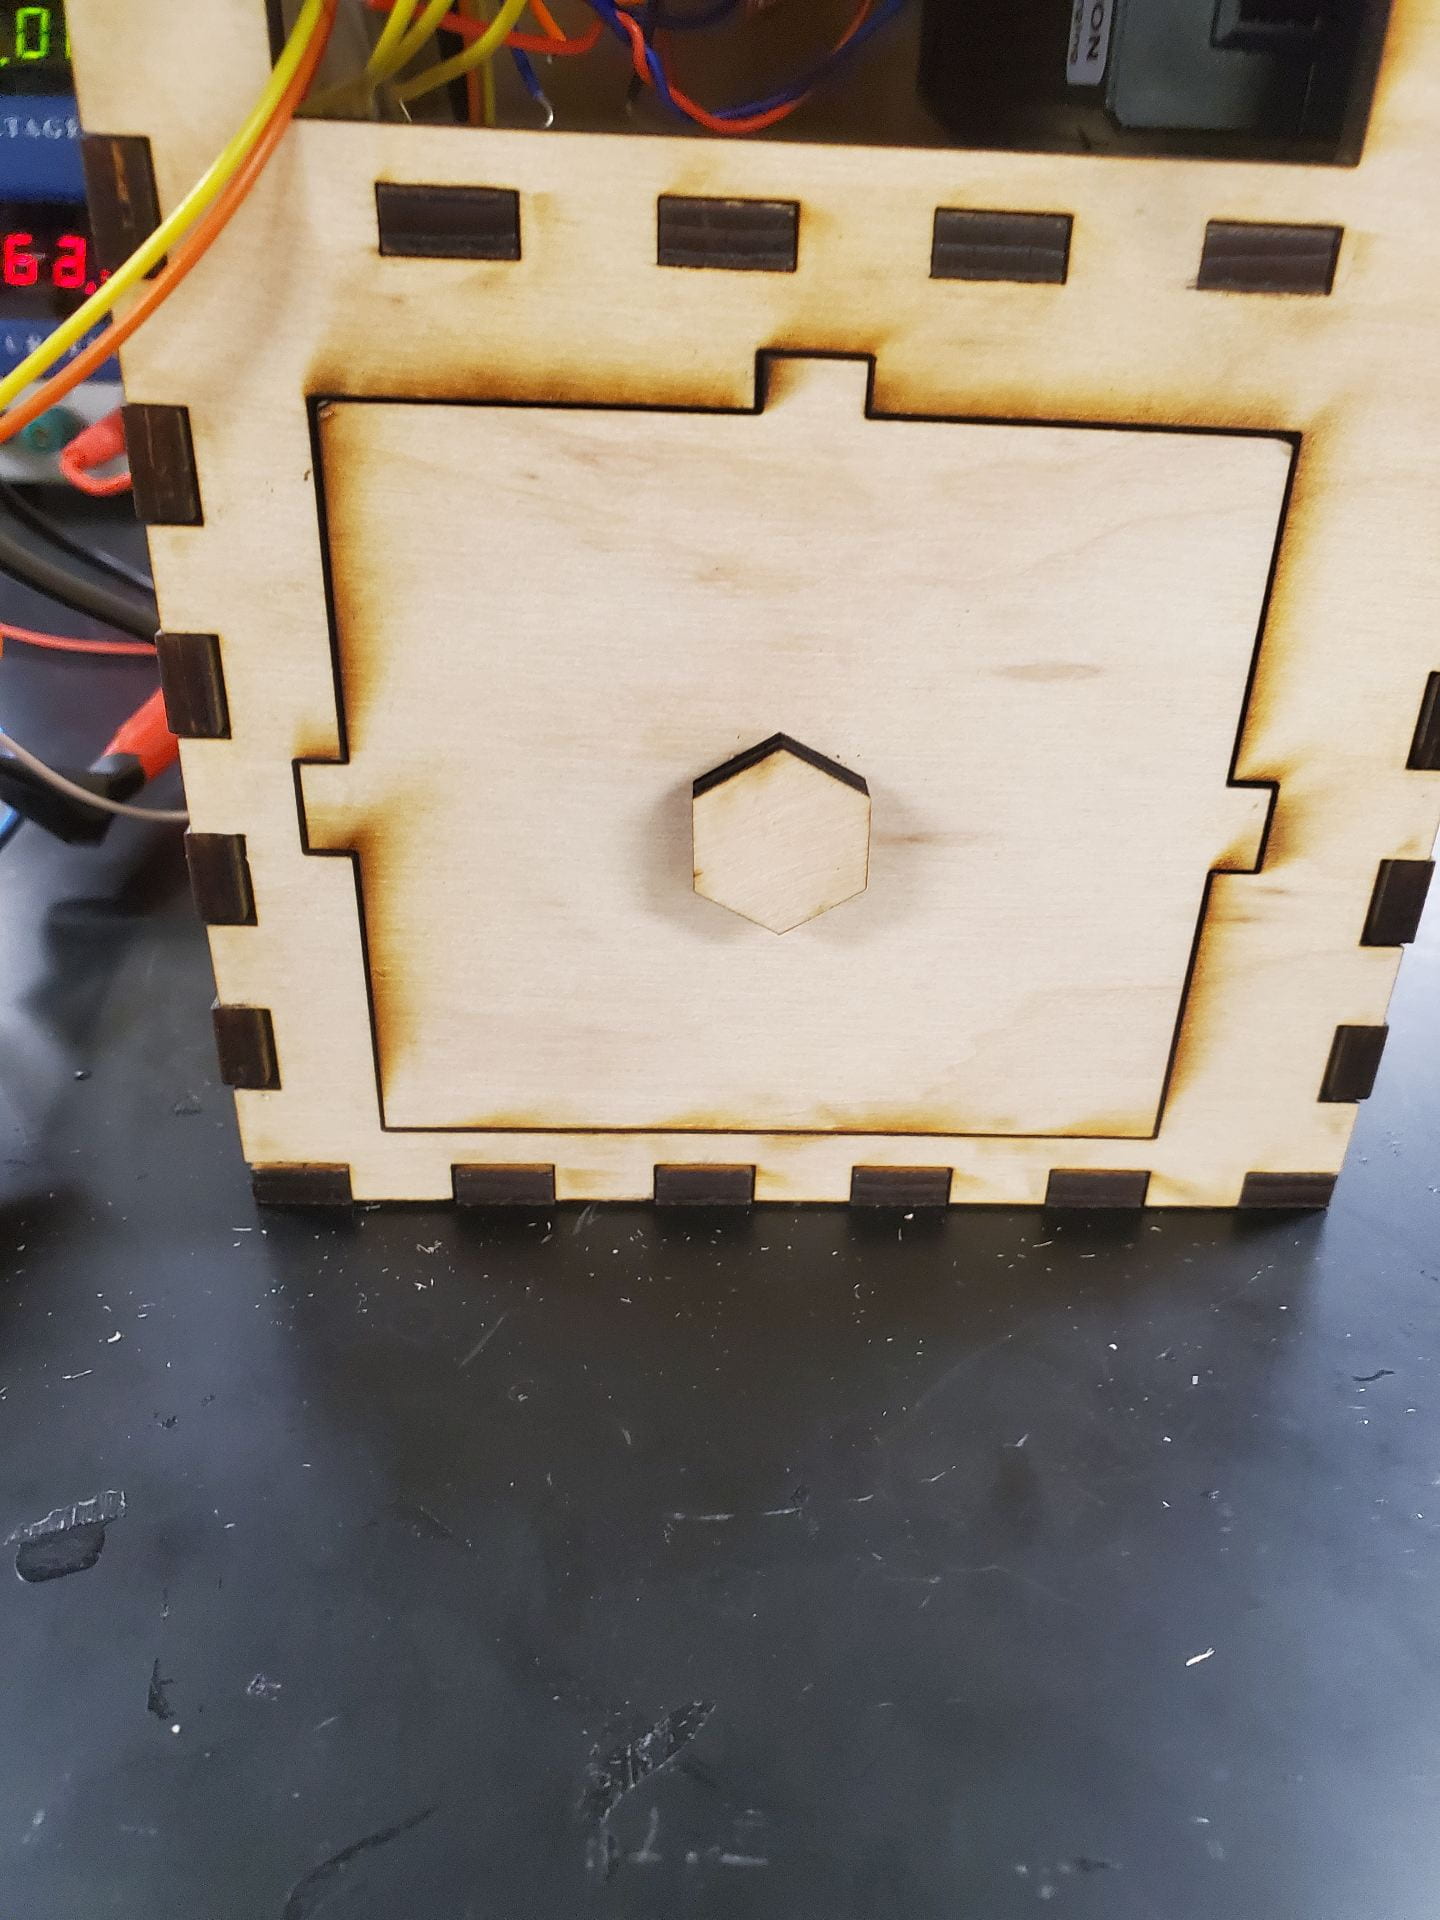
Door design.Inside – the electronics are on top, and the heating happens on the bottom.
Basically, all we did was flip the horizontal version vertically, but our upgraded design has some big implications. For one, we’ve optimized the inside space so the device is more compact and easy to carry – better able to fit into a backpack. Also, we now have doors cut into the front with little handles attached. We deliberated for a long time over the door shape – doors are serious business, folks. If you’re wondering why we spent an hour of our time arguing about puzzle pieces vs. hinges, the shape and method of opening the door impacts the amount of heat loss. We have to balance being easy enough for users to open and close with being as airtight as possible.
Buttons and screen
It’s interesting what tiny little details matter the most in a design – stuff that seems trivial to users can actually make or break a design. Fortunately, after that debate, we decided on the design in the picture above, and everyone agrees it’s a lot easier to open and close compared to the horizontal model.
Finally, we’ve installed the buttons and have a cutout for the screen whenever the wiring is finished. It’s looking more and more like a functional prototype – and we’ve now moved on to testing how functional it really is.
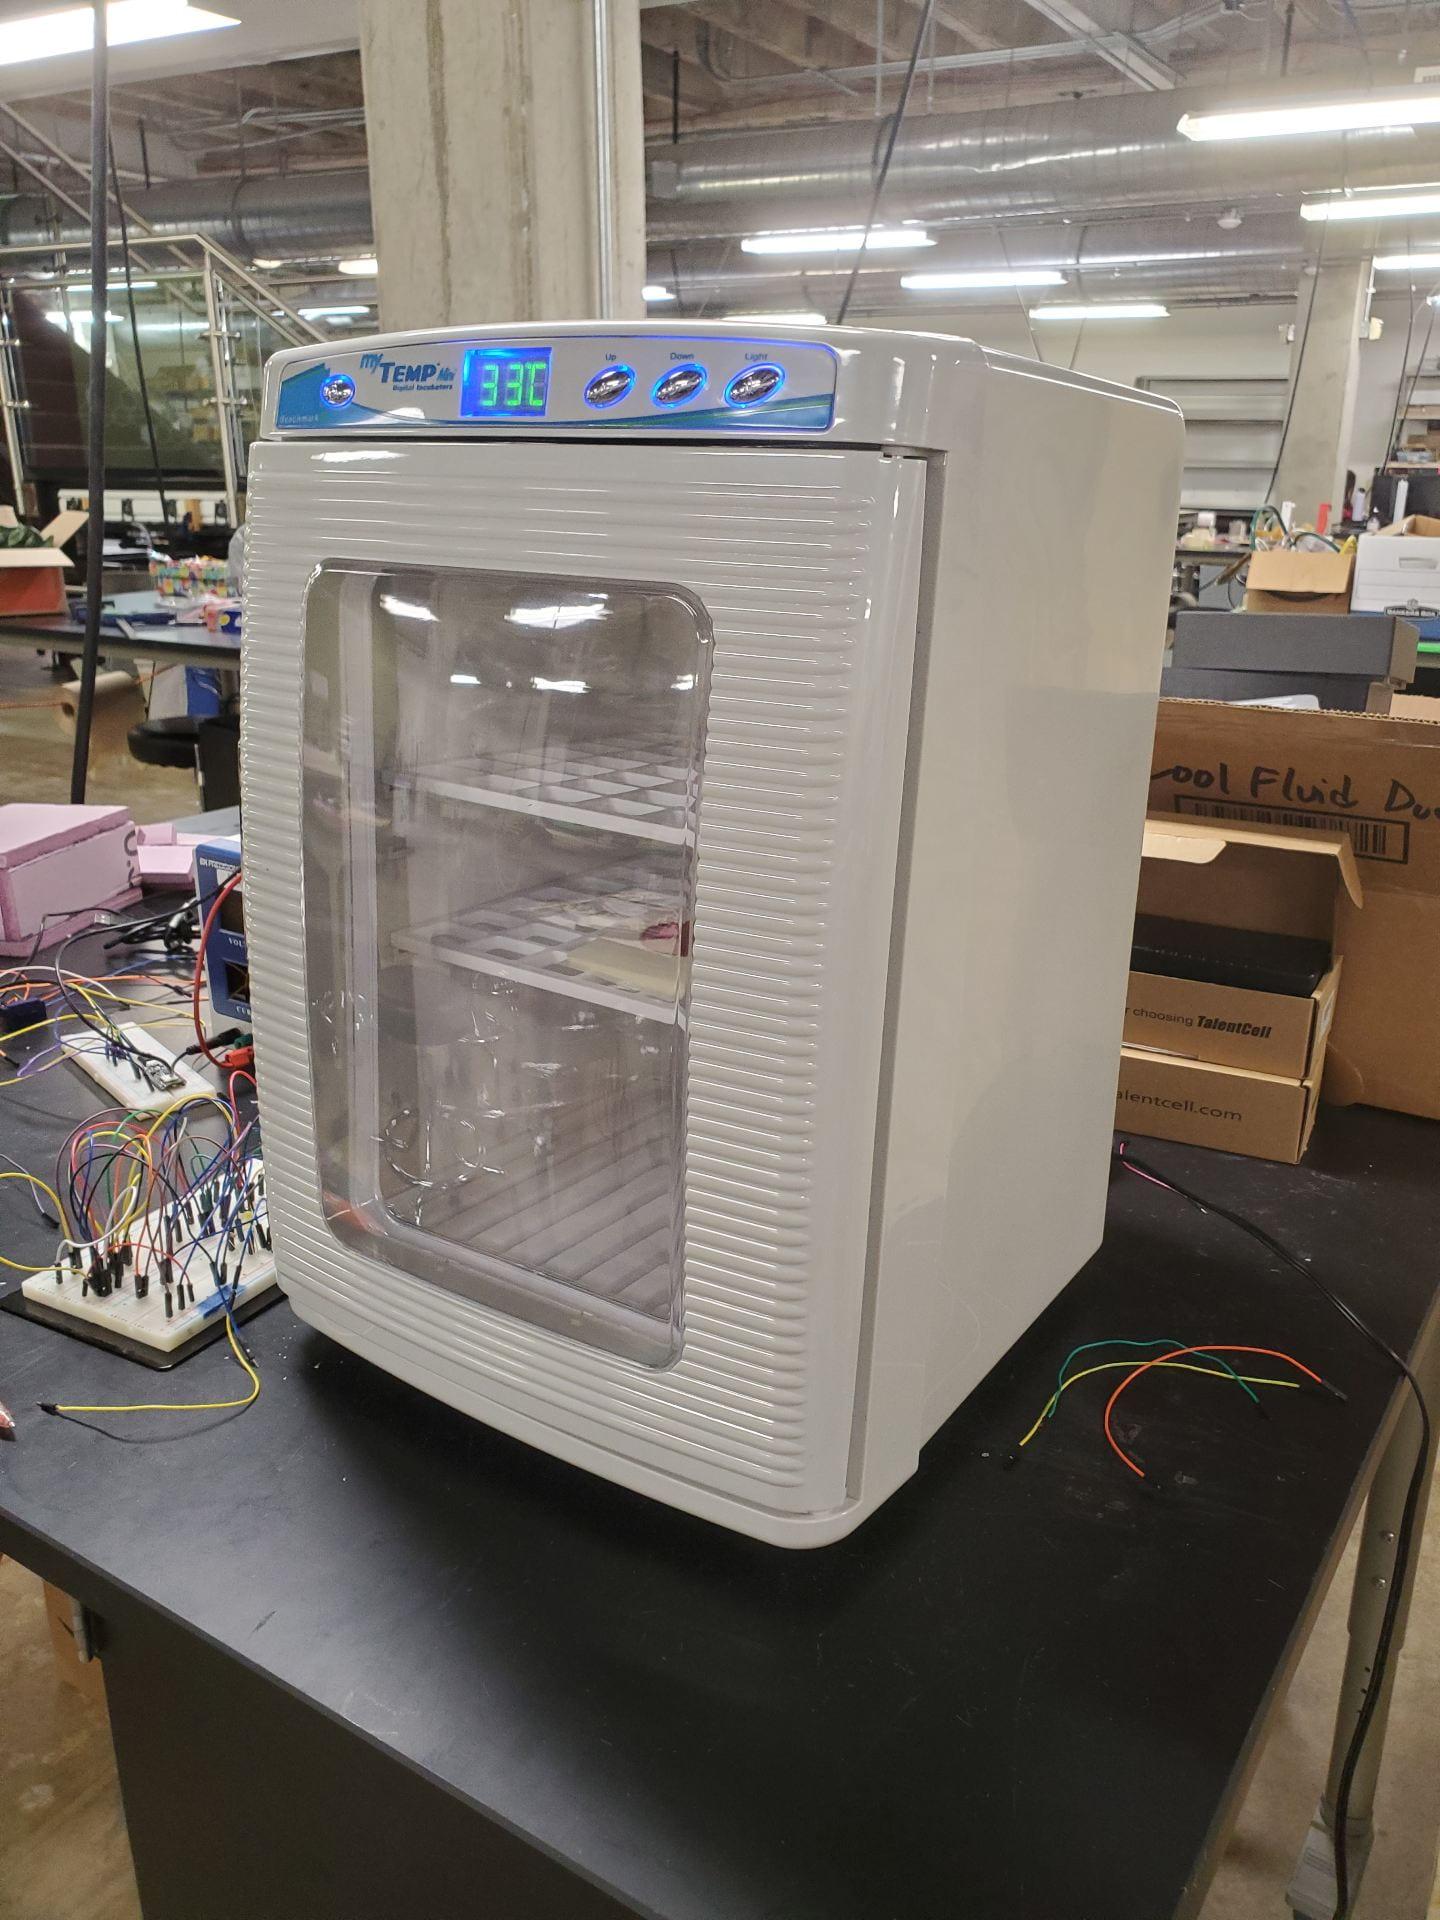
The commercial incubator in use.
We’ve started running parallel tests – one in our vertical model device, and one with a commercial incubator loaned to us by a professor. It took a while to set up for this – for one, we needed dirty water, and the best source we could think of was the Brays Bayou. A team member collected the water for us and took it back so we could put samples on the Petrifilms. Then we put ten in each incubator and started the timer. At the time of writing, our test has been active for 18 hours of the planned 36. There’s already some bacteria showing inside the commercial incubator – that water was filthy! We can’t see what’s going on inside our own device because there aren’t any windows. We’ll have to wait for the incubation period to end to see our results. And you, readers, will have to wait until the next blog post, where I’m sure we’ll have all sorts of data to talk about.
Wow, this past week has definitely been eventful for Team Heartache. On Thursday of Week 3, we had the opportunity to have our prototype evaluated by Dr. Matthew Wettergreen. He pointed out the importance the building our following prototypes in saline since out device will be submersible in the liquid (Points out the spaghetti noodle-marshmallow challenge from ENGI 120). We had our mid-summer presentation on the Friday of the same week and our second client meeting. Our clients did find the tracking system for the lung system promising but wanted a vertical motion of the heart contraction instead of the rocking motion our prototypes had. In this way, our device creates a sine in a sine wave motion for the tissue they will test with
During the beginning of the following week, our team split off with Chris and I exploring the possibility of using an additional spring board and an iron solenoid coil to create the heart contraction motion while Rachel and Kaitlyn worked using the sole tissue table to create the combine sine wave. Rachel was able to design a structure where the tissue table is built with a concentric tube and a notch that will lock on to the inner tube it will run along. Pictures are shown below