#Second Week at OEDK

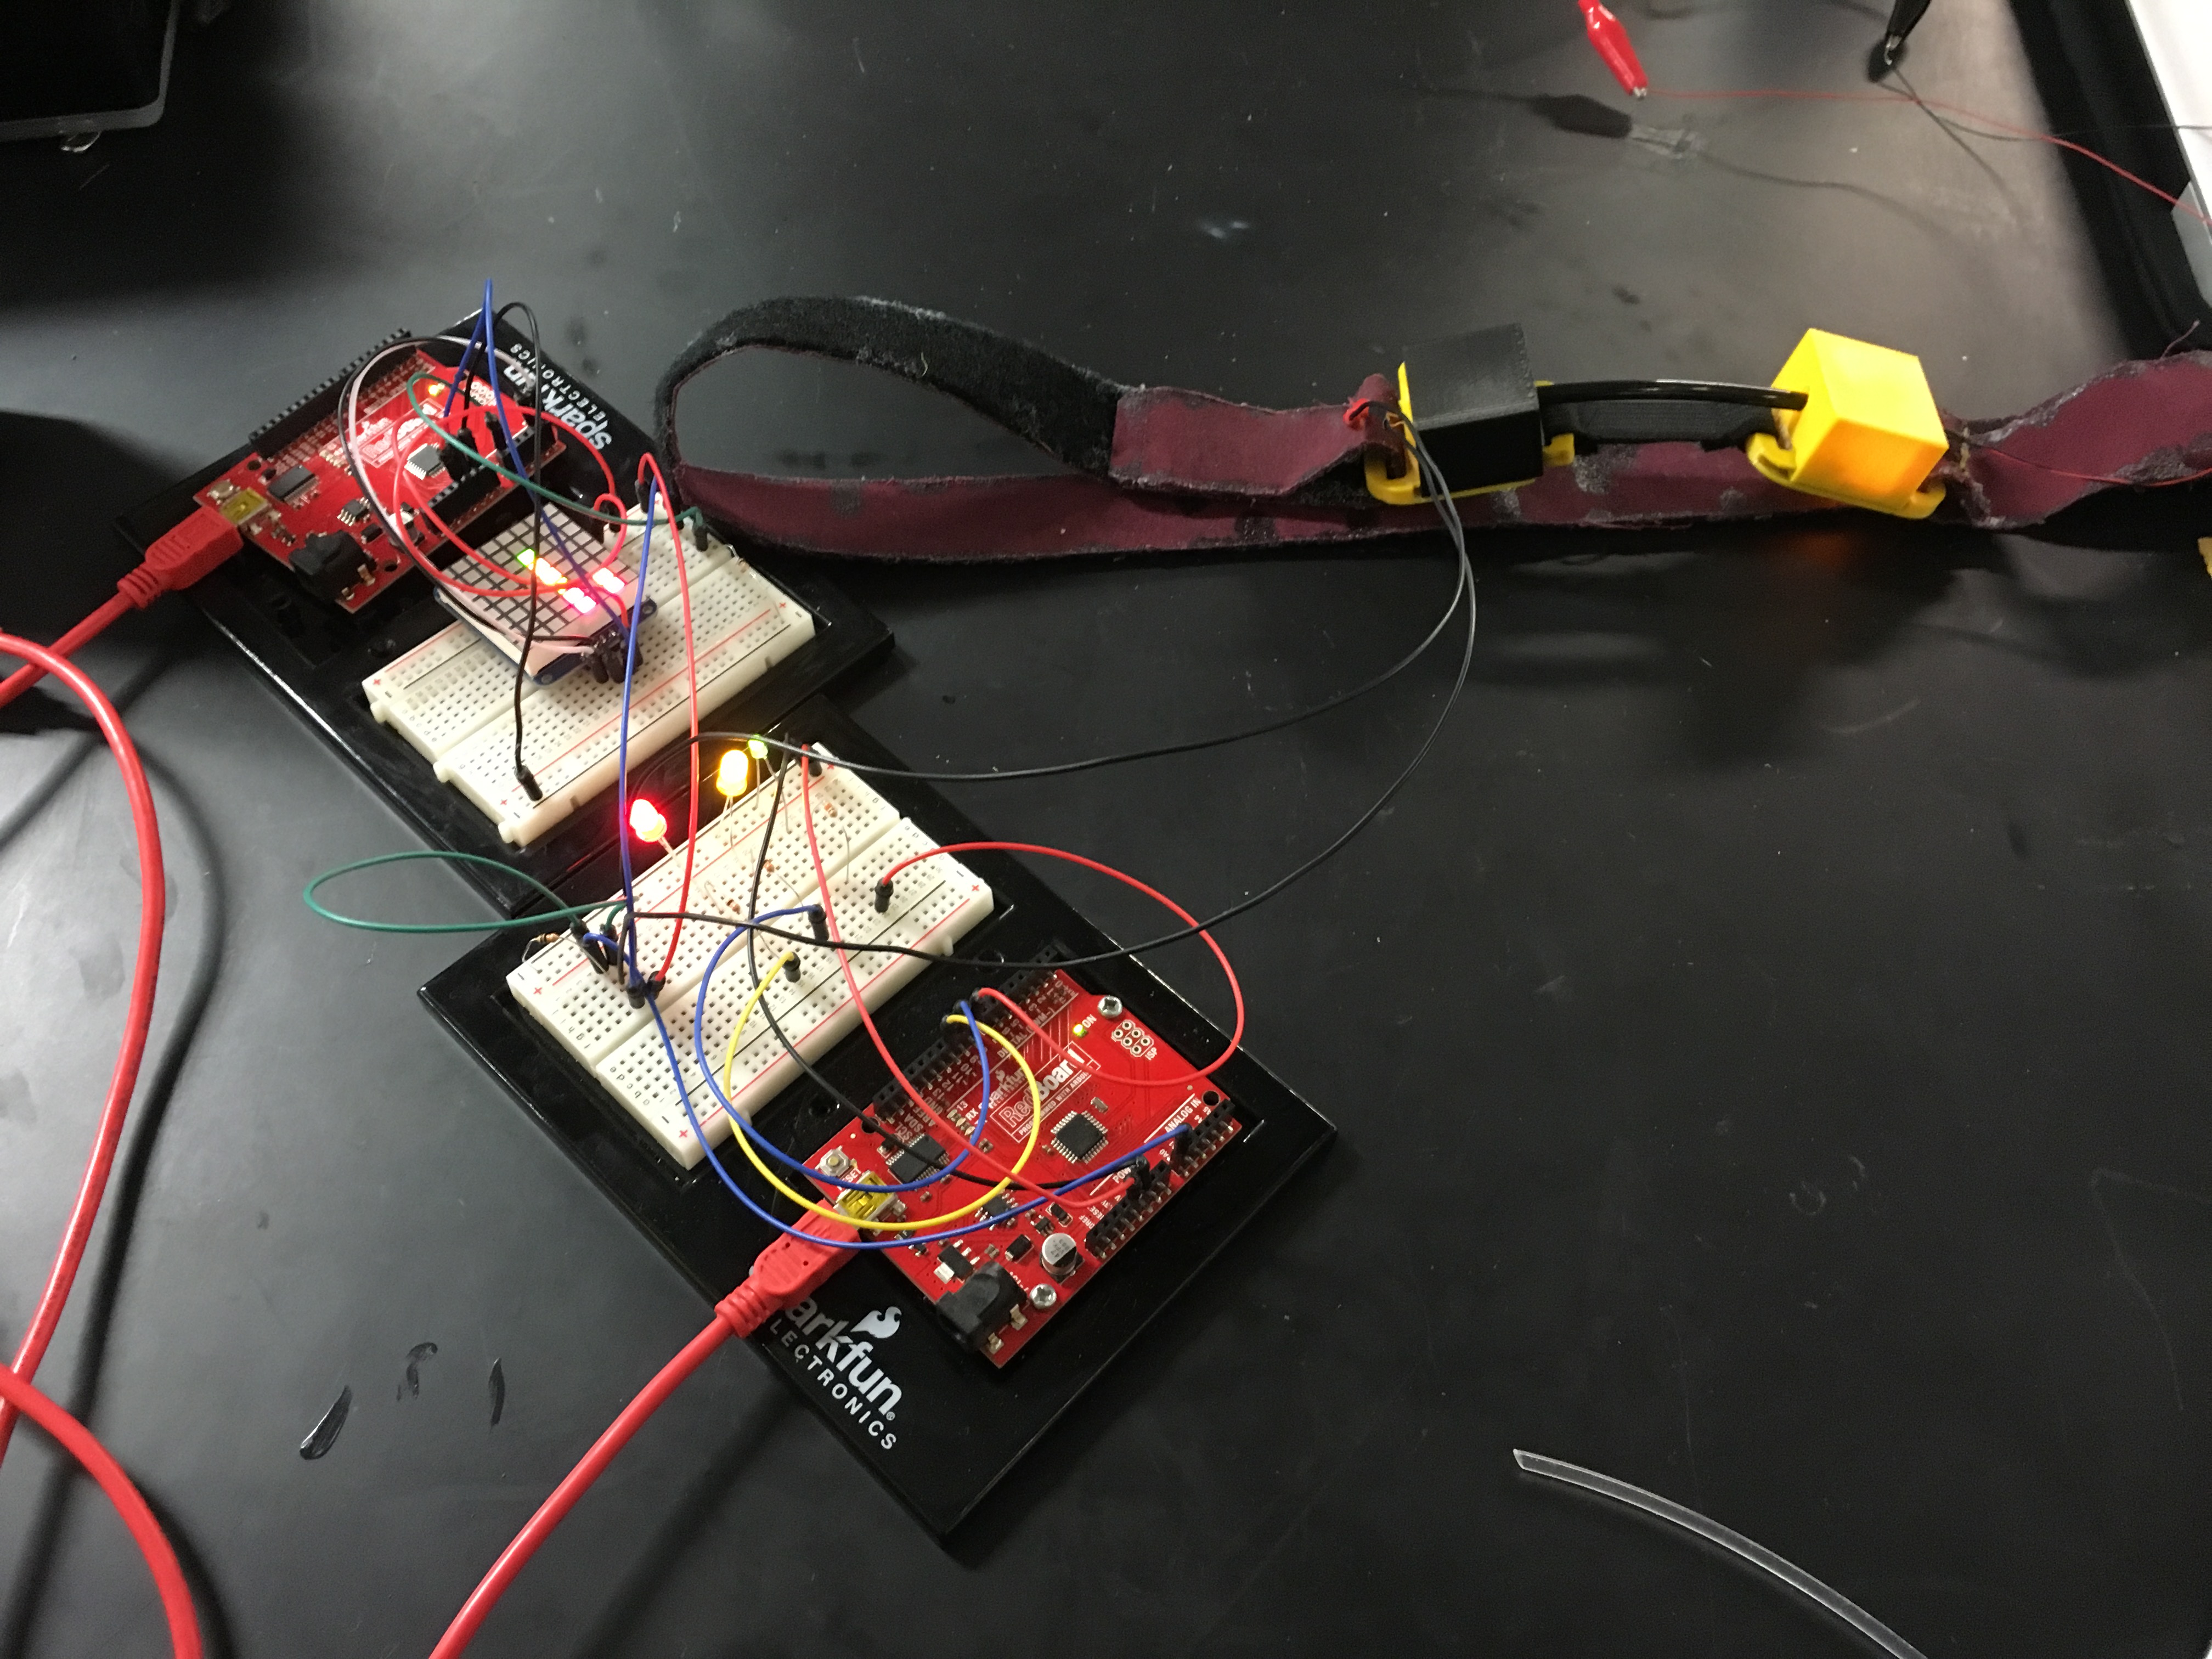
At this last weekend we improved a lot in the Anteater Project, from our book camp. We completed all the steps that were still missing from the week before. After brainstorming, scoring and screening matrixes, we defined our best solution and we started creating low fidelity prototype with cheap and easy access materials at the OEDK. Prototyping and testing was definitely the best part for our group, because we could start building our enrichment device for the anteaters and make our ideas became a solid prototype. We iterated until becoming with the final prototype (image below) and presented to all the other groups.

IMG_1189 (1)

The final prototype is made by a transparent plastic box, with black/grey straps in the top. The bottom part, consists in a laser cut wood maze. In this final prototype, we came up with this features ideas of using a maze and straps, because that way when the anteaters are going to use the device, they will be able to stimulate the use of their clowns and tongue. Which is a good psychological and natural behavior stimulation.

In the end of the week, we finally got our main project teams, that we will work until the end of the SEED program

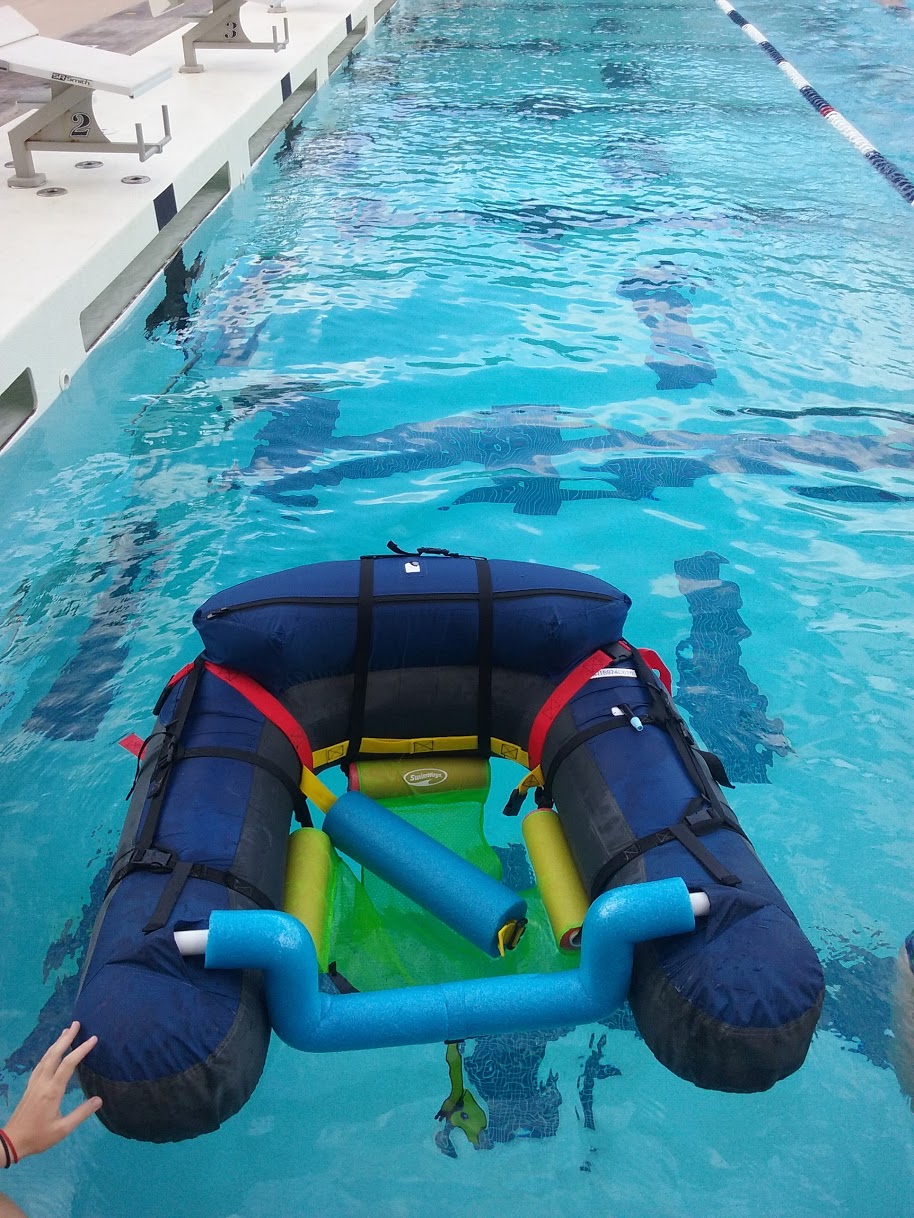
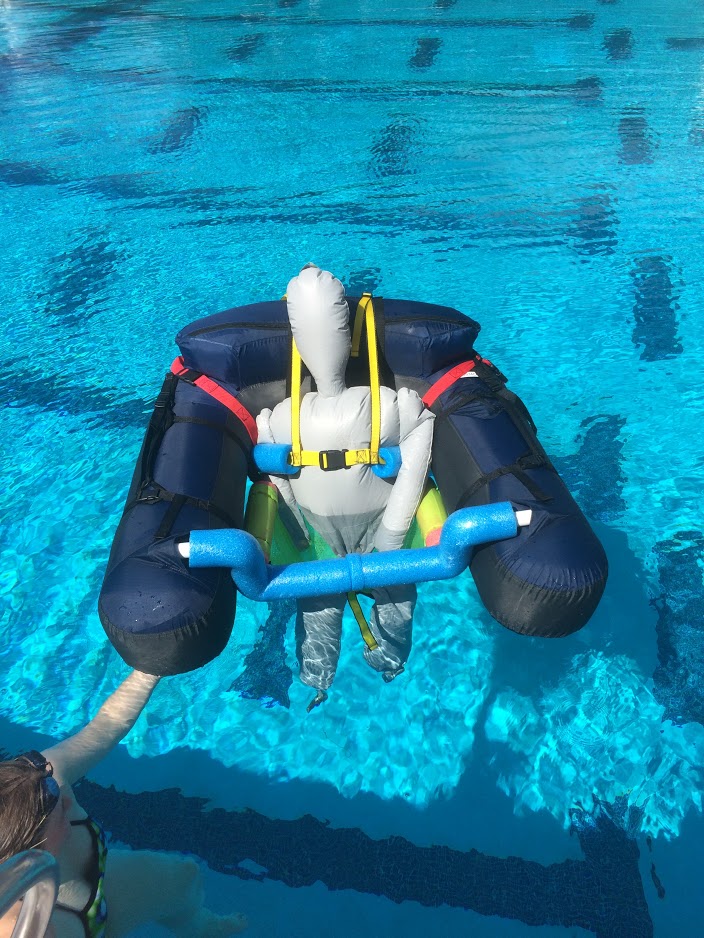
I will be working in a project continuation from the spring semester ENGI 120, that requires to build a floatation device for a 17 years old boy, Liam Smith, that has Cerebral Palsy.

My group consists in 3 persons: me, Gigi Rills and Allie. We spent the rest of the week doing research and reading about our project, which was really helpful to fully understand our project aspects and having a good background of the problem. We came up with possible solutions, existing solutions and solutions that didn’t work. The documentation of the ENGI 120 group was great, especially for me to understand better about Liam. I hope we will do a great job and make a Swimming device for him that works perfectly and will be safe.

#First Week at OEDK

Hello Everybody, I’m Rafael Vieira Lantmann. Born and Raised in Porto Alegre, Rio Grande do Sul, Brazil. I’m a Mechanical Engineering student at PUCRS (Pontificia Universidade Catolica do Rio Grande do Sul) and from 2015 August until 2016 May I was studying Mechanical Engineering at UCF (University of Central Florida – Orlando). Nowadays, I’m a Rice intern at OEDK, Rice University, Houston. The OEDK is amazing! You have everything there to make your ideas become real!

My My First Week at Houston, OEDK, was great. I met all my teammates for the SEED program. We have Guys from Malawi, Chicago, New Jersey, Missouri, Pennsylvania and Brazil working together.

In the first day and second day, we did a couple games/activities to know each other better and challenge everybody skills. We went to the zoo in the first day, was really fun. I’ve never been to a zoo here in the USA. The organization and all the structure really impressed me.

20160607_154951

We did power point presentations explaining about our cultures (history, geography, music, arts, literature, fun facts, traditions and other topics). It`s always great learn all this information about other people country and specially making new friends. In my presentation I dressed like in my state in Brazil, it`s called Rio Grande do Sul and we are known as “Gauchos”.

We have been learning and applying Design Processes Methods. Which is very important for my future as a Mechanical Engineer. We have our “Bootcamp” to follow and to emphasize all the concepts with activities.

We are currently working in a project for the Houston Zoo. Designing a feeding device for the anteaters (Pablo and Olive) that live there. Thursday (06/09/2016) we went to the zoo for an interview with one of the anteaters responsible. We asked around 30 questions about the anteaters. Behavior, feeding, characteristics, habitat and other important topics to start the Design Process.

After having all the information from the interview, we had a conversation to explain all the context and information to all group member. Using a PCC matrix, we evaluated engagement, natural and accessibility as the main topics of our Anteater Project.

The group came up some great ideas in the brainstorming section and helped us to improve the old ideas. The screening/scoring Pugh Matrix helped us to define our best solution. We planned to start prototyping after that, which is the most exciting part for me. Creating new “things” and improving the current ideas.

Probably the final prototype will be Transparent Box with canvas straps and a maze in the bottom. That will simulate the anteaters natural behavior with the clowns, the tong and stimulate the psychological part too. We are still working in the prototype.

Rafael V. Lantmann

#goteamswimsupport

week #6

Week six has been interesting!!!

Our Adafruit 8 x 8 matrix display finally arrived earlier this week. We soldered the LCD.We studied the Adafruit programming and transformed it into an Adafruit Arduino working code. So after having a working code for both the photoresistor + warning circuit  and the display circuit we had to do a few different tests.

IMG_6564

above is the picture of the LED partograph display matrix we worked on.It is so cuute!!

On Monday we Cut different sizes of fiber optic for tests (to see if different lengths of the fiber optic affect the device readings).We could not actually do the tests and recording of the displacement against the light level graphs because of some conditions like light from the outside affected the readings since the box was not enclosed enough.


2016-07-12 14.22.44 IMG_6573

Box_pic

As you can see the pictures above.We worked on our 3d printed different boxes at every point. We had to change and improve them in order to come up with boxes best for testing  and possibly the  final prototype boxes.After having good boxes for testing we tested two different diameters of the fiber optics (1.5mm against 3mm),also tested the two different lengths (4 inch against 6 inch)and plotted graphs of the light levels against displacement and observed the response of each of them.Also tested the belt to see if it won’t affect the accuracy of our device and it did not.Came up with two more graphs of the displacement against light levels in order to have an idea of the optoco’s response with a few iterations.

We also had a meeting with our client Dr Carns and her friend Dr Suneet  .We showed Dr Suneet our device and asked him a few questions concerning contractions. He offered to help  us see a woman in labor with contractions so that we can understand the whole scenario.On Thursday we visited a hospital with the help of our client and Dr Suneet.We observed a woman in labor and felt the contractions by placing our hands on her belly and  realized that the contractions are not visible by just looking at a woman in labor.The contractions do not cause any muscle extension, but the belly becomes hard/stiff upon a contraction and softer during relaxation.Therefore the concept our prototype uses is not feasible for the device after all.

Therefore we spent time documenting our project (Arduino code and circuit schematics), working on our presentations and we came up with a final prototype for our incomplete project for it can be used for another purpose later on or can be altered in some way to work as a tocodynamometer.

IMG_7323 IMG_6568

above are pictures of the final prototypes

Today we had a secret workshop.Mikaela and Helen managed to keep it secret.screen printed our T-shirts .It was exiting!!!


May God be praised for everything we have been through throughout the project.Thanks to all for your support and encouragement.

#GoTeamToco #

#muchlove#

Sixth week: Optoco is fading

Week six: July 15, 2016

Lucas Gutembergue da Costa


This week we kept working on the Optoco, our most recent prototype looks like this:

IMG_6573

Fig 1 – 3D printed box

IMG_7323

Fig 2 – Optoco prototype

IMG_6568

Figure 3 – Optoco prototype with the electronics

We had to iterate many times to finally get a good box to encase our electronics:

2016-07-12 14.22.44

2016-07-12 14.22.58

Figure 4 and 5 – iterations of the 3D printed box used to encase the LED and the photoresistor

We have also prepared different lengths and diameters of fiber optics and compared the response of the different configurations using signal vs displacement graphs. Additionally we finished and tested the code for the LED matrix that displays the results of the device. This LED matrix works similarly to a partograph, indicating the number of contractions per interval of time.


IMG_6564-191xig4-300x225

Fig 6 – LED matrix

On Thursday we went to a hospital to meet our client and a doctor that collaborates with our client. Our goal was to see a woman in labor to get a better understanding of labor contractions and evaluate how much the belly stretches during the contractions. One of the patients agreed to see us, therefore the whole team and our client had the opportunity to observe real uterine contractions. The problem we noticed is that the belly expansion during a contraction is negligible and can’t even be detected by observation. That means the concept of creating a device that sits on top of the belly and detects contractions using the expansion of the belly is not feasible. We learned in our visit that a contraction is detected by the increase in stiffness of the pregnant woman abdomen.

After the visit we discussed our observations with our client, concluding that our device is not a viable uterine contraction monitor. The idea of using fiber optic alongside with an LED and a light sensor can be used to detect contraction but the device needs to include a pressure transducer, such as a spring or an elastic material,  to convert the changes in pressure of the abdomen into displacement. Since we have only one more week left for the SEED internship, Team Toco won’t be able to design this modification of the concept. Therefore we agreed with our client to pass on to her all the information we accumulated during this project, including the signal vs displacement curves of the various configurations of fiber optics, the data processing algorithm we elaborated and our CAD model files.

On Friday we had a screen printing workshop. It was really fun and I was able to screen two very nice T-shirts.

2016-07-15 17.50.14 2016-07-15 17.50.37

Thanks for reading!

See you on the next (and final) post!


Success!!!

This has been a very exciting week!!! On Monday we finished up our models that we wanted to present to Dr. Schmeler. Tuesday we walked over to the BRC in the morning and presented four variations of each of the four stages of cervical cancer that our client had asked from us. We asked Dr. Schmeler and her lab for feedback on the accuracy of the surface texture, color, and color change for each of the cervical models. The entire lab was mind blown when they saw the color change and I felt really proud of our cervices!! They were also able to provide very helpful and positive feedback on each of the models. They really liked how we made different iterations of the same stage and they asked us to continue making four models for each stage. Therefore we will be making sixteen cervices instead of four for our final product. I am super happy because Dr. Schmeler and Dr. Kortum said that our models could definitely be very useful on their trips to Malawi and El Salvador. Dr. Scmeler said she would even like to use them as early as September! After the meeting we immediately began editing our files according to their feedback. We also worked on making all of the cervices hollow in order to fill them with hot water so that the color change will last longer. We even ordered flexible filament to print the cervices with in order to make them more realistic. We have already printed the normal and cystic cervices with regular filament and we plan on printing the precancerous and cancerous ones with the ninjaflex. We still have a lot to do in the last week, but we are on track to have fully functional final prototypes by Tuesday! Lastly, we ended the week by making really cool t-shirts using screen printing which was a lot of fun. 002034ab579048a3b577e7c1cf8f61c0 b8c94f1b37b84f28833fa28634d45bde 6b869852a0634099a6bd068b113a8b4e

The Final Prototype

We started off this week by testing out our prototype from last week to make sure it achieved our design criteria. Our first test was precision, where we assured that our device could get consistent measurements through several tests. We compared the precision of our device to that of the currently used goniometer, and found that our design had a lower standard deviation than the goniometer.  Below is a photo of use measuring our rotation with the goniometer during our tests.

IMG_7052

We also tested the torque required to turn our device because we want it to be easy for the patients to rotate. We found that the torque was far below our target threshold and it passed the test. We also conducted usability testing to using other SEED members to confirm that our device is both easy to use and comfortable to users. The only test we failed was durability. We conducted a drop test from table height onto carpet, and the model broke at a joint on the second drop.

After these tests we made a list of changes we wanted to make to the prototype and moved forward to build a final prototype for the program. Our goal is to finish by next Wednesday in the morning when we meet with our client and get some feedback. FOr this final prototype we are using the Fortus printer upstairs that prints ABS plastic in much higher resolution than the printrbots we have been using up to this point.

In addition to our usual work, we also had the opportunity to go to the zoo this week to give them our prototype anteater enrichment devices. They sent us videos of the anteaters using the toys afterwards, which was great to see after working on the projects. On Friday we also had the opportunity to screen print T-shirts and take a break from working on our main projects. Next week we will finish up our projects and unfortunately it will be the last week of the program.

Pronators and Supinators in The Ring

We kicked off the week with testing our integrated prototype. We setup 5 tests, namely: precision, torque(ease of rotation), setup time, comfort and durability tests. During precision torque, each of our team members wore and used the device 7 times and we worked out standard deviation for pronation and supination. For torque test we attached a spring scale to the pushing rod and record the scale displacement at which the platform moves away from the zero mark. As for ease of setup test, we asked 10 random individuals try and set up the device on us with the help of instruction set we wrote
IMG_2409

Based on the tests results we modified our CAD files files and printed out the new pieces to fix noted problems. We also learnt through drop test that hot glue was not appropriate to glue together our assembly so we screwed together the joints. We started to 3D print pieces for our high fidelity prototype and we assemble the prints as soon as they are done. i sew the nylon straps for latching our wrist and elbow clamps. I learnt the sewing from scratch and am so excited to have added a new skill on my job market.

On Thursday, we presented our bootcamp project for anteater enrichment device at Houston zoo. We got feedback on Friday and we were so excited to learn that they liked our ideas and posted recommendations on future improvements.

SEED Week 6

We started off this week with lots of prototyping and testing our latest boxes. This week, we’ve officially transferred away from laser cut wooden boxes and started using exclusively 3D printed boxes to house our electronics and fiber optics. We’ve been through  a number of iterations of the boxes so far, trying to focus on achieving a few key traits: securely holding the LED, photoresistor, and fiber optic in place, while making them relatively easy to remove and replace for testing. Below are all of the boxes and lids we ended up printing throughout the week, with the most recent iterations on the far left.

2016-07-12 14.22.44

The final box design features two plates that screw together to hold the fiber optic in place, and a small circular hole that the LED or photoresistor sits in, with wires coming out the back of the box. The lids slide on to a rail on the base of the box, and have a small hole that the fiber optic passes through.  On each end of the final box, there are hooks that the elastic and fabric belts attach to. It’s been a good week for learning engineering skills — I’ve gotten to learn a lot more about Solidworks and using the 3D printers! The final design for our boxes and the CAD file are pictured below:

2016-07-12 14.22.58


IMG_6573

The final box with fiber optic and LED in place

Box_pic

The Solidworks render

In addition, we did some more work on the code and display — we now have a fully working partograph LED display which can display contractions in 10 minute intervals, and

We’ve also been doing a good amount of testing how the light signal is affected by characteristics of the fiber optic cable. We spent much of the week testing different lengths and diameters of fiber optic to see which would be best for the final design. In addition to testing the Optoco, I’ve helped other teams test their final prototypes throughout the week. Tuesday morning I went to the pool with Swim Support to try out their device and give some feedback. I also got the chance to briefly test with Forearm Rotation team and take a survey for the Neonatal Temperature Monitor.

On Thursday, we went with Dr. Carns and Dr. Chauhan, an OBGYN, to observe a woman in labor and try and see how much the stomach stretches/expands when a contraction occurs. Ultimately, we discovered that there’s almost no measurable movement with contractions — mechanically, the current design of the Optoco just isn’t feasible. We discussed with Dr. Carns  some possible alternative designs, and it looks like our code and display is still solid, so we’ll be working for the last week to brainstorm ways to redo the design before we hand it off to Dr. Carns at the end of the internship next week.

Finalized Prototype

This week we finally finished our prototype and got to testing! Going into this week we were on prototype number 8 (below) which was a refined harness. Basically we perfected how we wanted the straps on the actual float. We also added a large pool noodle along the front strap which helped prevent the user from tilting forward. The test we invented to test whether or not the tracheal tube would get wet (or even get within 4 inches of the water) we would tape a piece of paper onto the tester’s throat and if the paper got wet, the test would fail. We ignored effects of splashing considering that is something we cannot control and there will be splashing no matter how we design the device. While we were designing we tried to minimize splashing as much as possible.

2

While the device did pass our safety test, it did not excel at the safety test. Since failure of safety could potentially result in death for the targeted user, we decided to take the extra time to improve safety and created our 9th and final prototype (below). Basically what we improved in this prototype is that we added vertical straps for more support under the arms.

1

Additionally what we worked on this week was an instructional video and set of written instructions for the family to be able to recreate what we’ve done and make fixes should the need arise. Since the original target for the lifespan of this device is 60 years (which is impractical for us to do) we figured we would instead create a list of materials and instructions on how to create the device from scratch.

Today we worked on creating the video of how to get the straps onto the device. We had an issue that I was the only on in the entire group who could assemble the device, so I created a video and had the group assemble the device. On Monday we will finish labeling all the straps.

Moving forward, next week we will finish our user testing at the pool Monday and also finish labeling all our straps. We test with the user on Tuesday and give final presentations on Wednesday.

A Final Prototype…Finally!

This week we settled on our final prototype, shown below:

IMG_0820

Our goal is to provide a device that allows a user with a lack of muscle control and a tracheal tube to float independently, yet safely in the water. Our design features a U-shaped float tube (originally meant to be used for fly fishing in deep water, oddly enough) to provide enough flotation to support at least 245 lbs, a safety factor of 2. There is a mesh seat to provide comfortable support from beneath, which clips into a pool-noodle covered PVC pipe in the front in order to prevent the user from sliding forward and out. A chest and over the shoulder safety belt prevents the sternum and neck area from falling forward into the water. The whole thing is connected through a series of belts and straps wrapped around the float tube to anchor the seat and belt.

So, with our final prototype in hand, we began testing our design constraints (size, safety, and support) and design objectives (ease of use, comfort, durability, and cost). To test safety, we had a fellow intern place a 4 inch paper towel in the tracheal tube area and had them lean forward as far as they could in the device (and then repeated the test 20 billion times). If the paper towel remained dry, we knew that the water level remained a safe 4 inches away from the tracheal tube. We also measured the angle between the sternum and plane of the water and test the durability of our two weakest components, the buckles and the mesh.

To fully test ease of use, we are planning on teaching and then timing interns who are not members of the design team how to clip Mortimer (our testing dummy) into the device. To do this we needed to create an instructional manual and video and a PVC “lift” to simulate the lift that will be used to lower the user into the water from his wheelchair.

We’re looking forward to further testing next week, with our fellow interns and the intended user!