Wiring and Shipping Units

After working a bit with the clip concept, I decided to play with the idea of using a wire piece instead. I really believe that solutions are often simpler than we think, and the simpler solutions are often the better ones. Therefore, my goal was to design a part that required as little custom production and assembly as possible. This led me to begin with the basic paper clip. To my surprise, these clips are much stronger than you’d think! I quickly discovered that two clips were more than enough to hold the tubing in place, eliminating any lateral/vertical movement. Surprisingly, I’m actually more excited about this concept than the custom part I’d made earlier. Here’s a little peak, but I’m still working on making the part easier to use and more intuitive. More updates on this later.

In other exciting news, the remaining 18 units are packaged, finalized, and ready to ship to Lilongwe by early next week! It’s an amazing feeling on this end to have production complete. On the other hand, it’s also so rewarding to see all our hard work being put to use. Pelham and Dr. Kortum sent over some photos of the units that arrived in Malawi, and I’m so excited to hear back about how they’re working out. I feel so lucky to get such a comprehensive view of the development for such an incredibly successful device.

Prototyping

As I’d mentioned before, I spent some time last week drafting up some sketch concepts for a new Pumani headset attachment. I decided to pursue two different options: a simple clip part (that does not require any additional parts ie. spring, snap etc) and a ultra simple option with wire. I really wasn’t sure how the wire would perform, but if it worked out, it would certainly be the cheapest and easiest method. I designed my clip part in SolidWorks and proceeded to use our MakerBot desktop rapid prototype machine to 3D print the piece. I’d worked with rapid prototyping before, but the machines I’ve used in the past have been much larger and extruded two different materials.

For those who are not familiar with the 3D printing process, this is an oversimplified breakdown: the rapid prototyping machine takes your modeled file (usually an .STL), and “slices” the part. It then uses your material of choice and extrudes this material through a heated, moving head in order to model your piece, slice by slice. It’s basically building some kind of layer cake. This is why prototyped pieces often have a texture on them due to how the material was deposited. (Though I’ve heard there are now coatings to get rid of these!) For our purposes, sanding does the trick to smooth out the surface. You might wonder how you could print a theoretical layer that does not have material already under it to support it (think an umbrella). This is where the two different materials I had mentioned above comes in. The machine will build supports for the structure in a different material. After the piece is completed, the supporting material is eliminated using a unique solvent. The MakerBot desktop printer that we are using only extrudes one material. Therefore, I get to whittle away the supports carefully by hand!

I ended up being quite pleased with the piece that came out. The prototype actually functions quite well, and I’ll continue to work toward improving the model.

Drafting Ideas

This week, Robert introduced a project to me that I had actually been exposed to briefly in the GLHT201 course I took last fall: designing a new attachment mechanism for the headset assemblies for Pumani. Currently, the method is extremely simple and cost effective. The tubing is attached to a stockinette hat worn on the baby’s head using two safety pins and a rubber band on each side. Despite the simplicity of the supplies that are being used, utilizing this attachment can be complicated. The process is a little time consuming, and sharp safety pins could pose a slight concern. The method works well at the moment, but we are looking to find a method that is simpler and safer without compromising cost-effectiveness and useability. Therefore, I decided to do some research and looked at what other methods are currently being used for CPAP devices or any sort of headset-like system. Many of the attachments are quite similar to each other: clips, elastics, hook-and-loop, and even the same safety pin system that we are using now. I can’t tell you how exciting this was for me. I was finally able to apply the design process that I so enjoy to my work at 3SD! Starting from research, I then went on to find inspiration from general securing methods such as paper clips or clothing attachments to start ideation. I went through many, many sketch concepts and quickly evaluated them based on the criteria I mentioned above to find around 10 that I felt were worth moving forward with. I haven’t sketched in quite a while, so this was a really enjoyable refreshing exercise for me.

It was really interesting for me to be able to integrate the skills that I’d gathered from my year as an Industrial Design student into a engineering industry setting. Robert and I went through the ideas I’d come up with and narrowed the options down further for continued development. I expect next week I’ll be making sketch models and prototyping these concepts. I will also be choosing a few of them to model in SolidWorks. By Wednesday, I’ll be able to give a quick presentation on my idea: showing what it will look like (to scale and in detail) with my SolidWorks model, and showing the mechanism for how it works with my prototypes. I also came up with a “Bug List” for all the aspects of Pumani that I could see improvement in. For some of these, I could see myself being able to readily address them with some testing in the workshop upstairs. For the more complicated changes, I’ll be brainstorming and coming up with concepts the following week. Again, the creative design process is what I really love to do, and I’m so glad to begin working on potential improvements for the Pumani.

Outside of work, I visited the city of San Francisco this weekend! I walked to the bus station and took the public transport there. After some wandering, I of course found myself at the farmer’s market. My favorite part: free samples! The produce in California is incredibly fresh. I tried a strawberry and felt like I’ve never tasted real fruit before I arrived here…

Preparing the Final Shipment

After sending out 32 completed and tested Pumani units to Lilongwe last Friday, we focused this week on finalizing and preparing the shipment of the remaining 18 units. During some last minute testing, we’d encountered an odd scenario where the testing fixture appeared to be lagging slightly. I spent a good amount of time combing through the LabView code and retesting a few of the remaining units at 3SD to find out what the problem may be. It may seem a little silly, but it seems the issue was simply the DAQ requiring an update. After communicating with Pride, the issue never appeared again after restarting their system. I do recognize that despite how simple the solution was, the problem could cause slight inaccuracies that should really be eliminated for testing. The remainder of the day was spent preparing an additional 10 sets of headset assemblies and 10 user manuals for Pride. Jocelyn had pointed out a change that she realized needed to be made to one of the pages in the manual. Since they’re already printed and bound, however, the edit is not easily made. I decided to send along some revision labels in addition to the manuals to make this revision simpler. The package was sent and received by Pride, and we expect that the next 18 units will be sent out to Lilongwe this following week.

I’m really excited to hear any feedback from Malawi once the units arrive! Hopefully my fellow classmates and colleagues from BTB will be using the units and letting us know how they perform.

DoseRight

This past week, Brittany and I have been in charge of putting together 100 sample kits for DoseRight! DoseRight is a syringe clip that acts as a guiding tool to help ensure that proper amounts of liquid medication are being provided each time. Misdosing of liquid medication is actually an alarmingly common occurrence. This becomes quite a problem, especially when administering anti-retroviral medications for children with HIV. Overmedicating or misdosing can lead to potentially fatal drug resistance. The DoseRight clip is an especially simple and intuitive solution for this problem, especially for medical practitioners that may have trouble with literacy or visual acuity and dexterity. You can read more at http://rice360.rice.edu/tech.

Considering the size and simplicity of this particular technology, putting together a kit takes a surprising amount of assembly! There are quite a few parts, many of which must be custom made or printed to order. I communicated with our local copy and print shop to get the instructions printed on appropriate cardstock, which then needed to be cut and folded to size. A similar process was used for the labels. The clips themselves had to be individually assembled to have an array of different size pieces (for different dosage amounts). Two clips, two syringes, an instruction card, and 3 labels are put on each box. Though there were quite a few steps, they were relatively simple (especially after working with the internal components in the Pumani!), and Brittany and I finished the 100 sample kits along with a few extra.

Working with the DoseRight was a really nice change of pace for me. Putting these boxes together was almost a little therapeutic. Throughout the process though, I was constantly communicating with Pride and the shipping company since it was the day for the Pumani units to be boxed and sent to Malawi! Facilitating the communication between the correct people took a bit of effort, but I’m so glad that they are finally complete and on their way.

Taking Pride in Your Work

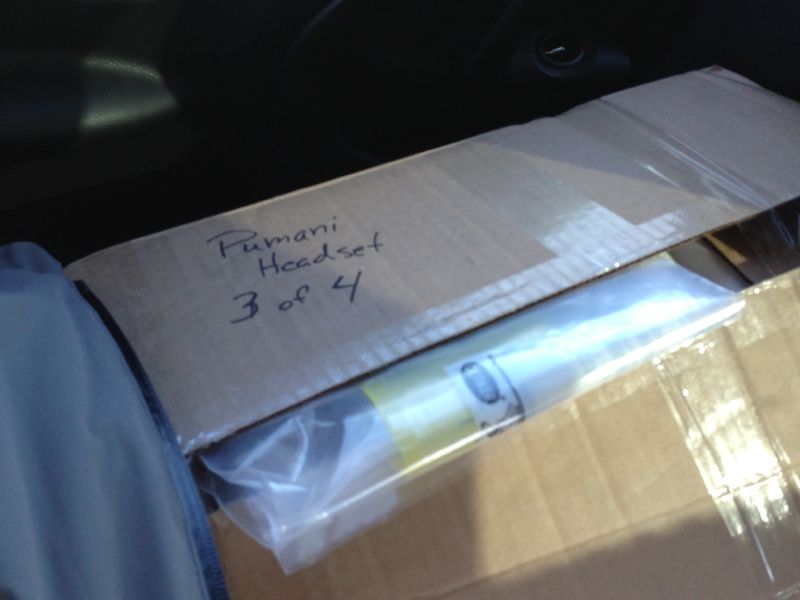
This week is when we are expecting to ship out the next round of units to Malawi! Since there have been quite a few revisions since the last model, I retrofitted some units from 3SD and sent those over to Kelley at Rice. In return, she will send back the units that she has on hand so that I can update them.

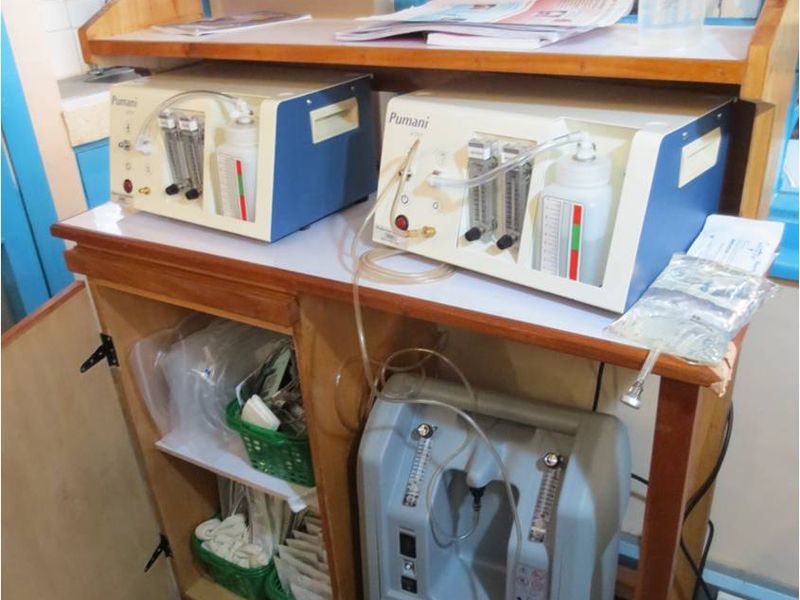
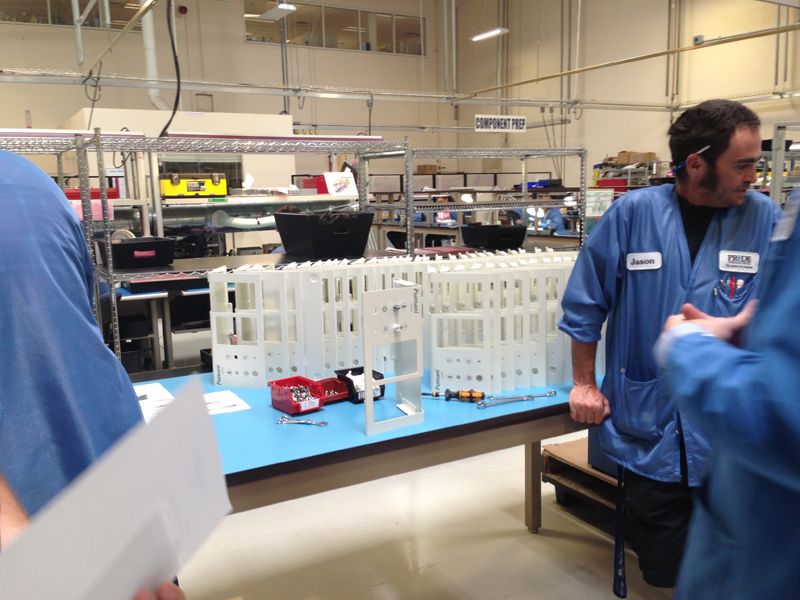
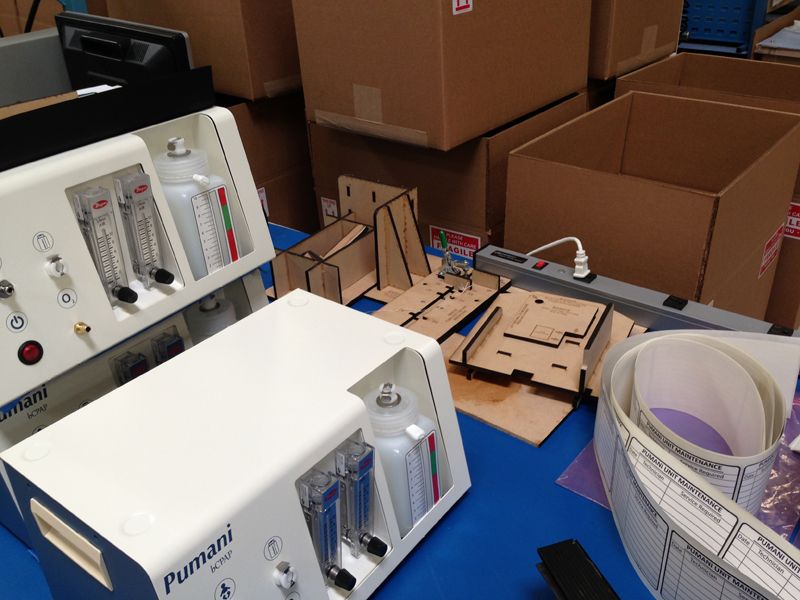
There’s been quite a bit going on this week due to the big deadline, and this past Thursday, I made a drive up to Sacremento to visit Pride Industries, the manufacturing company that is producing the Pumani units. The primary purpose of my visit is to make sure the revisions to the units are being made correctly and ensuring that the units are being thoroughly tested to be ready for clinical use. Since I’ve been working so closely with the Pumani units and am most familiar with all the revisions, Robert felt I could make the trip alone. As it turns out, there were a few minor issues to be resolved, so I’m extremely glad I was able to be there in person to work through them. Along with Mark, James, and Dennis, who are the primary technicians behind the manufacturing and testing processes for Pumani, I was caught up to speed on where they were in the process thus far. Unfortunately, there were some delays due to nonconformist issues with the suppliers that Pride was working with. For example, many of the packaging boxes came with weakened corrugation in a few areas and had to be remade. After communicating with the Pride team, I realized that much of their production is dependent on paperwork being processed and approved. (I’m discovering more and more how prevalent this is). However, upon my arrival, Pride was already well into production.

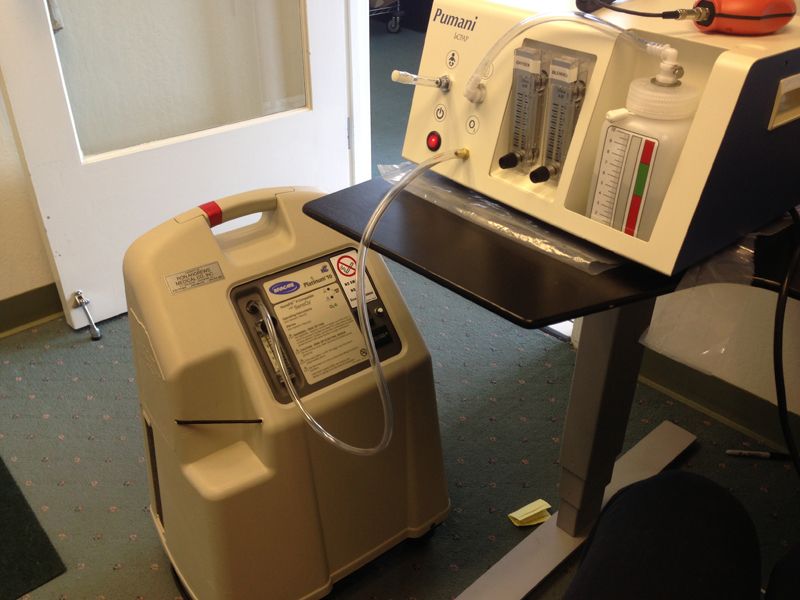
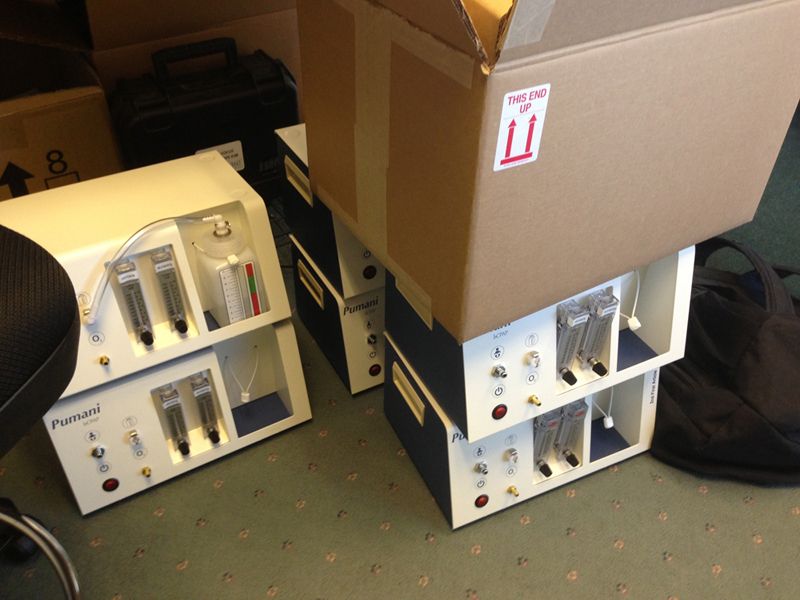
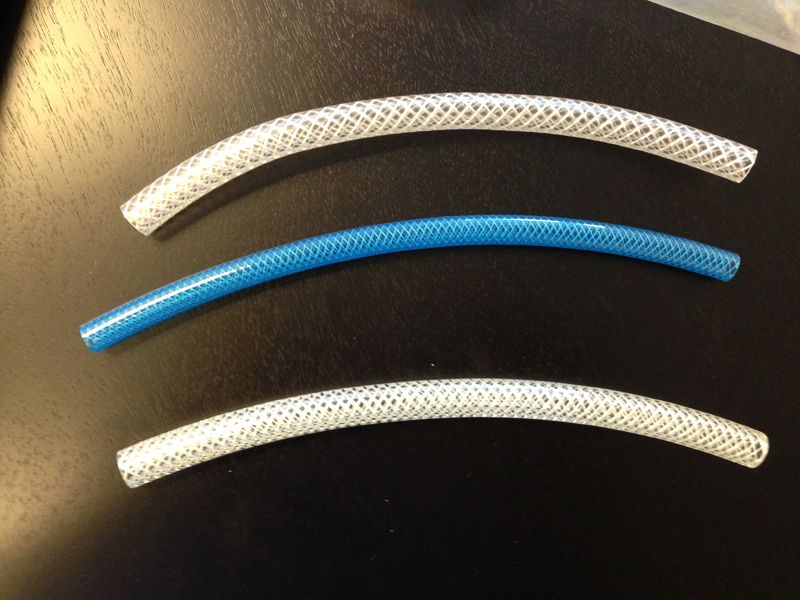
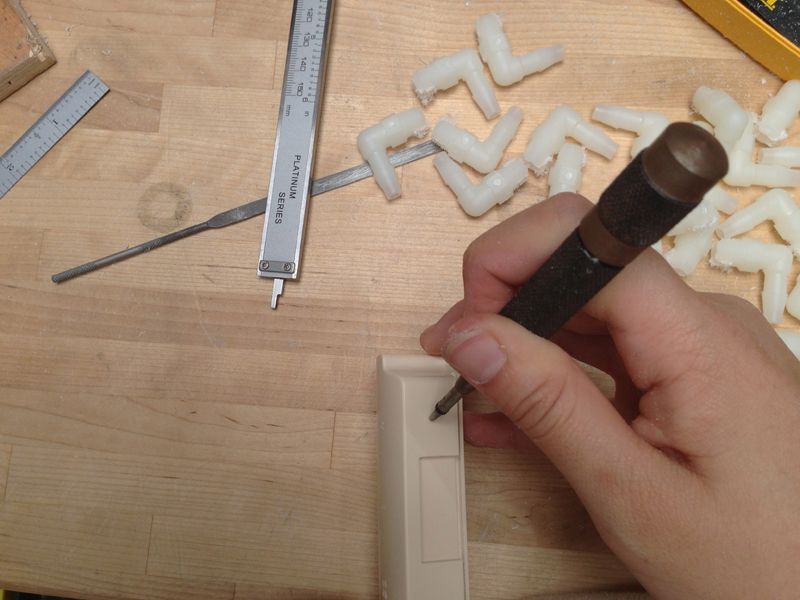
I went through the units that were being completed and inspected them for correct assembly and appropriate resolution of minor problems from the previous revision. I knew this was necessary since the tubing inside the units is actually very sensitive to orientation and placement. If they are not inserted or positioned the correct way, there is an increased chance for kinking. I found no problems at all in their assemblies. Pride also successfully resolved a minor glue issue that we found in the last units. In this round, we also made the spare parts kit inside the Pumani more secure by fastening them with hook-and-loop instead of double-sided tape.

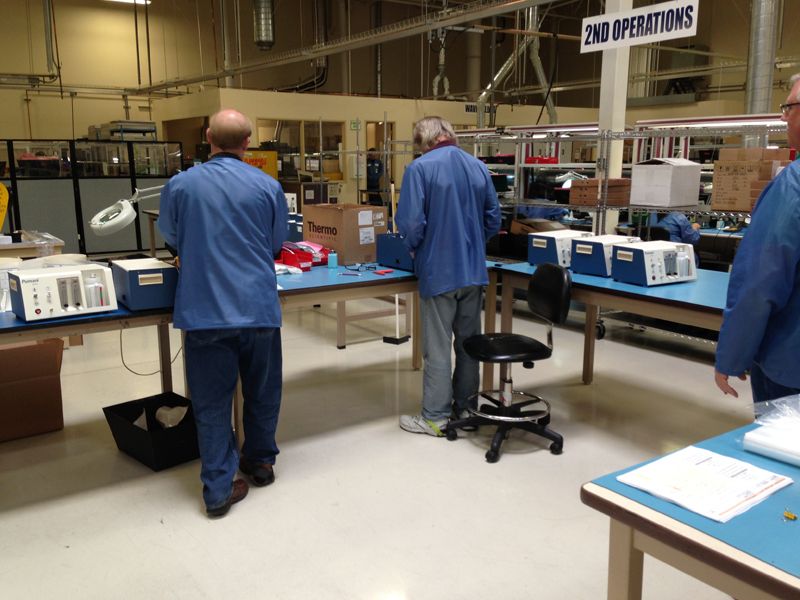
After witnessing the production line, I discovered how detail-oriented and meticulous their process is. I briefly touched on the vision of the company in a previous post: to provide jobs to those with disabilities. In this regard, they’re extremely successful. As a result, their process must be very well documented and well thought out to ensure consistent, quality builds. For this purpose, they have made many clever building fixtures. For example, some laser cut pieces are used to help in cutting tubes exactly the correct length or act as guides for placing labels.

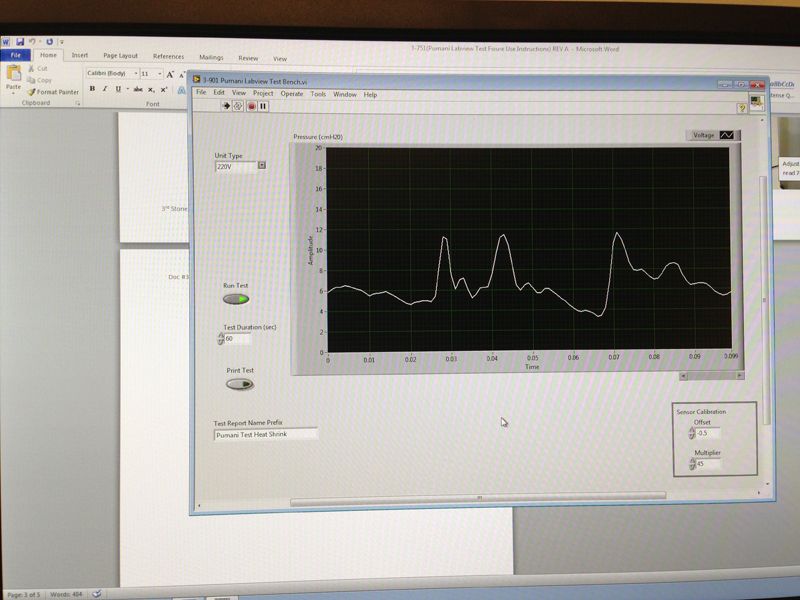
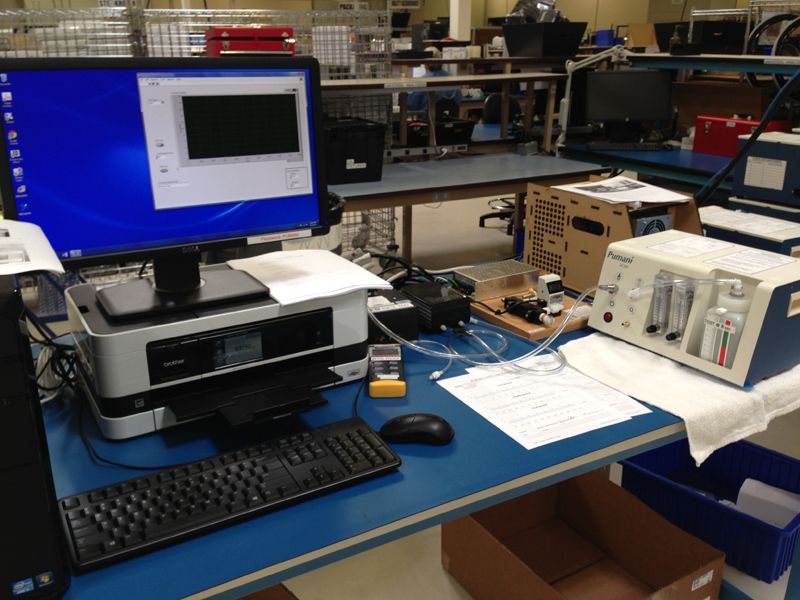
After quality checking the units for correctness in assembly, I observed as James (the testing engineer) ran the analog and digital pressure tests for every unit. The results are all printed, documented, signed, and filed away. The tests that are being run are the same as the ones I had been conducting at 3SD, so it was very helpful for me to be able to look at the quantitative results and graphs to ensure conformance.

The testing went well, and I thanked Pride for allowing me to watch their process and keep an eye out for potential problems. I then made the drive back home, which somehow seemed much longer than the drive there. It’s a little surprising how much energy driving long distances can take out of you!

Oxygen

Many apologies for the rather sporadic blogging! I’ve finally caught up to speed today to share what I worked on. After running many pressure tests last week, today’s task was to test all the units again for oxygen levels. We are primarily looking to confirm a few things: the oxygen mixing performs as expected, there are no oxygen leaks, and the exhaust system we developed recently works appropriately. This is done using an oxygen concentrator and an oxygen meter.

I started by testing the effectiveness of our exhaust system. I tested the O2 concentration performed at a predetermined “worst case scenario”. Using these parameters, I tested the levels of oxygen immediately outside the exhaust, in the proximity, and inside the unit (while keeping the office appropriately ventilated) during operation. The concentrator is surprisingly noisy, but it is important to keep doors open for continuous airflow in order to get accurate readings. I felt a little guilty for my coworkers working nearby. After the testing, I was extremely pleased with the results. There was absolutely no buildup of oxygen within or surrounding the unit, indicating that the modification is working well!

The next round of testing is considerably more tedious. Using the guidelines for oxygen and total air flow rates, I proceeded to test every combination to make sure that we would get the desired concentration of oxygen being outputted to the patient. The amount of oxygen being produced by the concentrator changes along with the flow rate from the Pumani unit. According to our most recent oxygen mixing table, the units all perform to standard! As usual, our results are documented and then summarized in a more succinct format for future reference. The oxygen testing was honestly quite the process. Robert and I joked that after running these tests with concentrated O2 for so many hours, I would begin to feel rather energetic…

Testing, Testing, and More Testing!

After finalizing our assembly for this batch of Pumani units, I have been in charge of testing the pressure and oxygen qualifications for the units 3SD has on hand. The initial pressure qualifications are run through a Labview test fixture created by 3SD. Thus far, my exposure to Labview has been limited to my experiences last summer doing research and my recent electrical engineering course. I’m glad to be able to look through the coding and understand the logic and theory behind the test bench that we are using. The recording process for testing pressure may seem simple, but the system is actually quite efficient and thoughtful. The Labview bench automatically records every point (60,000!) over the course of a minute to a table, where the template analyzes the values and determines whether or not the unit “passes” according to our preset standards.

For each unit, I ran the test 10 times to ensure accuracy in our results. All of the units passed with negligible deviation between tests. The pressure values we were looking for are well within range, as well as the peak pressure values. I compiled the results into a single spreadsheet for our records and future units. I find it really exciting to be able to work these units myself and see firsthand how well they perform quantitatively. It is definitely extremely satisfying to see that the modifications we made are working well and improving the units as they should. These rounds of tests are also completed for each and every unit to be manufactured at Pride.

Taking Up Responsibilities

The primary engineer at 3rd Stone, Krister, recently left for Alaska last Thursday. Since then, many of the tasks that he had previous been responsible for completing have been passed onto me. In some ways, much of my learning has been a bit of trial by fire. I’m realizing that this is how most jobs would work outside of school. No one is truly obligated to guide you through the process, and though 3SD has been amazing in giving me the tools and tips to adapt to the engineering industry, the rest of the growth is up to me! Since our visit to Pride, I’ve been in continuous contact with the quality engineers and project managers that are in charge of manufacturing the Pumani units. 3SD has been really pushing hard to get the 36-40 units produced and shipped out to Lilongwe this past week.

During this process, I’ve been updating the 6-7 remaining Pumani units we have in storage to the most recent revision. This involves taking apart all the internal tubing assemblies, replacing parts, and creating new drawings/documents. I also tried to test out some alternative, kinkless tubing to see if those would be an option, but our current material is superior.

One of the primary changes was to replace a temporary piece inside the unit with heat shrink tubing. Surprisingly, one of the largest challenges for me was not directly involved with the part replacement, but rather using the SolidWorks Product Data Management system. I’ve never used PDMworks before, so many of the nuances of uploading models, checking them in, and monitoring revisions is all very new to me. I definitely made a few mistakes and had to look through the PDMworks guides to find out the proper procedures for using a shared vault. However, after a day or so of creating my own CAD models and drawings for the tubing assembly and heat shrink, I feel fairly confident moving forward. After submitting the appropriate paperwork for installing the heat shrink tubing, I proceeded to physically rework the units to reflect these changes. Unfortunately, after many trials, it became clear that the solution was not ideal. I discussed some of my concerns with Robert, and together we decided on scrapping the heat shrink tube addition and replacing it with a simpler solution that worked beautifully. Of course, this means undoing the modeling and documentation that I had recently completed, but like I’d mentioned last week, these kinds of changes do not bother me. It is only because of the extensive amount of pre-production testing that we can be confident that the units we put into use will perform to the highest standard. All of the changes have been logged in my work notebook.

All of these changes happened over the course of less than 2 days, as Robert reminded me that timing and punctuality is of utmost importance when communicating with a manufacturer. I had to put in some extra hours to get these changes finalized and confirmed with Pride, but I realize it is vital for us to keep up with the schedule on our end to make sure the units are not delayed.

Week 2 Update

So much has happened in the past couple weeks, but I never got around to blogging about it since both work and living transitions have kept me busy. I’ve officially moved into my housing at Dominican University, which is about 3 miles or so from the office. The campus is really nice and surrounded by trees (not unlike Rice!).

As for work at 3SD, I’m not quite sure where to begin! The team has been working tirelessly to perfect the Pumani unit, both the units that are already abroad as well as those to be manufactured. Krister and I have continued to work on reconfiguring tubing sets and exhaust system to make absolute certain that there is no chance of compromising safety. The units in Malawi have been working very well, which is great to hear. I remodeled the tubing sets 3-4 times (both digitally as well as physically) before coming up with something that eliminated any chance of kinking while maintaining the proper back pressure. Initially I definitely felt quite disappointed and frustrated when I had to continue ripping apart all 20 tubing sets I had constructed to rebuild them, essentially losing 8+ hours of work. However, this feeling was short-lived. Every iteration that I went through was a learning process, and I feel that we should always strive for a more perfect model.

Here I’m working on developing the exhaust system for the Pumani.

With all these revisions and redesigns, there of course must be paperwork to follow. I worked through learning the process for documentation and just filed my very own Document Change Order this past week! Surprisingly, this was actually very exciting to me. I’ve had to jump into these projects with such a steep learning curve that I almost can’t believe it has only been two weeks since I arrived. Being able to complete an industry process that I was completely unaware of just two weeks ago by myself is so satisfying, and I can’t wait to learn more.

Speaking of industry, we very recently visited the Pumani manufacturing company, Pride Industries, in Sacremento this week. Pride is truly an amazing company. They provide great manufacturing and service solutions while also providing job opportunities for individuals with disabilities. We visited the site with an auditor and found no issues. They go through incredibly meticulous processes to document all tests and processes for the Pumani. I got to see and learn how to use the testing fixtures there and get a first hand view of how every unit is put together on the line. Sitting in on the meetings was also incredibly informative.

More exciting news: I’m now working at a work station! The computer is equipped with SolidWorks and Labview. I can now edit the design models and run pressure and oxygen level tests on every unit. Though the weeks have been busy, I really appreciate the work and am more than happy to be able to contribute. I really look forward to getting any feedback after Pelham takes some of our kits with him to Malawi!

In other news, every Thursday night there is an incredibly farmer’s market in San Rafael. I know where I’ll be eating dinner those days.